
DairyMaster – Multi-Farmer Animal Management, Livestock & ERP - SaaS Based
"A complete SaaS-ready Flutter solution for dairy farms — empowering admins to manage multiple farmers with real-time production tracking, health records, finances, and intelligent reporting."
📌 What is DairyMaster?
DairyMaster is a sophisticated, multi-tenant livestock management ecosystem designed for the modern agricultural industry. It provides a robust, digitized infrastructure that bridges the gap between Platform Owners (Super Admins) and professional Farm Managers, enabling them to track animal health, monitor production cycles, manage complex finances, and leverage Gemini AI for predictive insights.
🛠️ Technology Stack
Built with the latest and most stable frameworks of 2026 to ensure high performance, security, and scalability.
Backend
Laravel 12 (PHP 8.2+)
Mobile
Flutter 3.x (Riverpod)
AI Engine
Google Gemini Pro
📱 Ecosystem Overview
The system is divided into three primary modules, each tailored for a specific stakeholder:
Super Admin Web Panel
The central "Control Tower" for the SaaS owner. Manage multiple farmers, control subscriptions, configure global settings, and oversee platform-wide revenue.
Farm Owner Mobile App
An intuitive daily operations tool for farmers. Track individual animal history, log milk production, monitor inventory, and manage staff in real-time.
Dr. AI Assistant
The platform's intelligent advisor. Provides vision-based health checks, disease analysis, and yield optimization tips using the latest Gemini AI models.
🚀 Key Feature Highlights
Dairy Master comes packed with professional-grade features to help you run a successful livestock business.
SaaS Infrastructure
- Multi-Tenancy Architecture
- Subscription Management
- Global Payment Gateways
- Advanced Role-Based ACL
Farm Operations
- Livestock Lifecycle Tracking
- Milk Production Analytics
- Medical & Vaccine Logs
- Inventory & Stock Alerts
AI Insights
- Gemini AI Disease Vision
- Predictive Yield Analysis
- Smart Health Advisor
- Automated Report Gen
🎯 Target Audience
Dairy Master is designed for a variety of users in the agricultural sector:
- Large-scale commercial dairy farms
- Livestock startups & AgTech entrepreneurs
- Agricultural consultants & veterinarians
- Cooperative farming societies
System Overview
Dairy Master operates on a strictly multi-tenant architecture. This ensures that every Farm Owner's data is isolated and secure while the Super Admin maintains global oversight.
- SaaS Ready Model: Built-in subscription tiers, billing cycles, and automated invoicing.
- Responsive Frameworks: Fully mobile responsive UI using the latest templating standards.
- Data Visualization: Heavy use of dynamic charts for rapid financial and operational assessments.
Laravel 12 (Backend)
To ensure a smooth development and deployment experience, ensure your environment meets the following backend requirements.
-
PHP 8.2 or Higher
The core runtime for Laravel 12.
-
MySQL 8.0+ / MariaDB 10.4+
Relational database management.
-
Composer 2.x
PHP dependency manager.
-
Node.js & NPM (LTS)
For compiling assets and frontend logic.
-
Required Extensions
BCMath, Ctype, Fileinfo, JSON, Mbstring, OpenSSL.
Flutter 3.8 (Mobile)
Requirements for building and running the mobile application on Android and iOS.
-
Flutter SDK 3.8.x
The primary cross-platform framework.
-
Dart SDK
Included automatically with the Flutter SDK.
-
Android Studio / VS Code
Recommended IDEs with Flutter/Dart plugins.
-
JDK 17+
For Android build processes.
-
Xcode 15+ & CocoaPods
Required exclusively for iOS/macOS builds.
Gemini AI Setup
Dairy Master integrates Google's powerful Gemini AI. Follow these steps to generate your unique Gemini API Key and link it to your platform.
1. Generate API Key via Google AI Studio
- Navigate to Google AI Studio and log in with your Google account.
- In the left sidebar menu, click on Get API Key.
- Click Create API key. You can optionally tie it to a new or existing Google Cloud project.
- Copy the generated API Key to your clipboard securely.
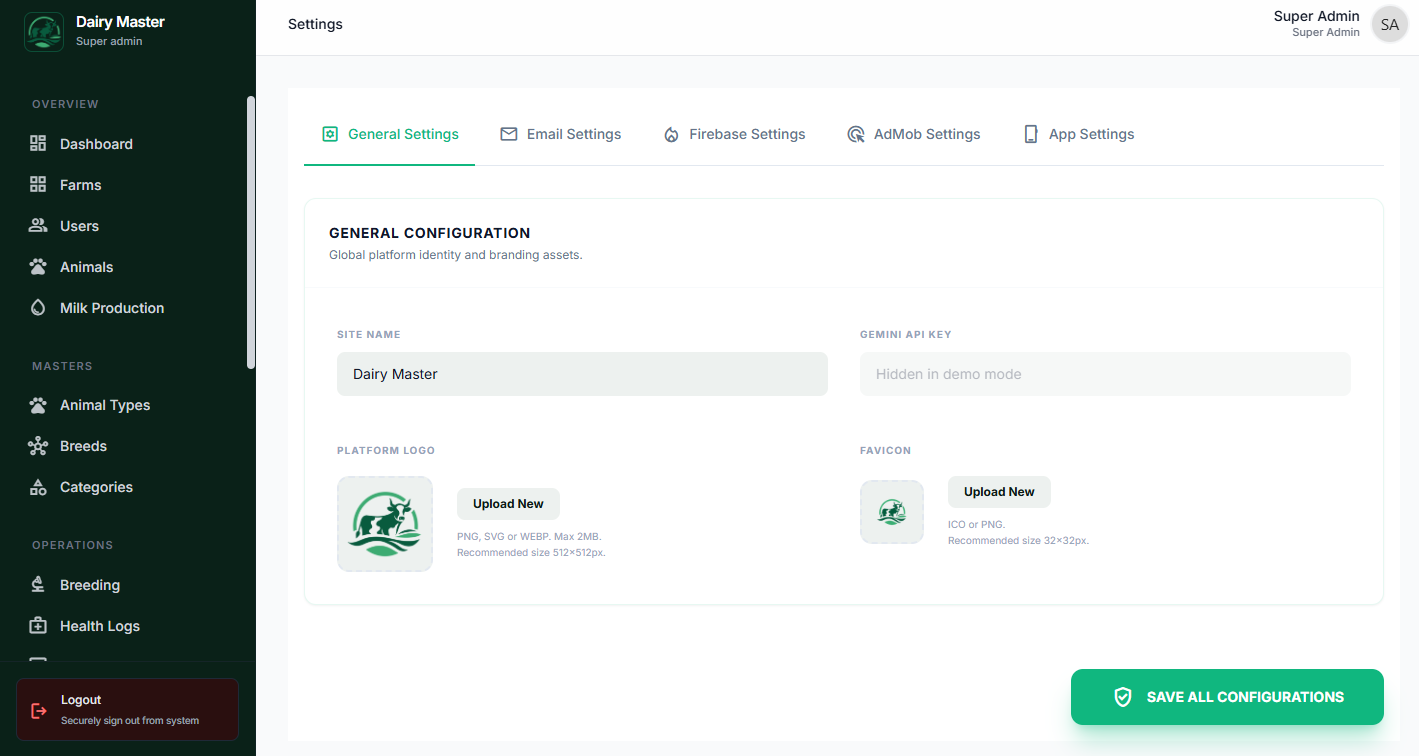
2. Update Key in Super Admin Settings
Instead of manually editing server environment tags, place your key directly inside the SaaS administration panel.
- Log into your Super Admin Panel.
- Navigate to the Settings module in the sidebar navigation.
- Stay on the Basic Settings tab and scroll to locate the Gemini API Key configuration field.
- Paste your key and click Save. That's it!
Firebase Setup
Dairy Master relies heavily on Firebase for robust real-time capabilities and push notifications. Follow these detailed steps to completely configure Firebase for the server and mobile apps.
1. Create a Firebase Project
- Log in to the Firebase Console using your Google account.
- Click Add project, enter a name (e.g., Dairy Master), and click Continue.
- Disable or enable Google Analytics depending on your preference, and click Create project.
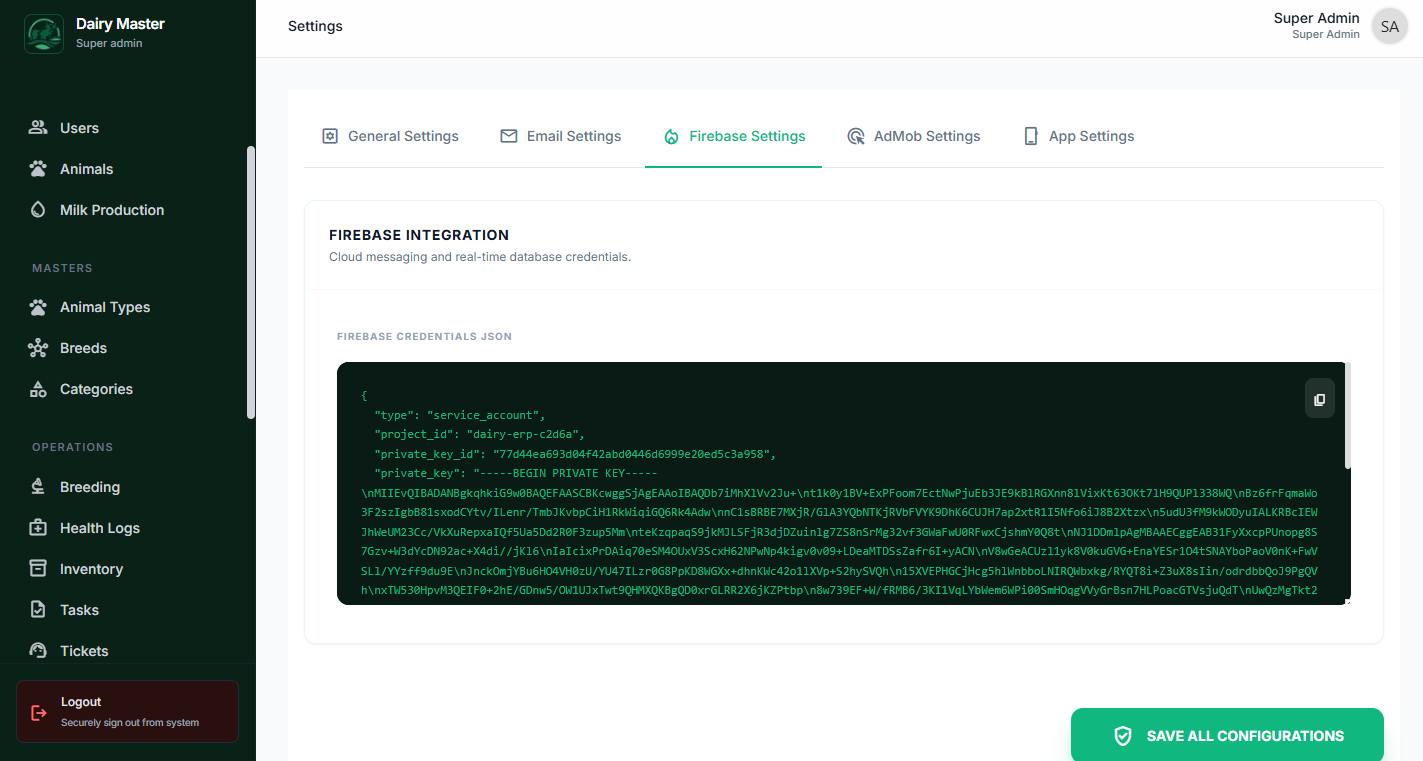
2. Service Account Setup (For Backend API)
The backend requires a Service Account JSON to send notifications to users securely via the FCM API V1.
- In your Firebase project dashboard, click the Gear icon next to Project Overview and select Project settings.
- Navigate to the Service accounts tab.
- Click Generate new private key.
- This will download a JSON file containing your service account keys.
- Log into your Super Admin Panel, navigate to Settings and open the Firebase Settings tab.
- Configure your Push Notifications by inputting the credentials from this JSON file.
3. Setup for Android App
- Go back to your Project settings > General in Firebase.
- Under Your apps, click the Android icon.
- Enter your mobile app's package name (e.g.,
com.dairymaster.app). - Skip downloading the SDK steps for now and simply download the
google-services.jsonfile. - Place this
google-services.jsoninside theandroid/app/directory of your mobile app source code.
4. Setup for iOS App
- Under Your apps in Firebase settings, click Add app and select the iOS icon.
- Enter the iOS Bundle ID matching your Xcode project (e.g.,
com.dairymaster.app). - Download the
GoogleService-Info.plistfile. - Open Xcode, and drag & drop this file into your Runner/App directory. Ensure "Copy items if needed" is checked.
Installation Guide (Backend)
Follow these standard CLI instructions to initialize your local development environment for the project. Make sure you have Node > 18.x and Composer installed.
Step 1: Install Dependencies
Open your terminal in the root directory of the project and run:
composer install
npm install
Step 2: MySQL Database Setup
Create a new empty database in your MySQL environment (e.g., via phpMyAdmin or Terminal).
CREATE DATABASE dairy_master;Step 3: Environment Configuration (.env)
Copy .env.example to .env and update your database credentials.
cp .env.example .envUpdate these core variables in your .env file:
DB_DATABASE=dairy_master
DB_USERNAME=root
DB_PASSWORD=your_password
Step 4: Generate App Key
php artisan key:generateStep 5: Run Migrations & Seeding
Initialize the database schema and create the default Super Admin account.
php artisan migrate --seedApp Installation (Flutter)
DairyMaster is built with Flutter. This guide explains how to prepare your local machine to run the source code.
CAUTION
Flutter setup is for local machines only. Do not attempt to install or run Flutter on a cloud server/VPS.
IMPORTANT
Flutter requires Git and Android Studio. Follow all steps carefully to avoid configuration errors.
Windows Detailed Setup
WATCH INSTALLATION VIDEOStep 1: Flutter Website
Go to flutter.dev → Docs → Get Started → Windows. Choose Android as your target.
Step 2: Requirements
- Windows 10+ (64-bit), PowerShell 5.0+, Git for Windows.
- VS Code (Recommended) & Android Studio.
- 10GB+ Free Disk Space.
Step 3: SDK Extraction
Download the Stable .zip, extract to D:\development\flutter (avoid C:\Program Files). Run flutter in flutter_console.bat to verify.
Step 4: Environment Variables
Edit "Path" in User Variables → Add D:\development\flutter\bin. Restart terminal and verify with flutter command.
Step 5: Flutter Doctor
Run flutter doctor in cmd to check for missing dependencies like Android toolchain or licenses.
Step 6: Android Studio
Install Android Studio with "Android Virtual Device" selected. Use non-system drive if possible to avoid permissions issues.
Step 7: SDK Detection
If not detected, run: flutter config --android-sdk "C:\path\to\Android\Sdk"
Step 8: Licenses
Run flutter doctor --android-licenses and type y for all prompts.
Step 9: Emulator Setup
Tools → Device Manager → Create Virtual Device. Choose a modern device and system image, then click Play ▶.
Step 10: Final Verify
Run flutter doctor again. Critical issues should be gone. 🚀
macOS Detailed Setup
WATCH INSTALLATION VIDEOStep 1-3: SDK Prep
Download macOS Stable SDK from flutter.dev. Extract to ~/development/flutter. Verify with ./bin/flutter.
Step 4: Path Configuration
Edit ~/.zshrc (or ~/.bash_profile) and add:
export PATH="$PATH:$HOME/development/flutter/bin"Run source ~/.zshrc to apply.
Step 5: Xcode & Dependencies
Install Xcode from App Store. Run flutter doctor to detect missing iOS/Android requirements.
Step 6-10: Android & Verification
Follow standard Android Studio installation, license acceptance (--android-licenses), and emulator setup. Run final flutter doctor. 🚀
Linux Detailed Setup
WATCH INSTALLATION VIDEOStep 1-3: Setup Tools
Install curl, git, xz-utils. Extract Flutter .tar.xz to ~/development.
Step 4: Persistence
Add export PATH="$PATH:$HOME/development/flutter/bin" to ~/.bashrc and source it.
Step 5-10: IDE & Tools
Install Android Studio. Ensure KVM acceleration is enabled for the emulator. Finalize with flutter doctor. 🚀
Step 2: Project Initialization
Once your environment is ready, run these project-specific commands in the mobile app root:
flutter pub get
flutter gen-l10n
Step 3: Launch Local App
Connect a physical device or start an emulator, then run:
flutter runApp Configuration & Setup
Connect your app to the backend and configure global services.
1. API Connection
Open lib/core/constants/api_constants.dart and update your backend URL:
class ApiConstants {
  static const String baseUrl = 'https://yourdomain.com/api';
  // ...
}
2. Firebase Integration
Place your config files in the respective platform directories:
- Android:
android/app/google-services.json - iOS:
ios/Runner/GoogleService-Info.plist
Important: Make sure to match your package name in the Firebase console.
Deployment Guide
We highly recommend utilizing a VPS with at least 2GB of RAM for smooth multi-tenant operations. Dairy Master supports CI/CD pipelines natively.
- Ensure Nginx or Apache correctly defaults to the `/public` directory.
- Execute folder permission updates for Cache and Storage:
sudo chown -R www-data:www-data storage bootstrap/cache
sudo chmod -R 775 storage bootstrap/cache
Detailed Customization
Rebrand and tailor Dairy Master to your specific business needs with these granular customization steps.
1. White-labeling & Branding
To change the app name and package identity:
App Name
- Android: Edit
android:labelinandroid/app/src/main/AndroidManifest.xml. - iOS: Update
CFBundleDisplayNameinios/Runner/Info.plist.
Package Name (Bundle ID)
To quickly update the package identity across all platforms, we recommend adding and using the change_app_package_name package:
# Run this in your terminal
flutter pub run change_app_package_name:main com.new.package.name
2. Logo & Launcher Icons
Update your visual assets across all platforms:
- Replace
assets/images/logo.pngwith your new branded logo. - Replace
assets/icons/app_icon.pngfor the launcher icon. - Run the generator command:
flutter pub run flutter_launcher_icons:main3. Theme & Color Palette
Modify the primary brand identity in lib/core/constants/app_colors.dart:
class AppColors {
  /// Deep Emerald — Primary Brand Color
  static const Color primary = Color(0xFF0E7C56);
  static const Color primaryLight = Color(0xFF3DA37A);
  static const Color primaryDark = Color(0xFF095C3E);
  // ...
}
Tip: After changing colors, you may need to hot-restart the app to see global changes.
4. Adding New Languages
Dairy Master supports easy localization expansion:
- Create a new
app_XX.arbfile inlib/l10n/(e.g.,app_fr.arb). - Add your translated keys following the English template.
Laravel (Backend) Structure
Comprehensive folder organization for the server-side infrastructure. Understanding these directories is essential for backend development and API management.
dairy_master_backend/
├── app/               # Core logic, Controllers & Models
├── bootstrap/         # Framework bootstrap files
├── config/            # All configuration files
├── database/          # Migrations, Seeders & Factories
├── public/            # Index.php & static assets
├── resources/         # Frontend views & raw assets
├── routes/            # API, Web, and Console routes
├── storage/           # App logs, cache & uploads
├── tests/             # Unit and Feature tests
└── .env               # Local environment variables
Mobile App (Flutter) Structure
Dairy Master follows a clean, feature-driven architecture to ensure high maintainability and testability.
lib/
├── core/                  # App-wide configurations
│   ├── localization/      # Generated l10n files
│   ├── theme/             # App palettes & typography
│   └── constants/         # API & Global constants
├── features/              # Feature-driven modules
│   ├── health/            # Medical & Veterinary logic
│   ├── breeding/          # Reproduction & AI logic
│   ├── production/        # Milk tracking & stats
│   ├── finance/           # Revenue & Expense tracking
│   ├── inventory/         # Stock management
│   ├── auth/              # Login & Registration
│   ├── common/            # Shared UI components
│   └── staff/             # Team management
├── l10n/                  # Multi-language .arb files
├── assets/                # Global images, icons & fonts
├── test/                  # Widget and Unit tests
├── pubspec.yaml           # Project manifest & Dependencies
└── main.dart              # App entry point
Core Module
Contains the foundation of the app, including the theme engine, global constants, and localization infrastructure.
Features Module
Each business domain (Health, Milk, etc.) is isolated in its own feature folder containing its own UI, providers, and models.
1. Stripe Setup
Ideal for global credit card processing and automated recurring billing.
- Log in to your Stripe Dashboard.
- Navigate to Developers > API Keys.
- Copy your Publishable Key and Secret Key.
- In Dairy Master Super Admin > Settings > Payment Gateways, select Stripe and paste the keys.
- Set your Webhook URL to
https://yourdomain.com/stripe/webhookin Stripe settings.
2. PayPal Setup
The world's most recognized digital wallet for seamless subscription management.
- Log in to the PayPal Developer Portal.
- Create a new 'App' in the REST API apps section.
- Generate and copy your Client ID and Secret Key.
- Navigate to Super Admin > Settings > Payment Gateways, select PayPal and enter your credentials.
- Ensure you toggle between 'Sandbox' for testing and 'Live' for production.
3. Razorpay Setup
Optimized for the Indian market with support for UPI, Cards, and Netbanking.
- Log in to your Razorpay Dashboard.
- Go to Settings > API Keys.
- Generate a new Key ID and Key Secret.
- In Dairy Master Super Admin > Settings > Payment Gateways, input these credentials in the Razorpay tab.
- Configure Webhooks in Razorpay to monitor transaction success states in real-time.
Pro Tip: Always perform a small test transaction in Sandbox Mode before enabling live payments.
Super Admin Panel
The core administration suite for controlling the SaaS infrastructure.
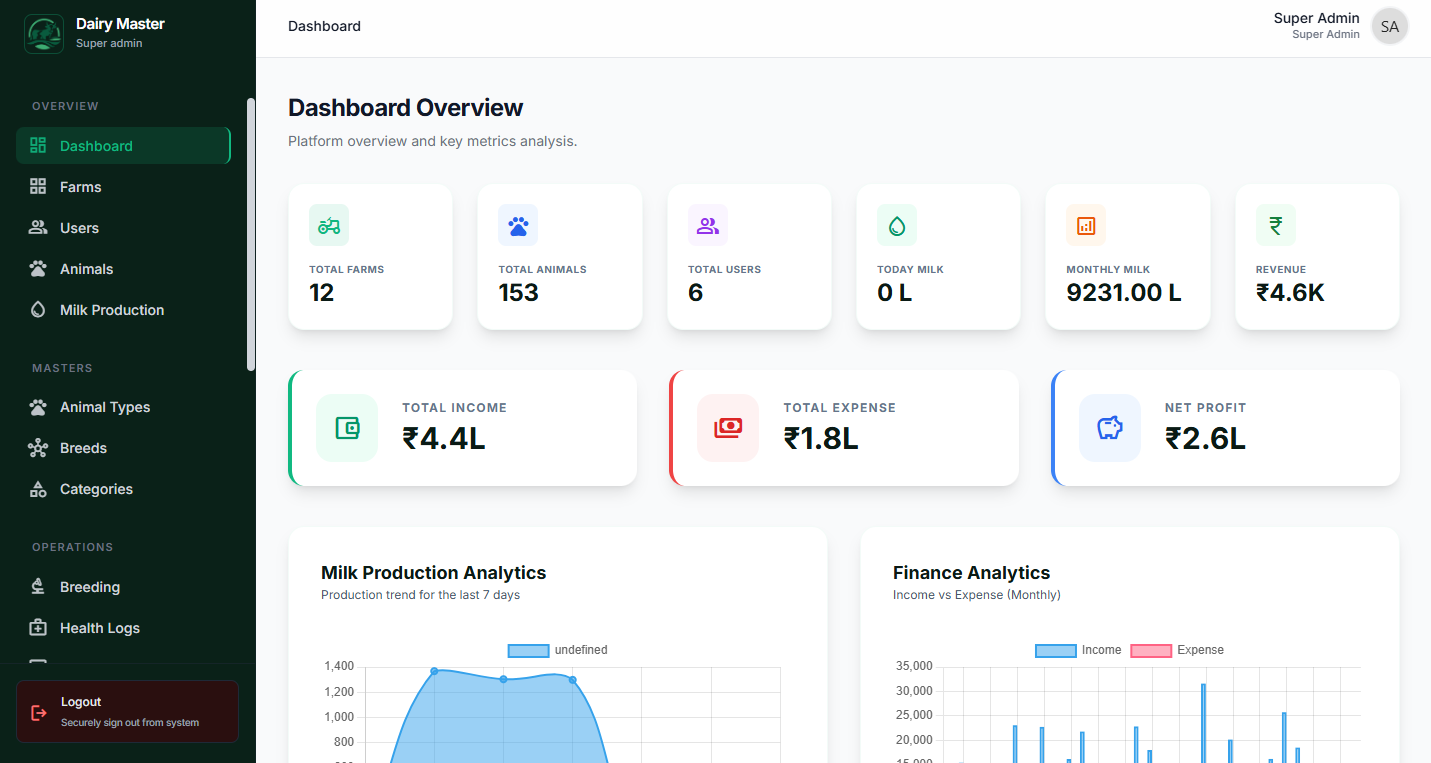
Dashboard Overview
The SaaS dashboard aggregates critical platform metrics including MMR (Monthly Recurring Revenue), total active farm tenants, and recent platform activity logs. Click on any image below to view it in full screen.
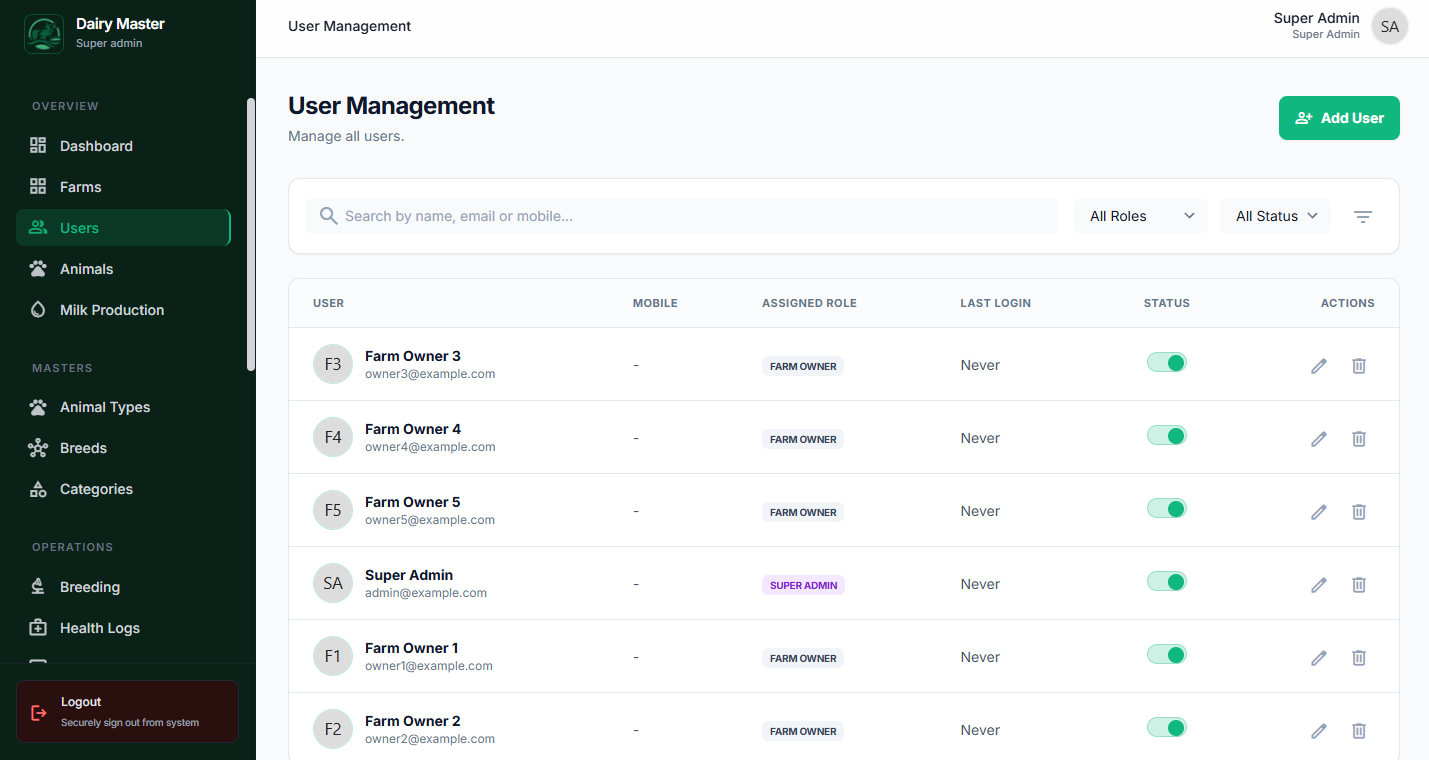
User Management
A centralized hub for the Super Admin to view all registered platform users. The admin can impersonate accounts for support tasks, suspend malicious accounts, and assign system roles.
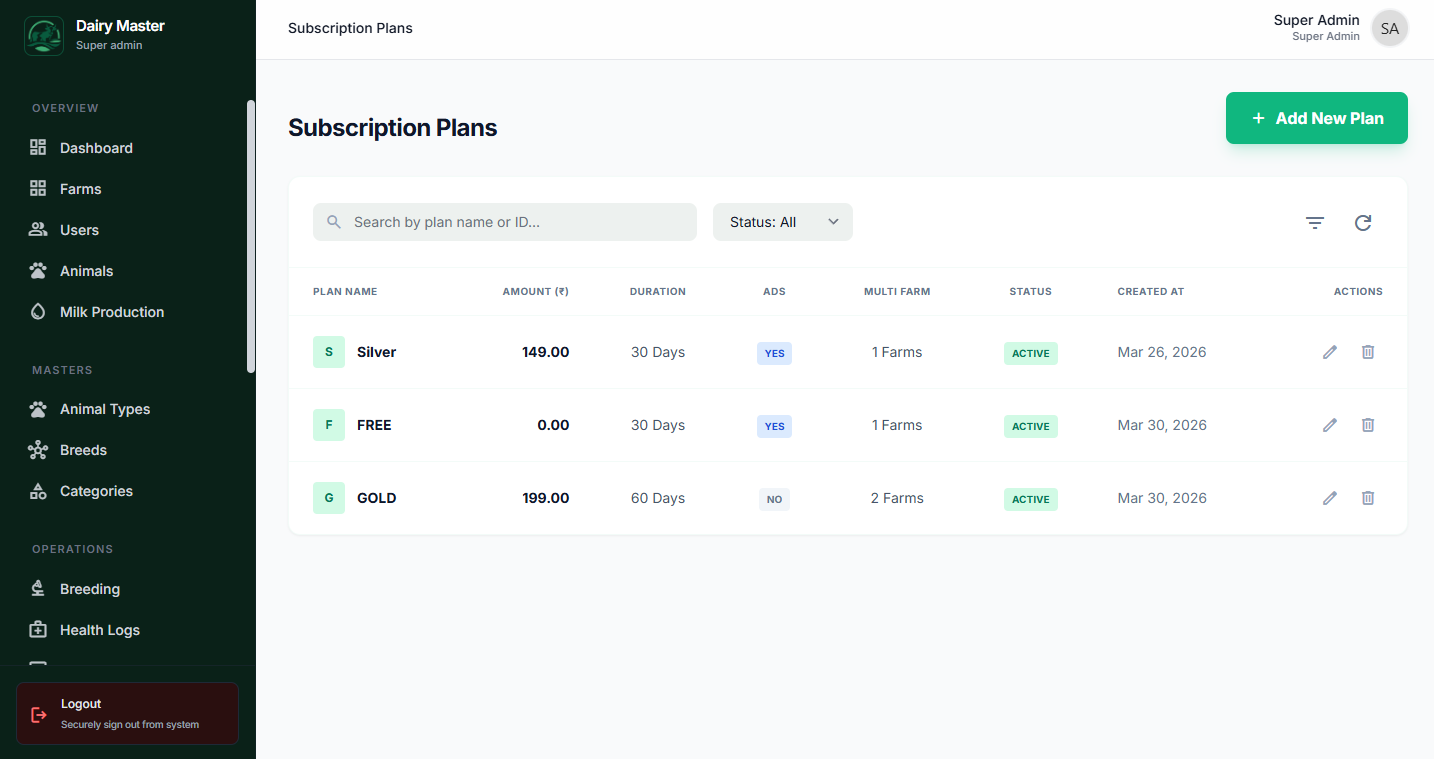
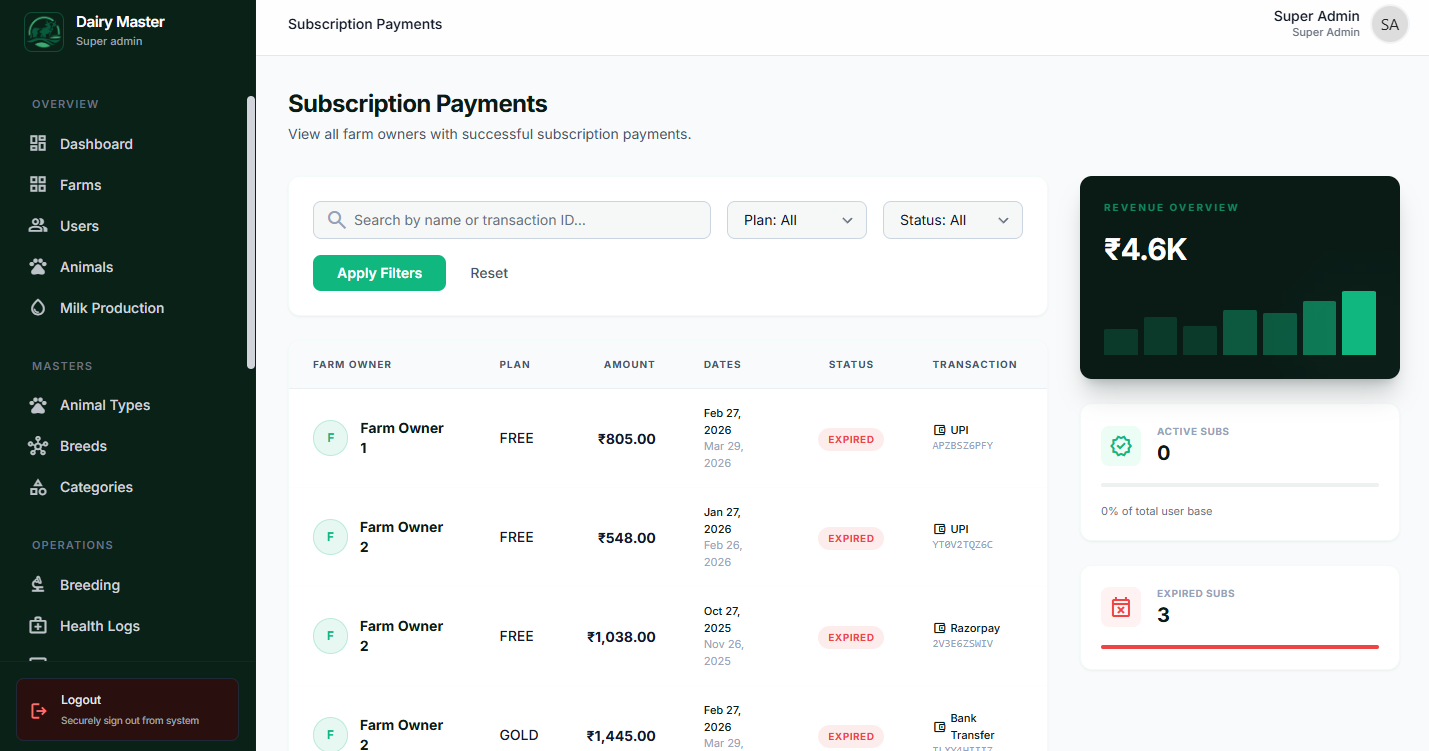
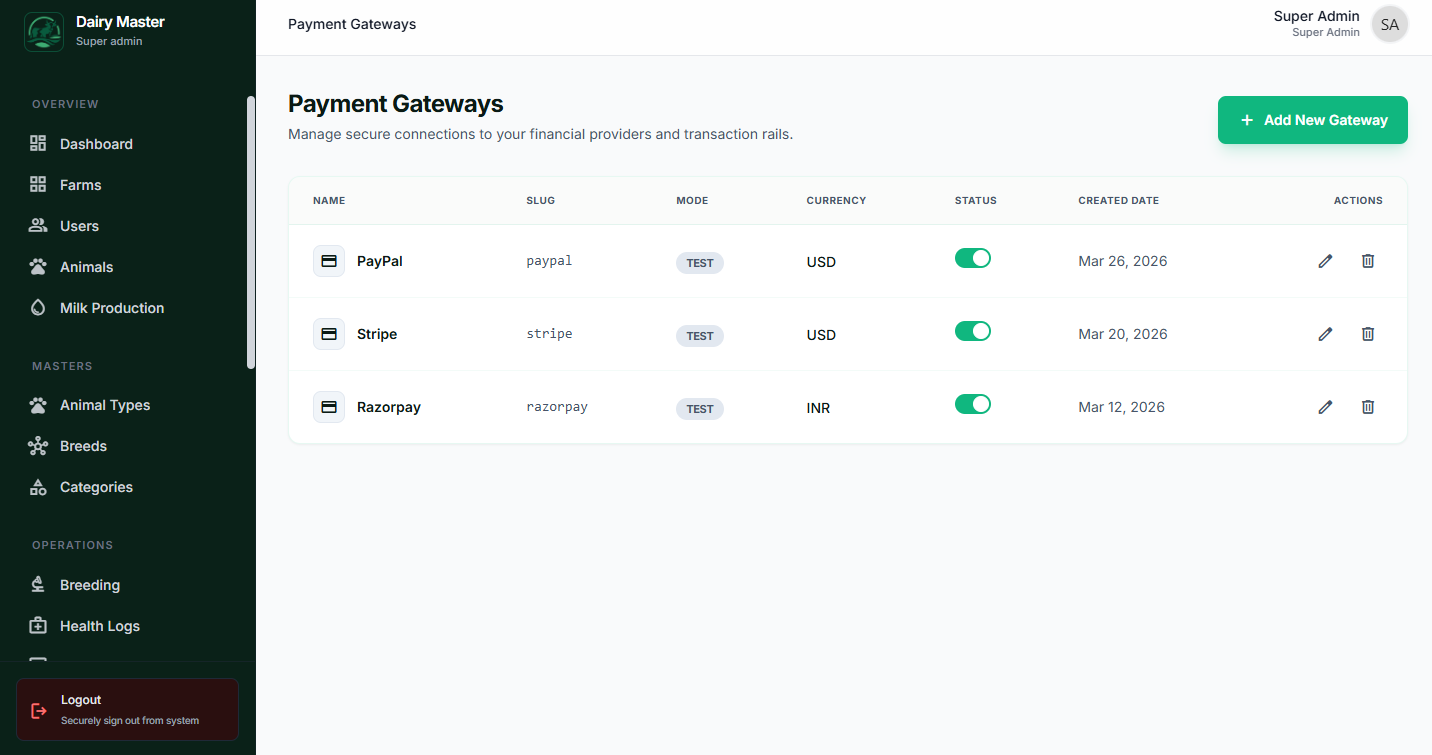
Finances, Subscriptions & Gateways
Control the monetization of your SaaS. Create dynamic pricing models, monitor payment intakes, and configure direct API credentials for modern payment gateways like Stripe and PayPal.
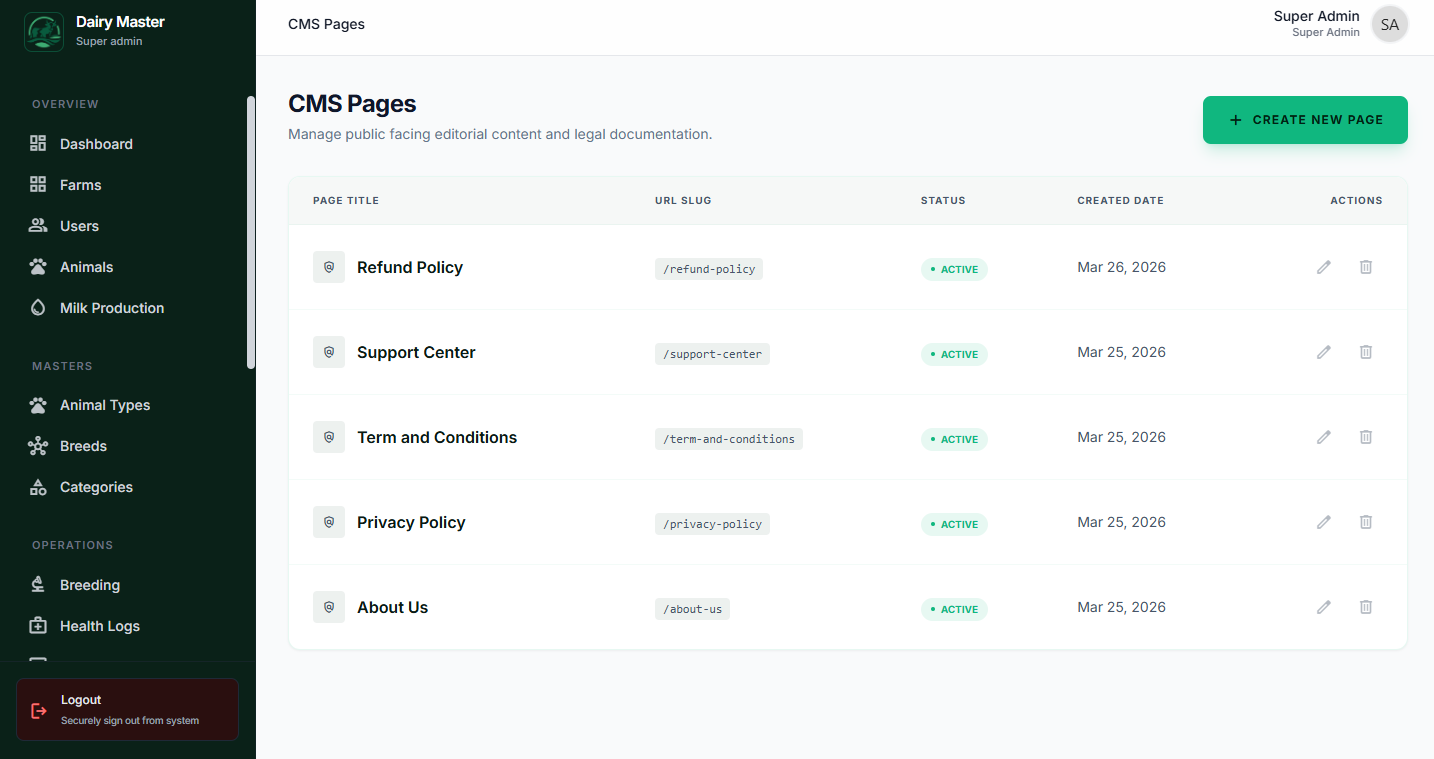
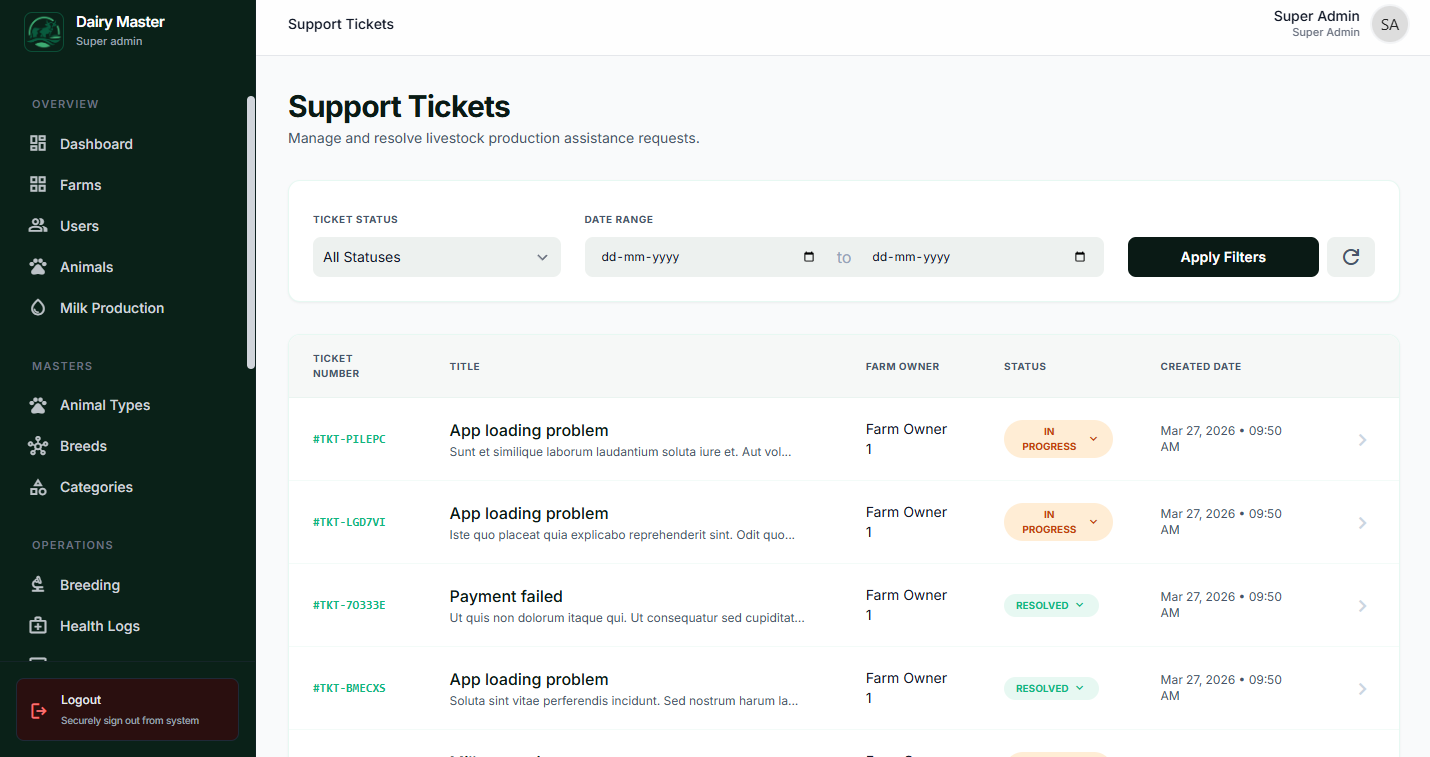
Frontend CMS & Support Desk
Edit landing page content seamlessly without deploying code. You can also view and respond directly to user support tickets from within the dashboard ecosystem.
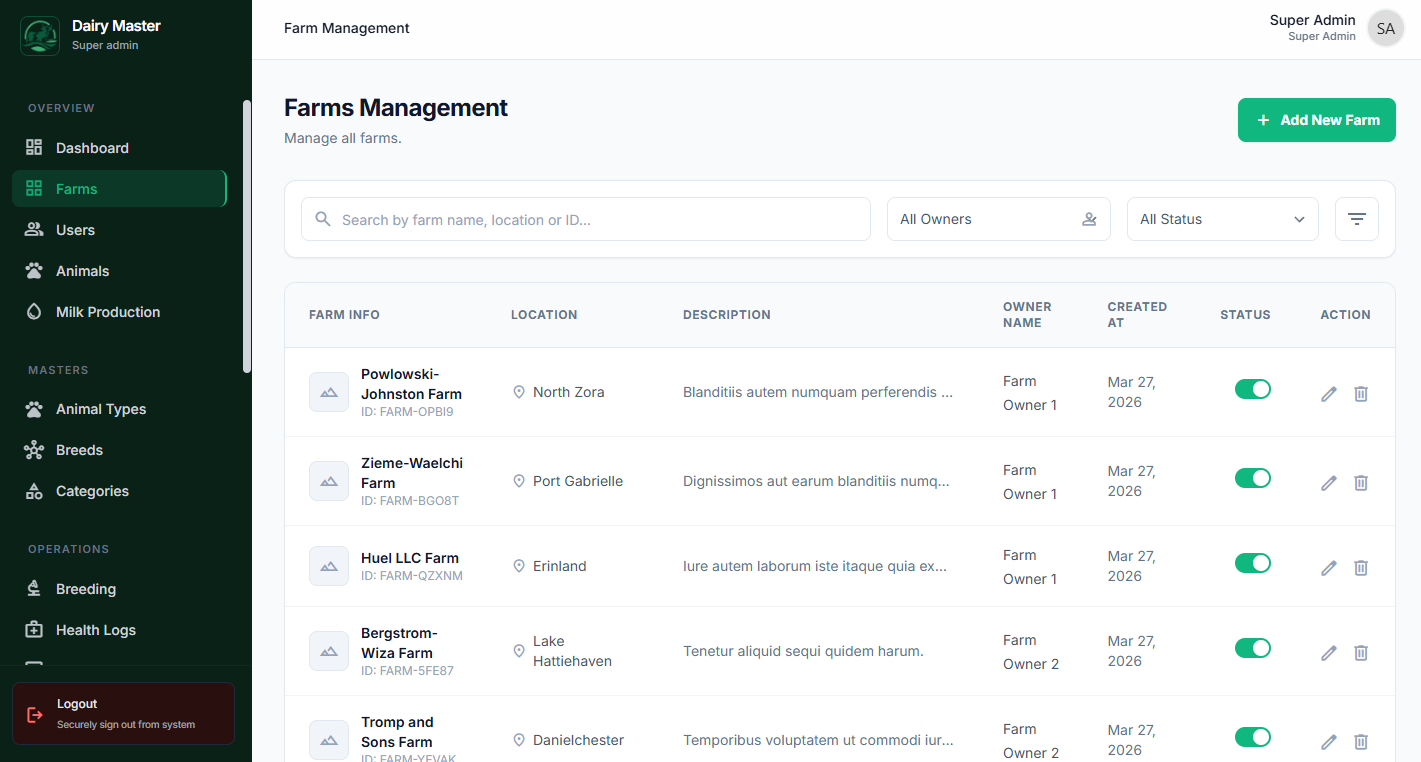
Farm Modules (Super Admin Omni-Viewer)
The Super Admin can visually preview all inner application modules used by the end-clients (Farm Owners) for auditing and support validation.
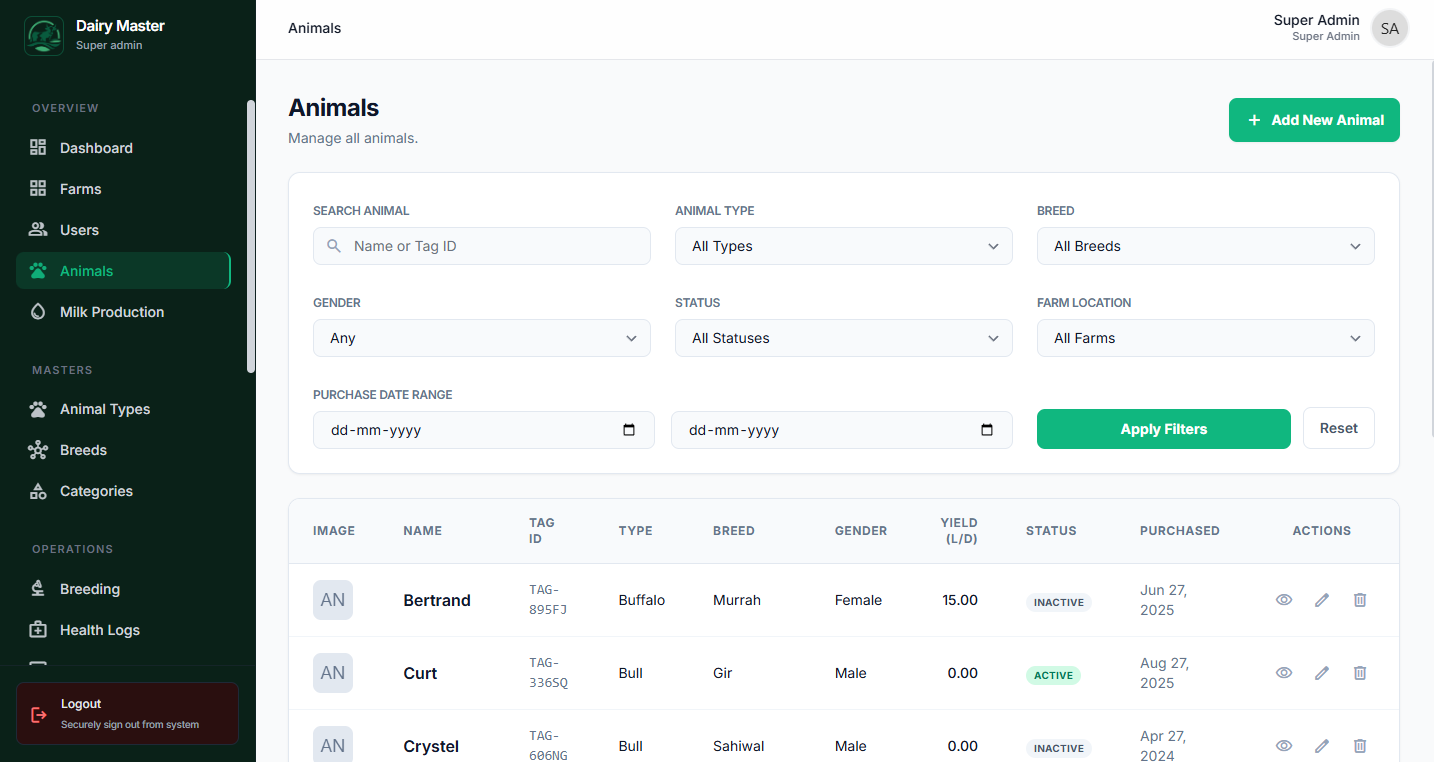
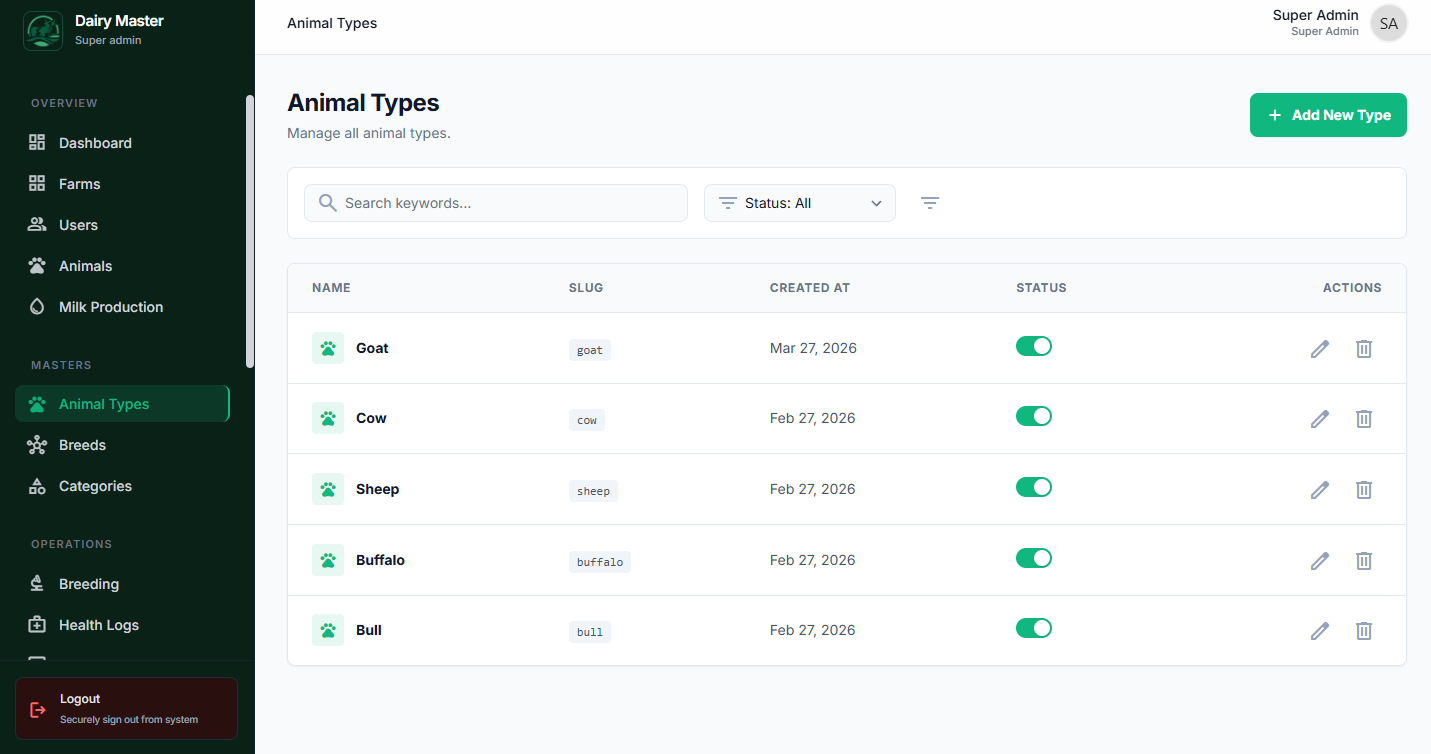
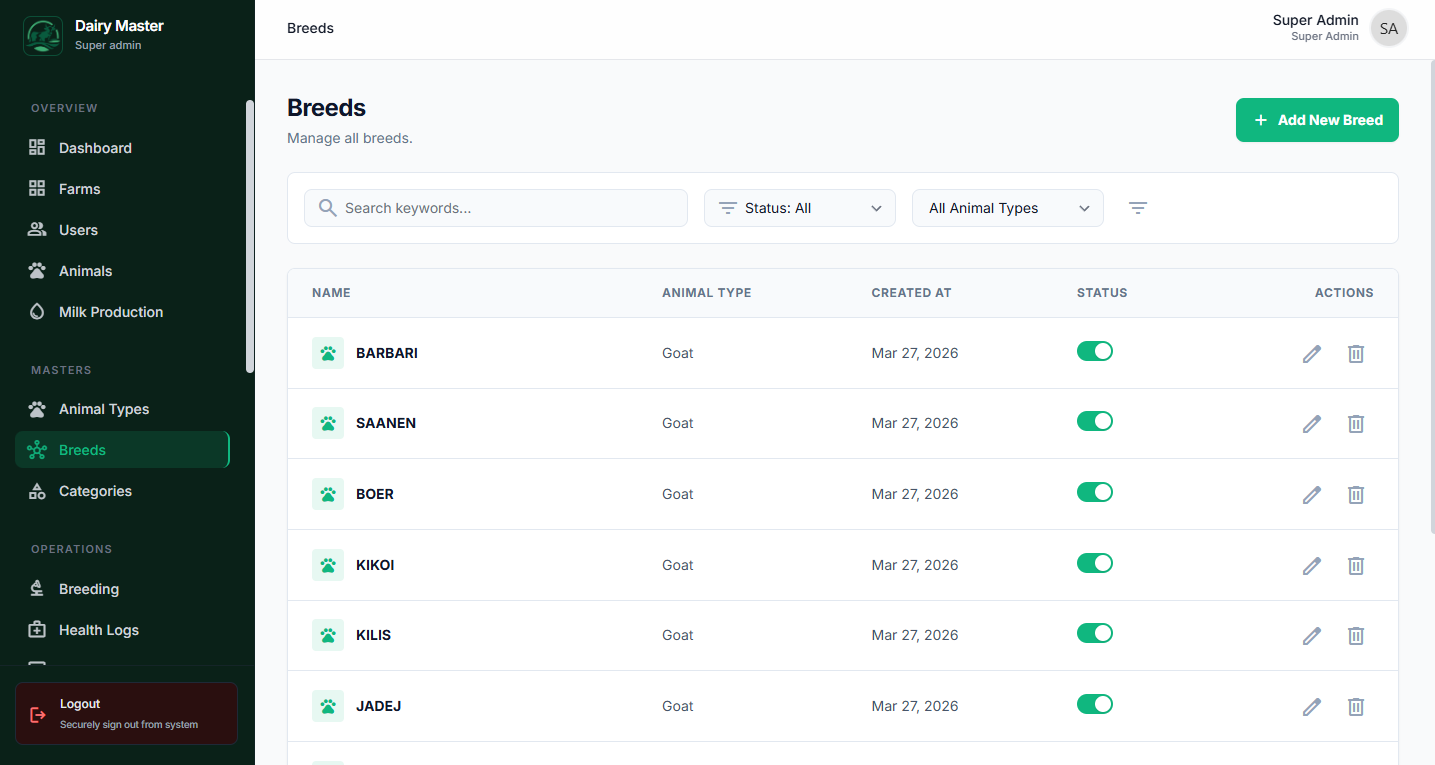
Farm Operations
Animal & Livestock Profiles
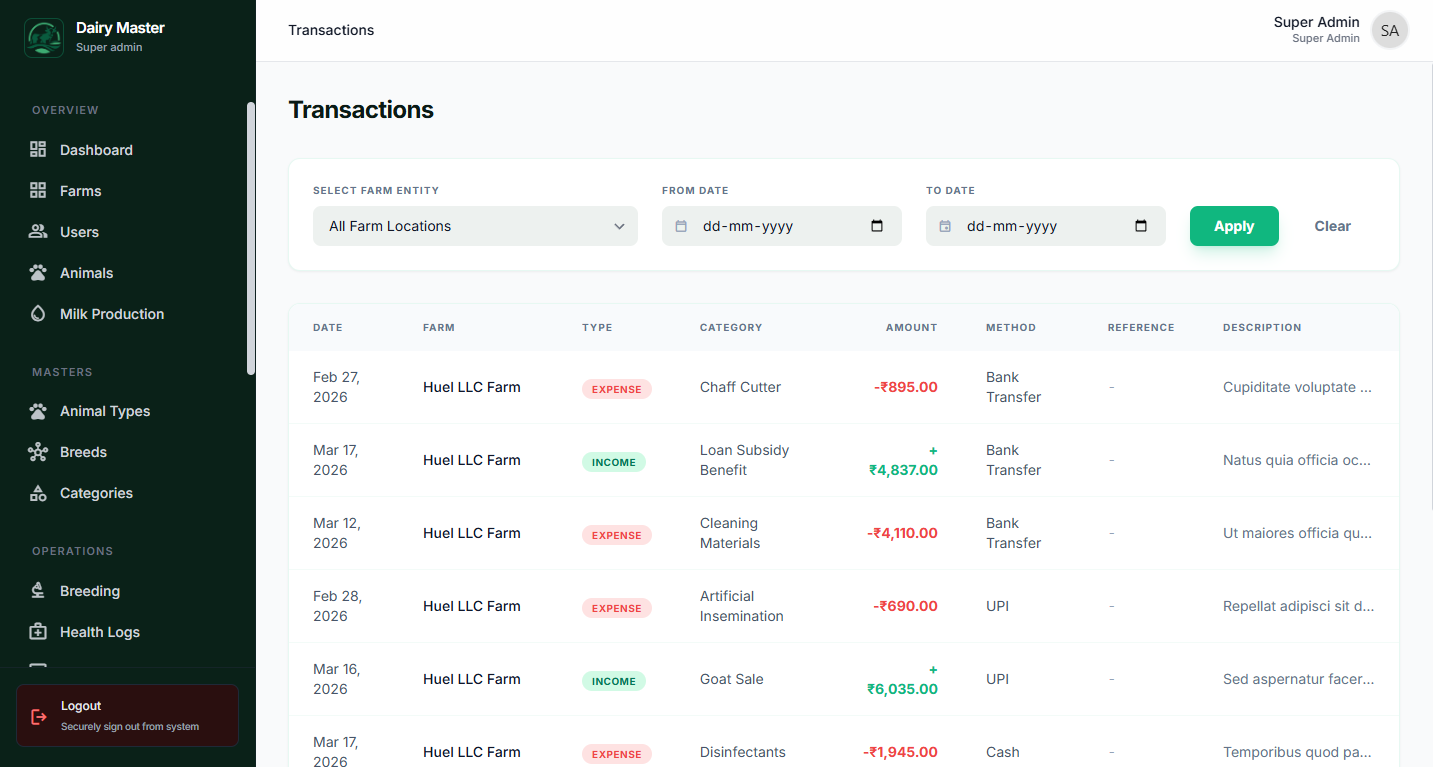
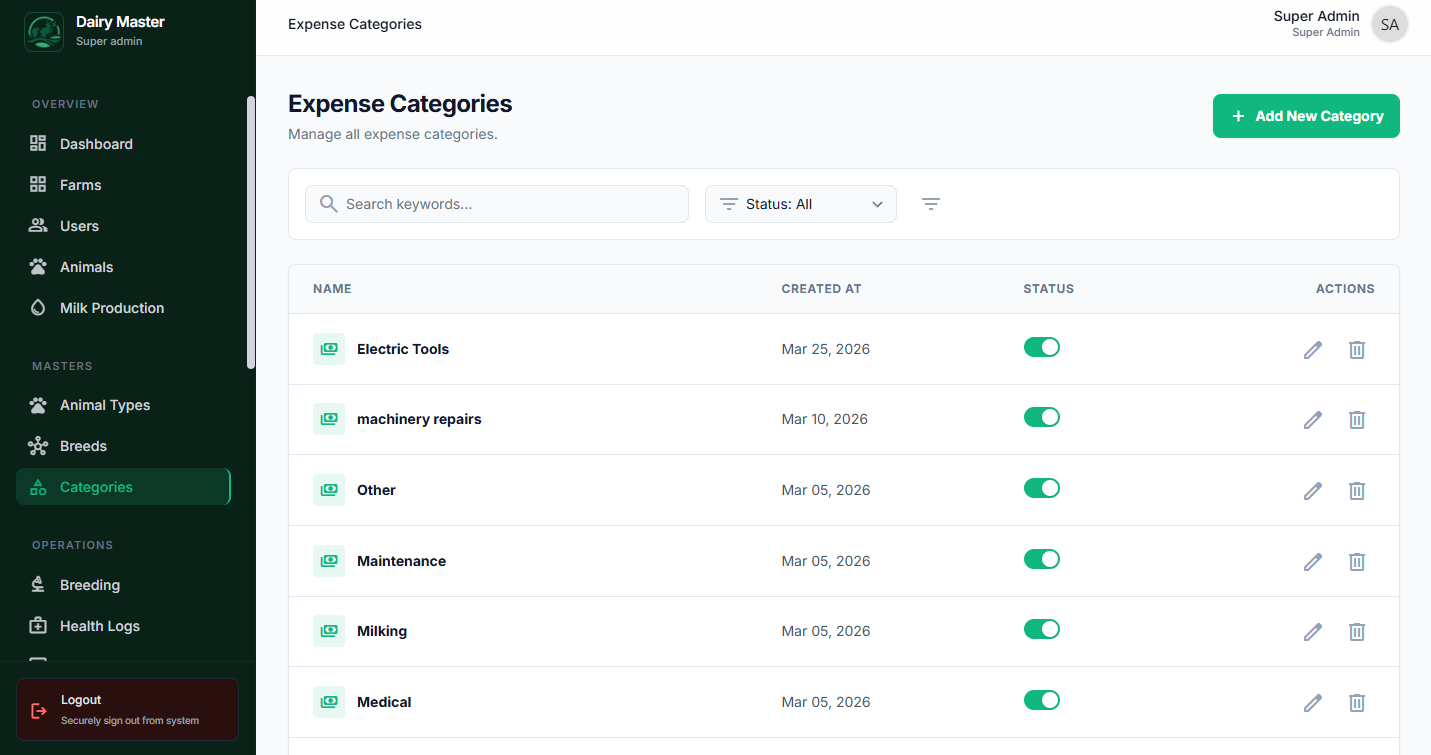
Inventory & Finances
Farm Owner App
The specialized mobile & desktop client application customized for end-users.
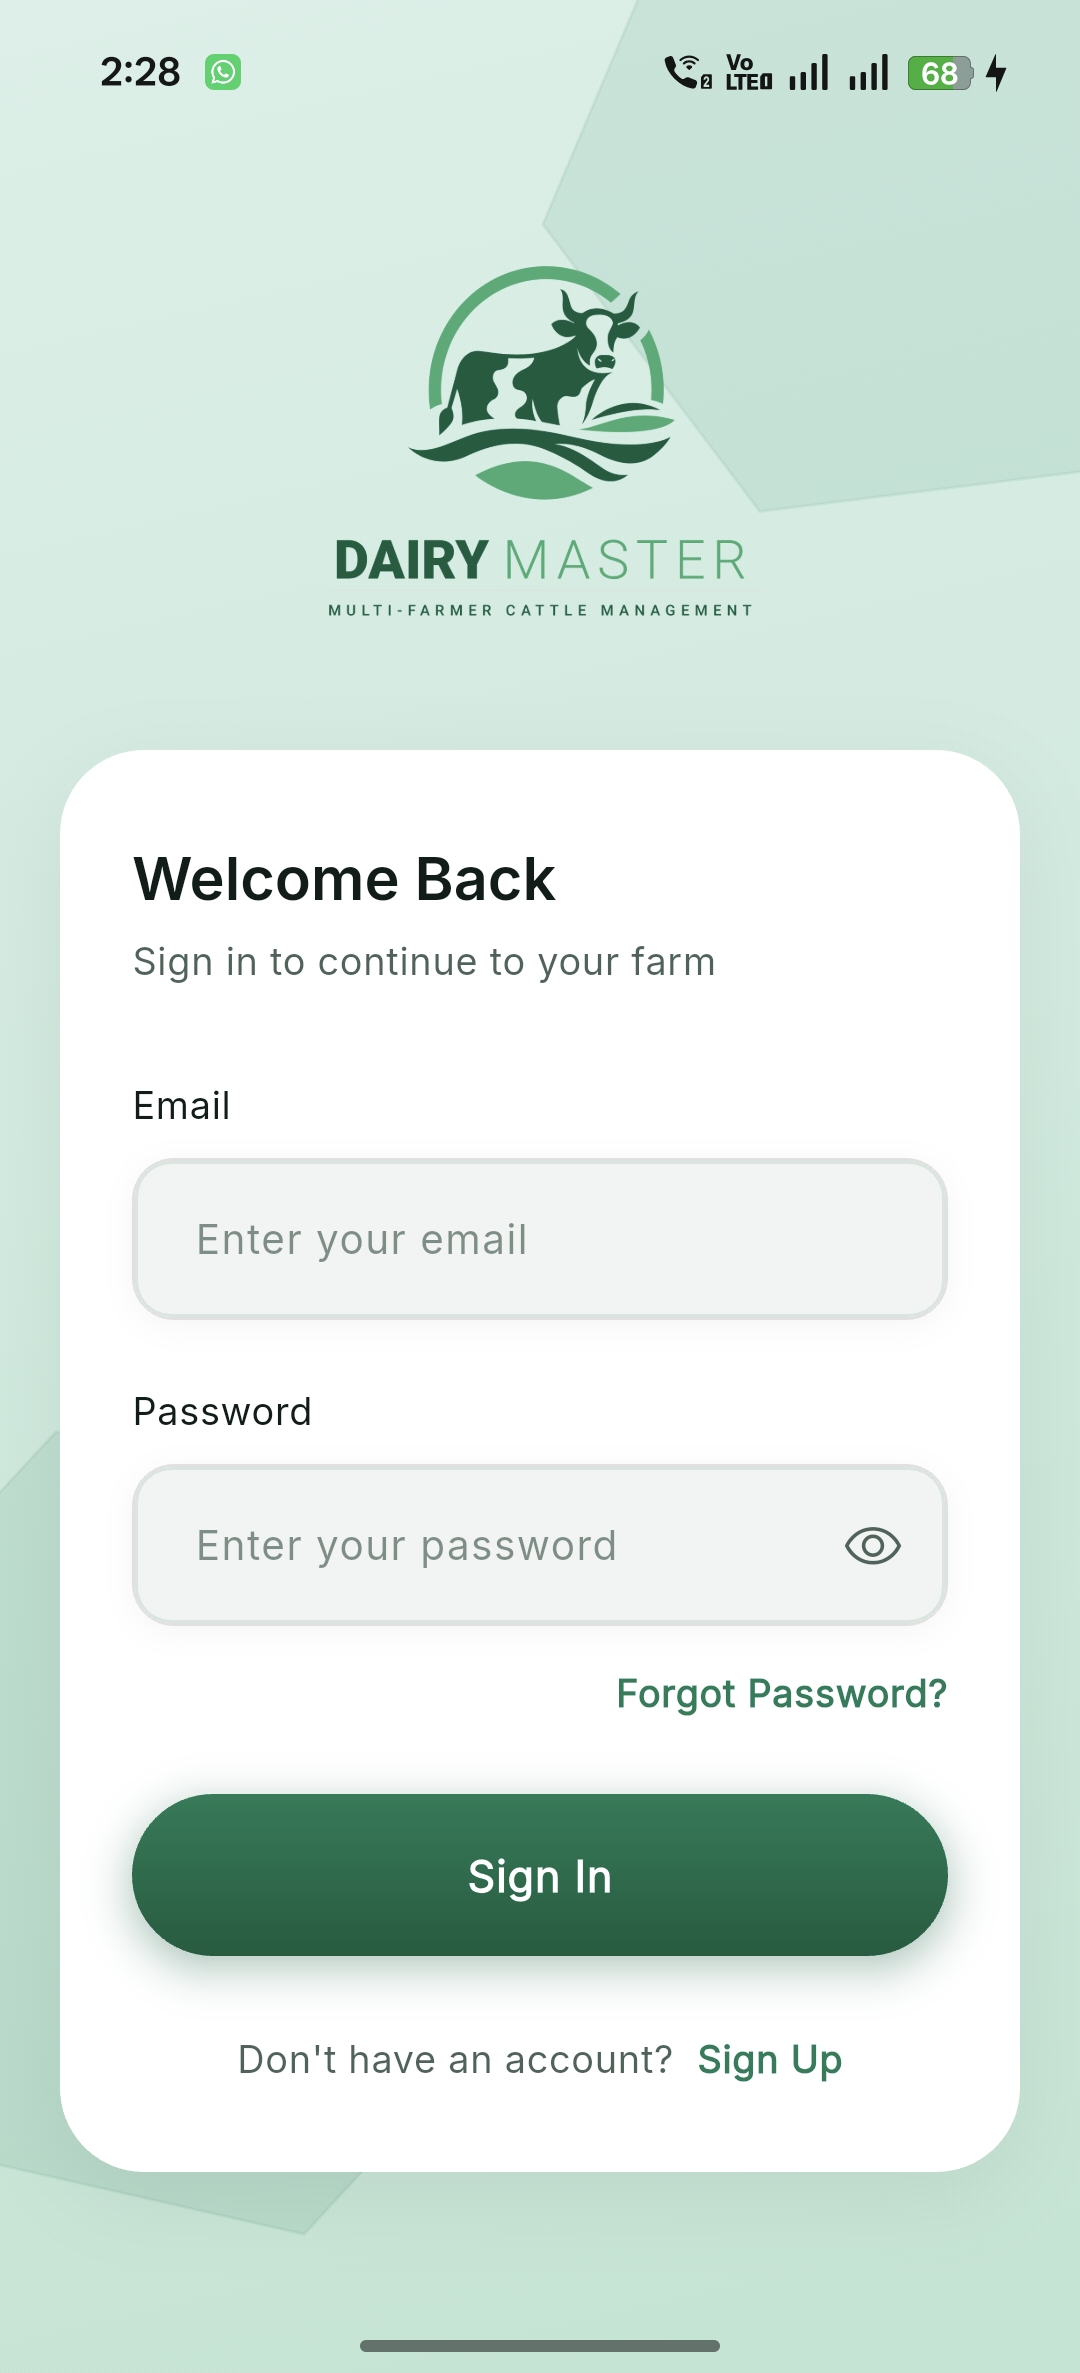
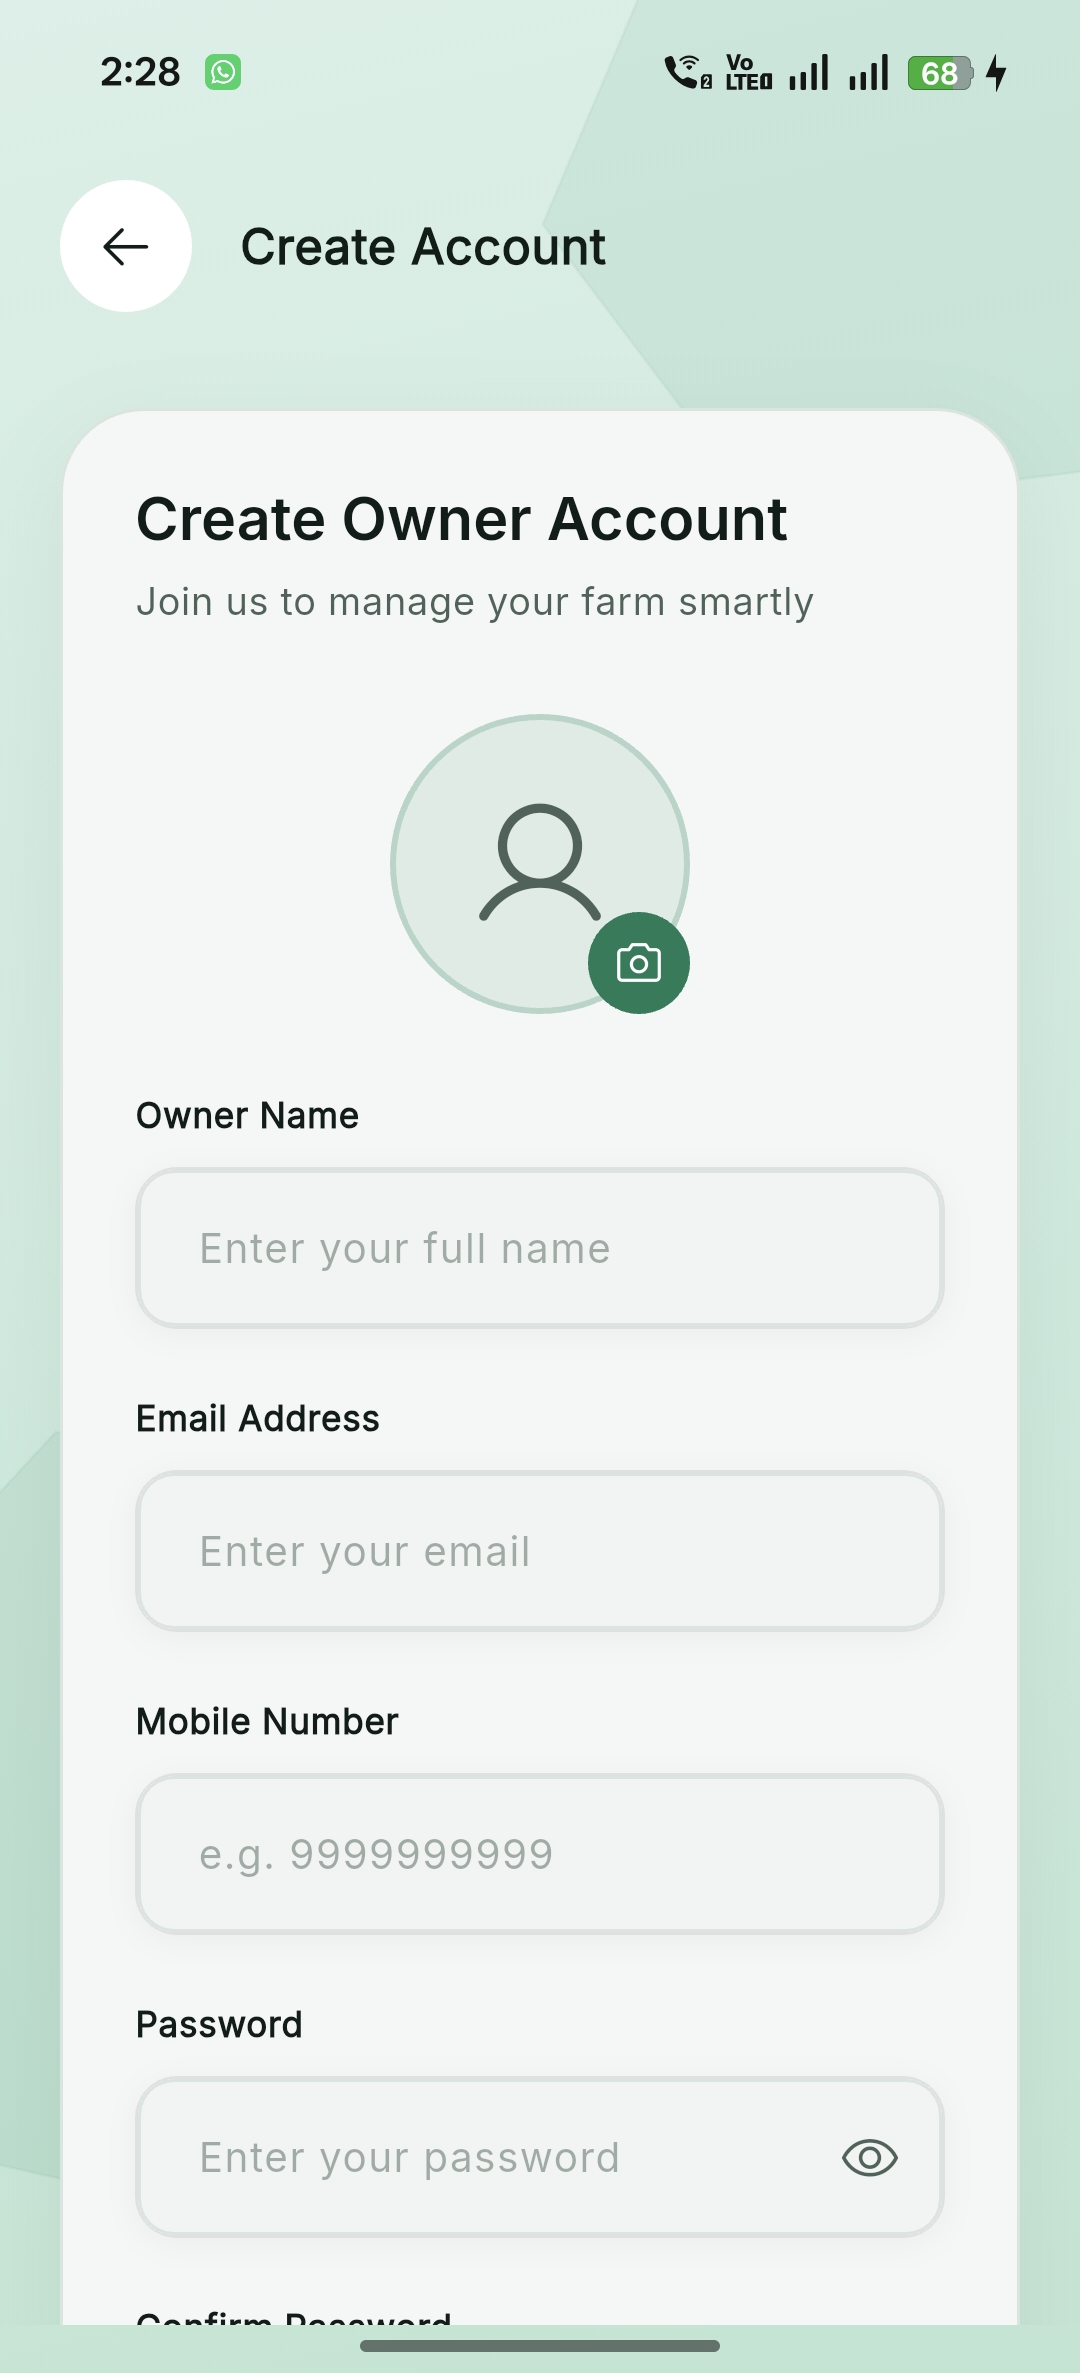
Authentication & Onboarding
Streamlined onboarding experience with splash screens, secure login, and easy registration for new farm owners.
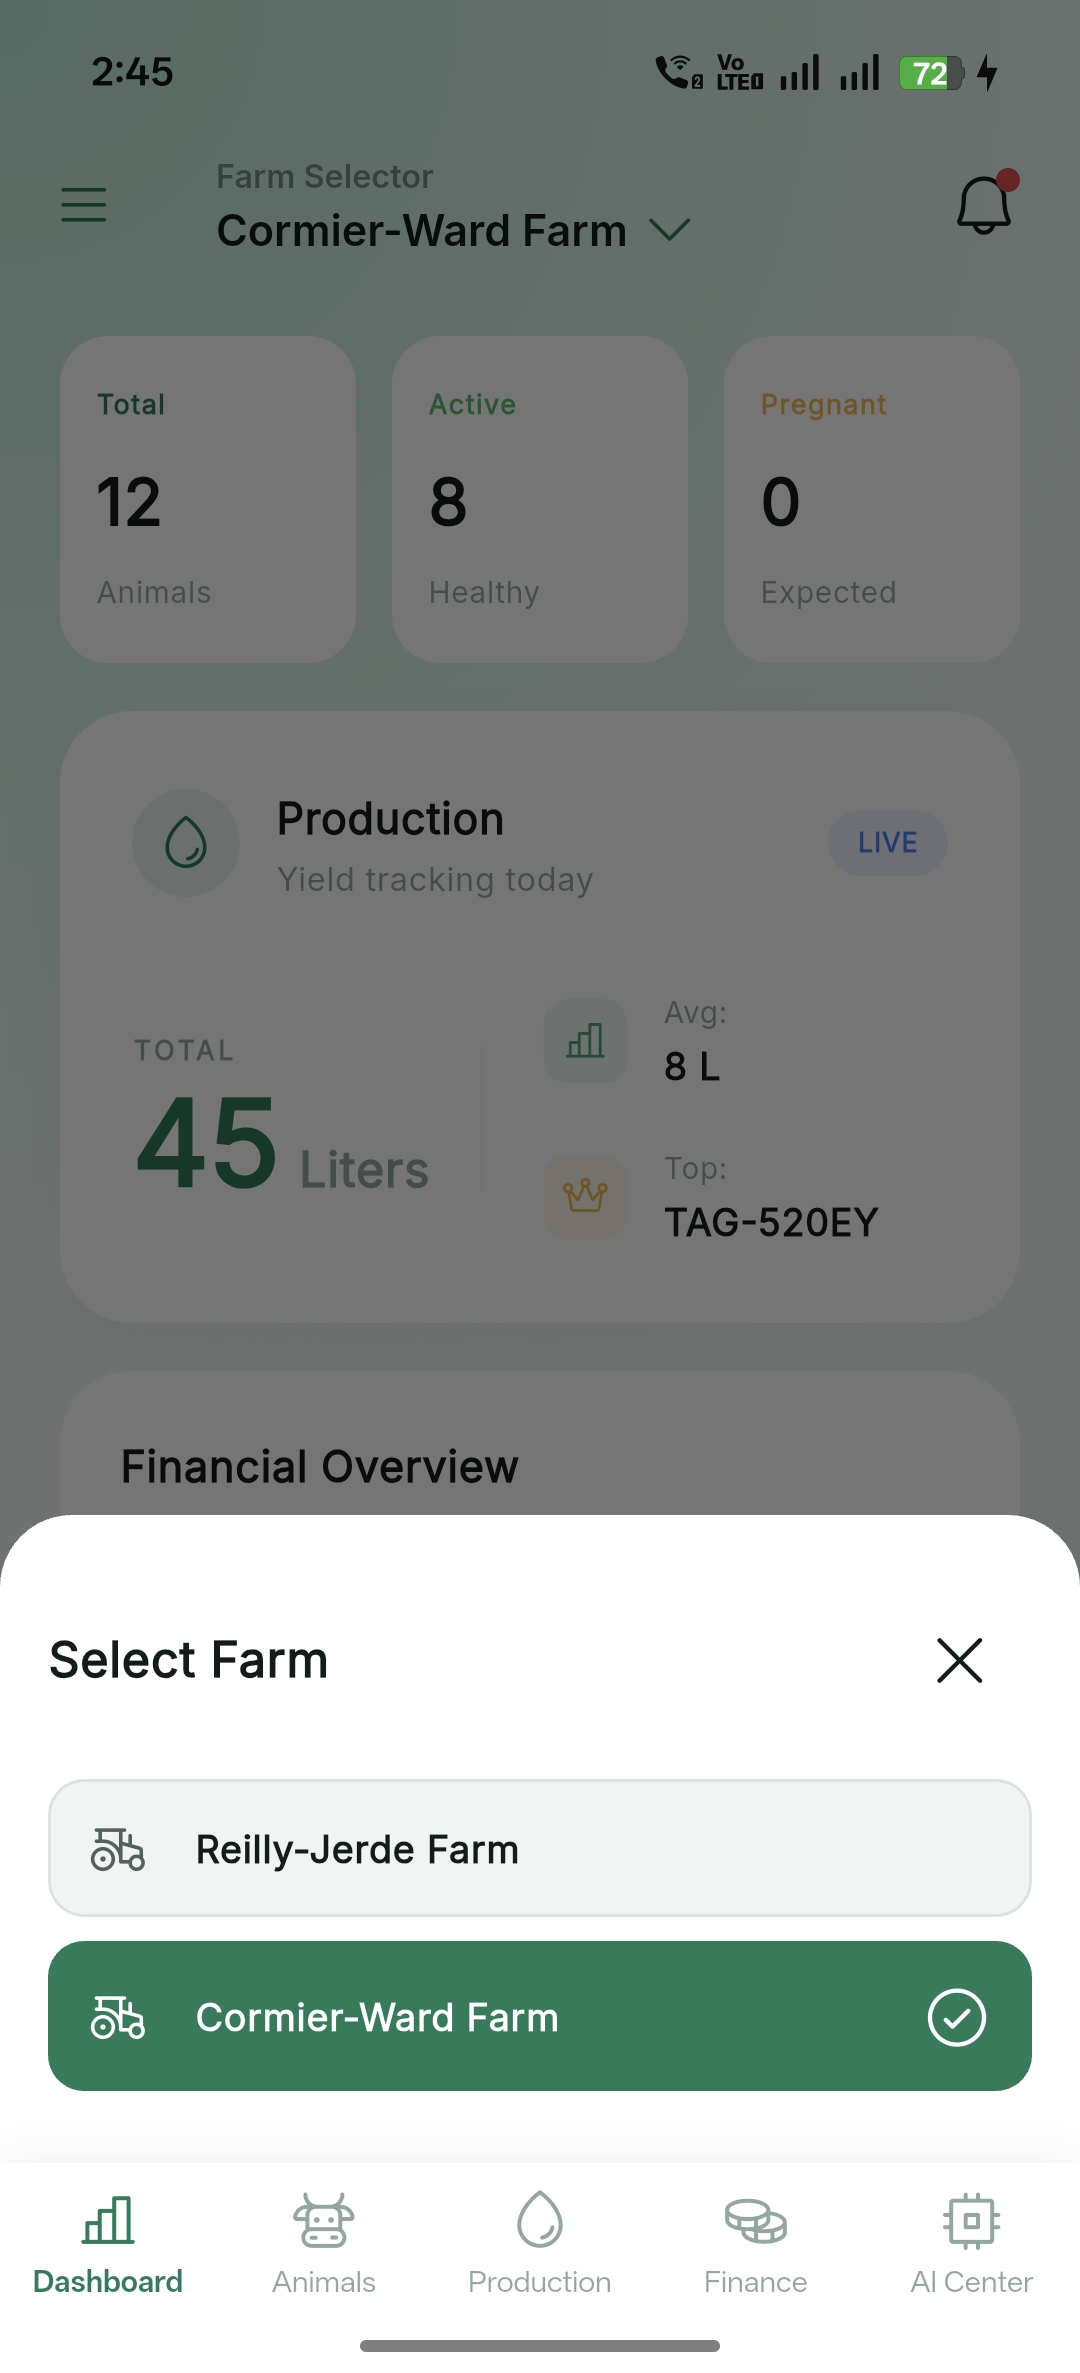
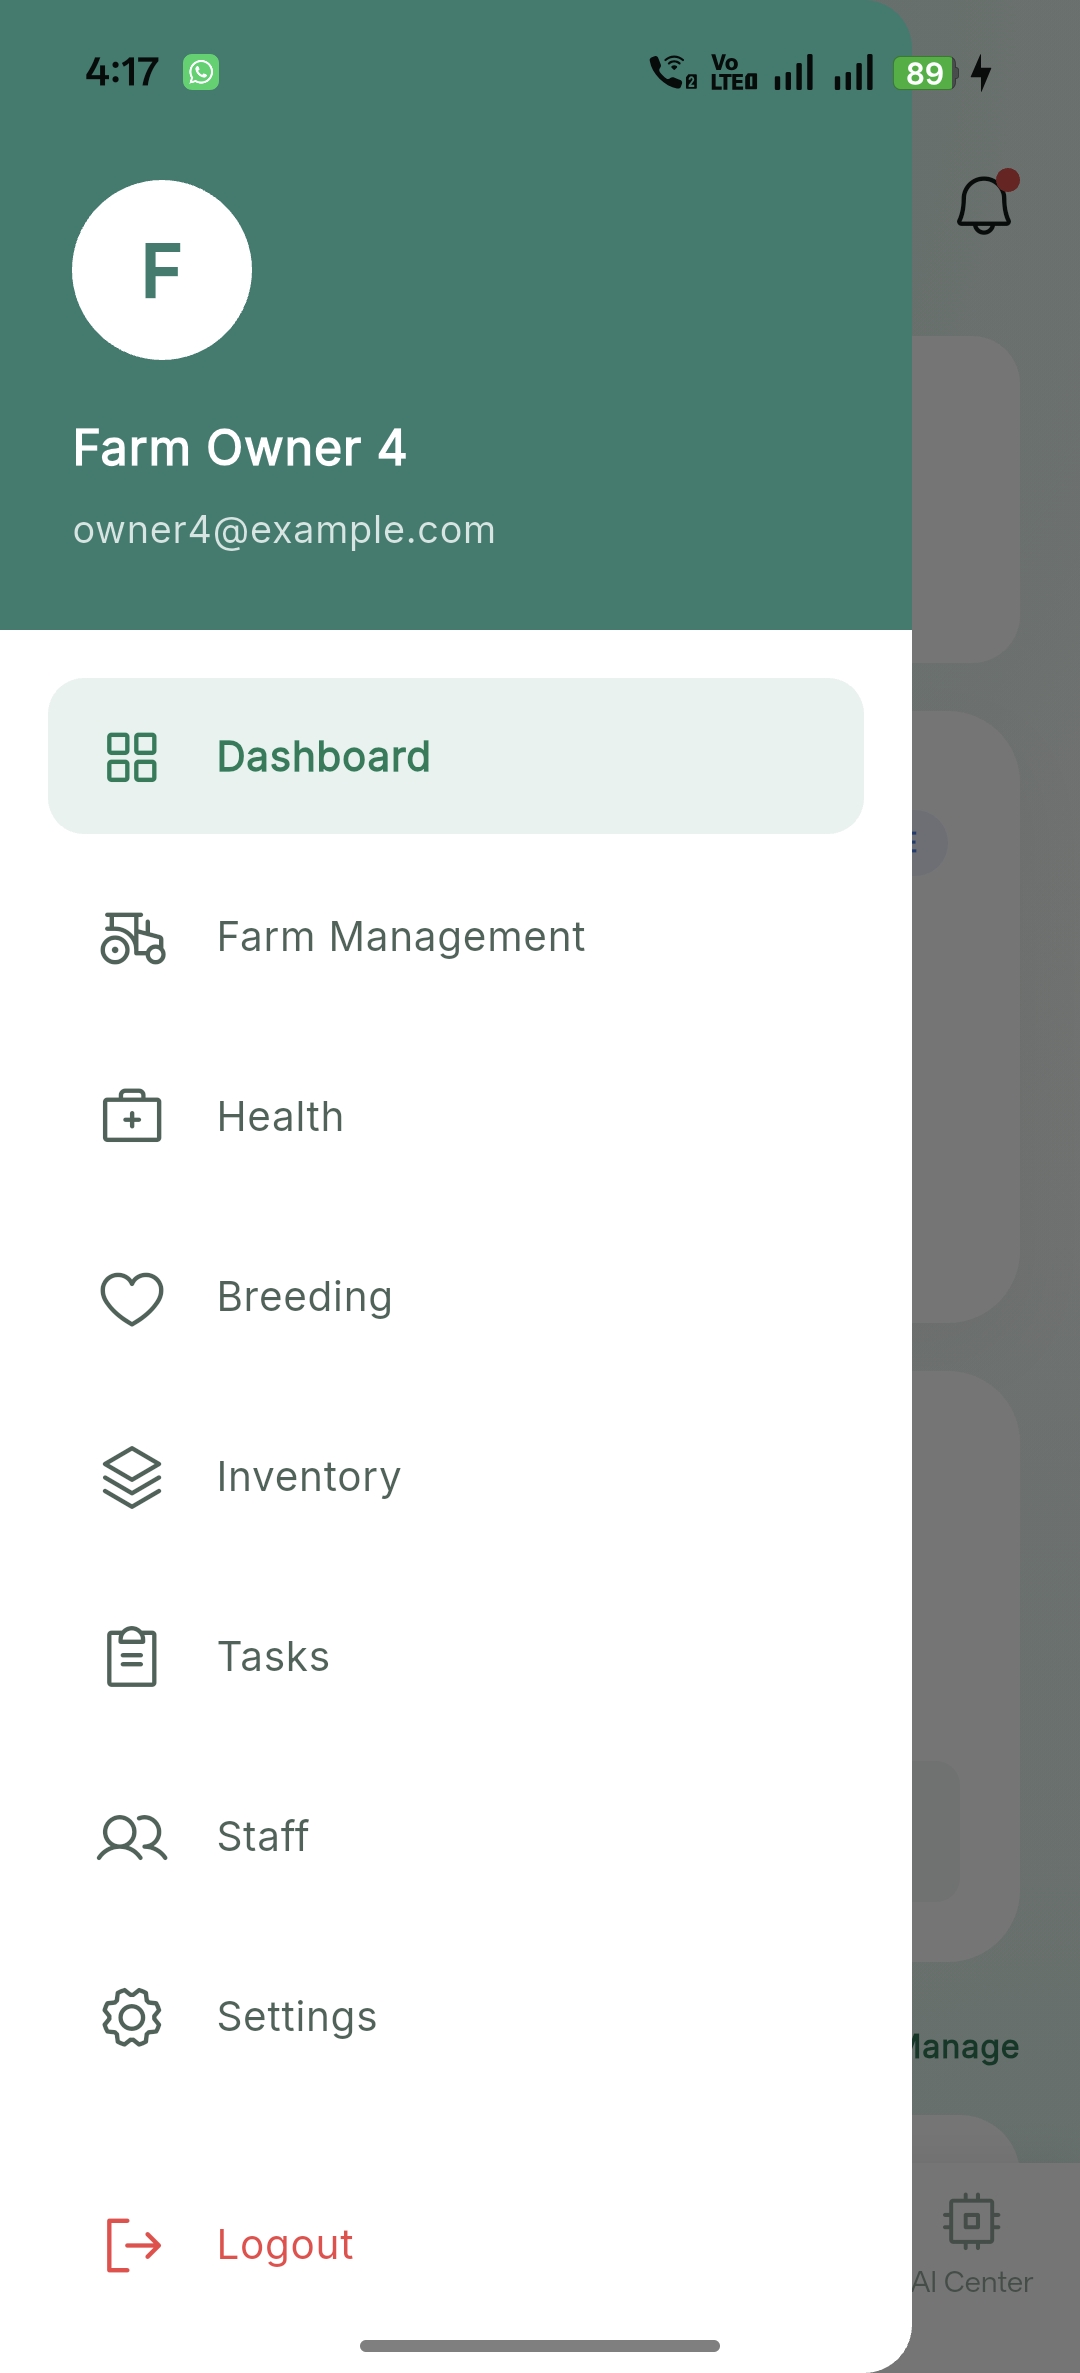
Dashboard & Navigation
Intuitive dashboards providing a bird's-eye view of your farm's performance, with multi-farm switching and quick navigation.

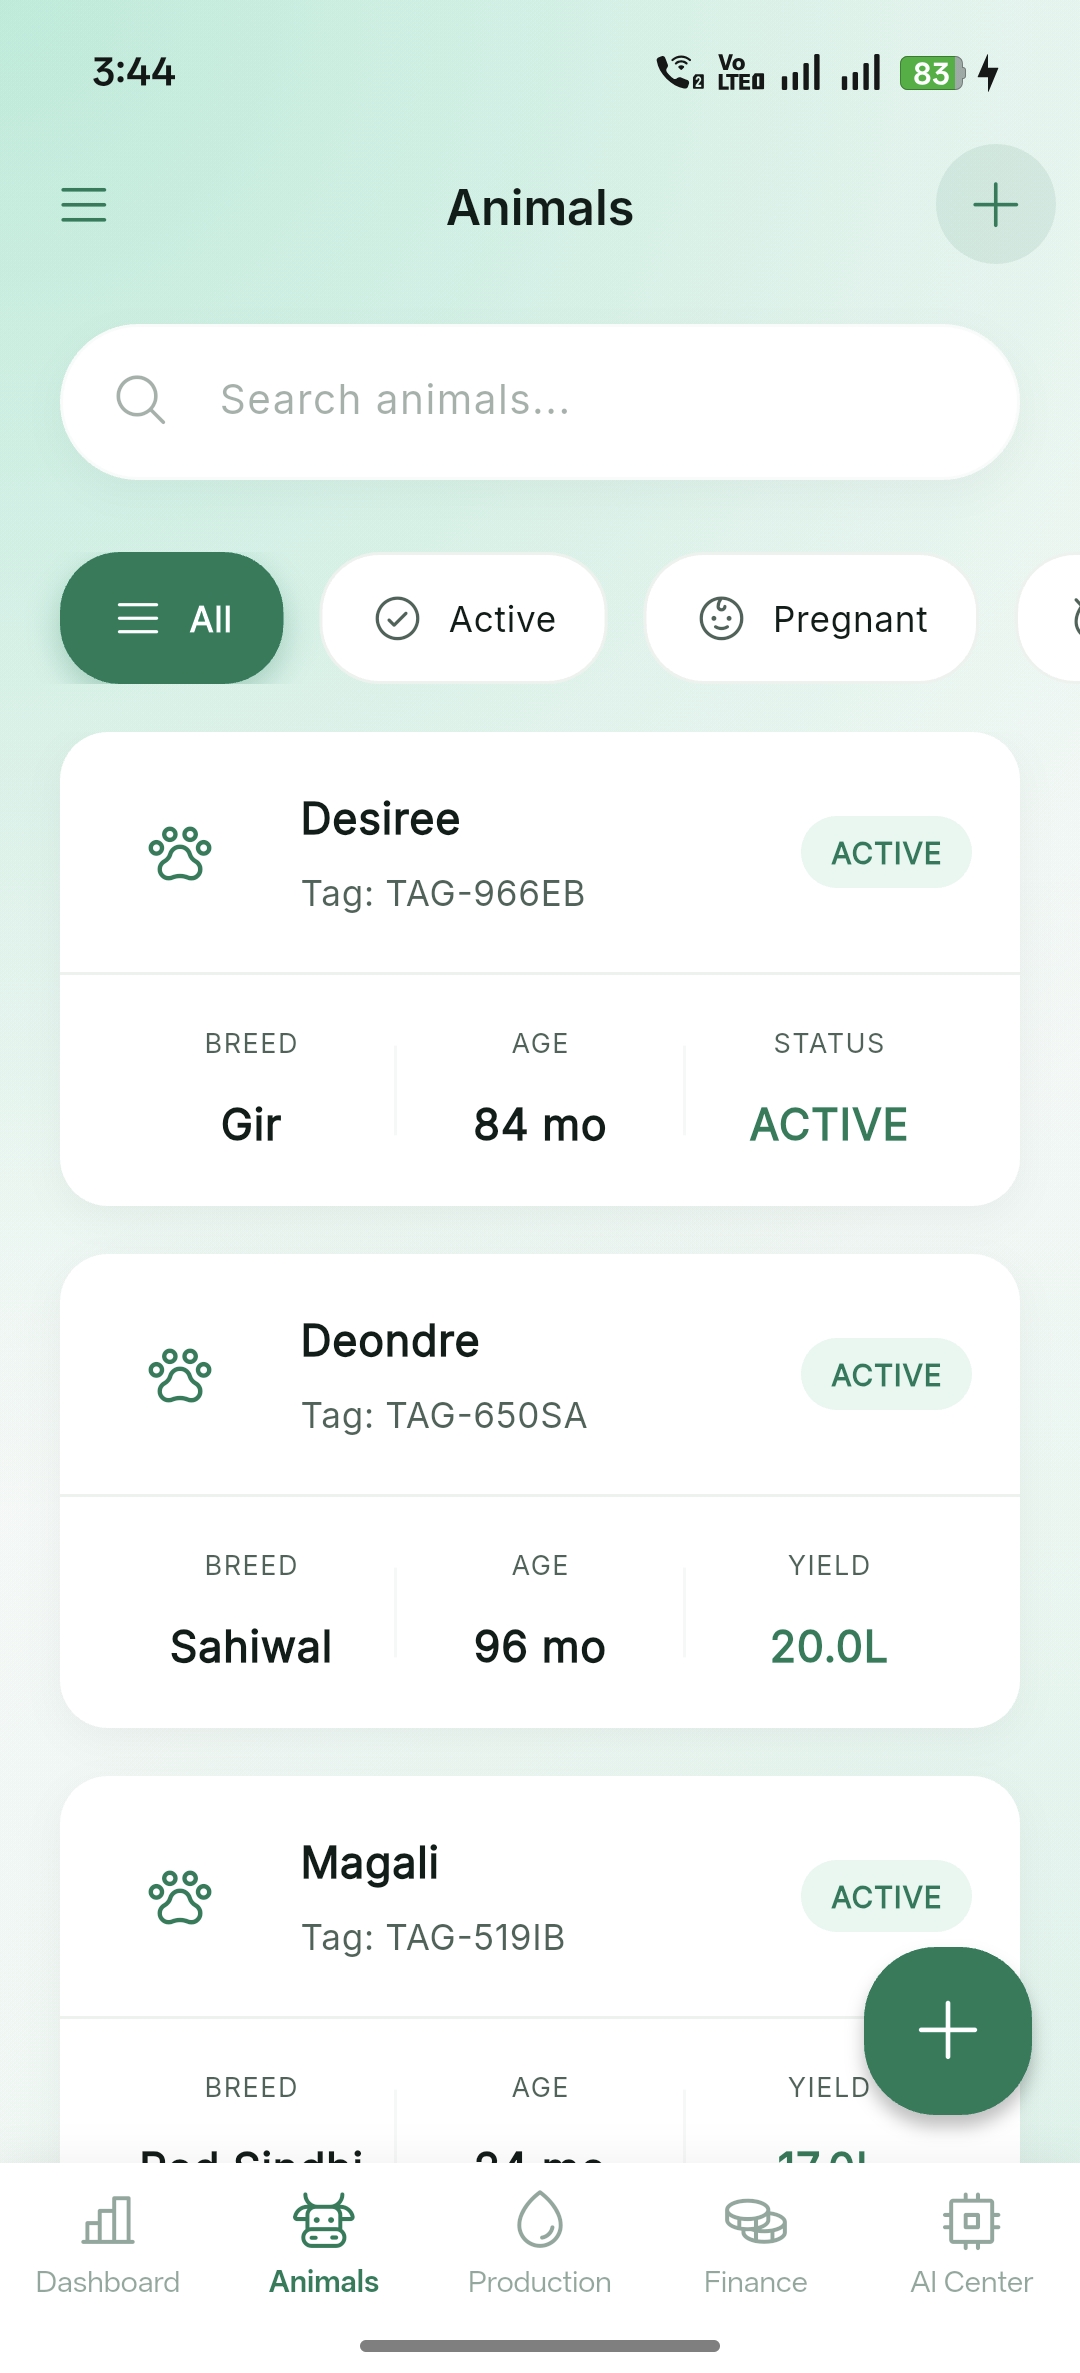
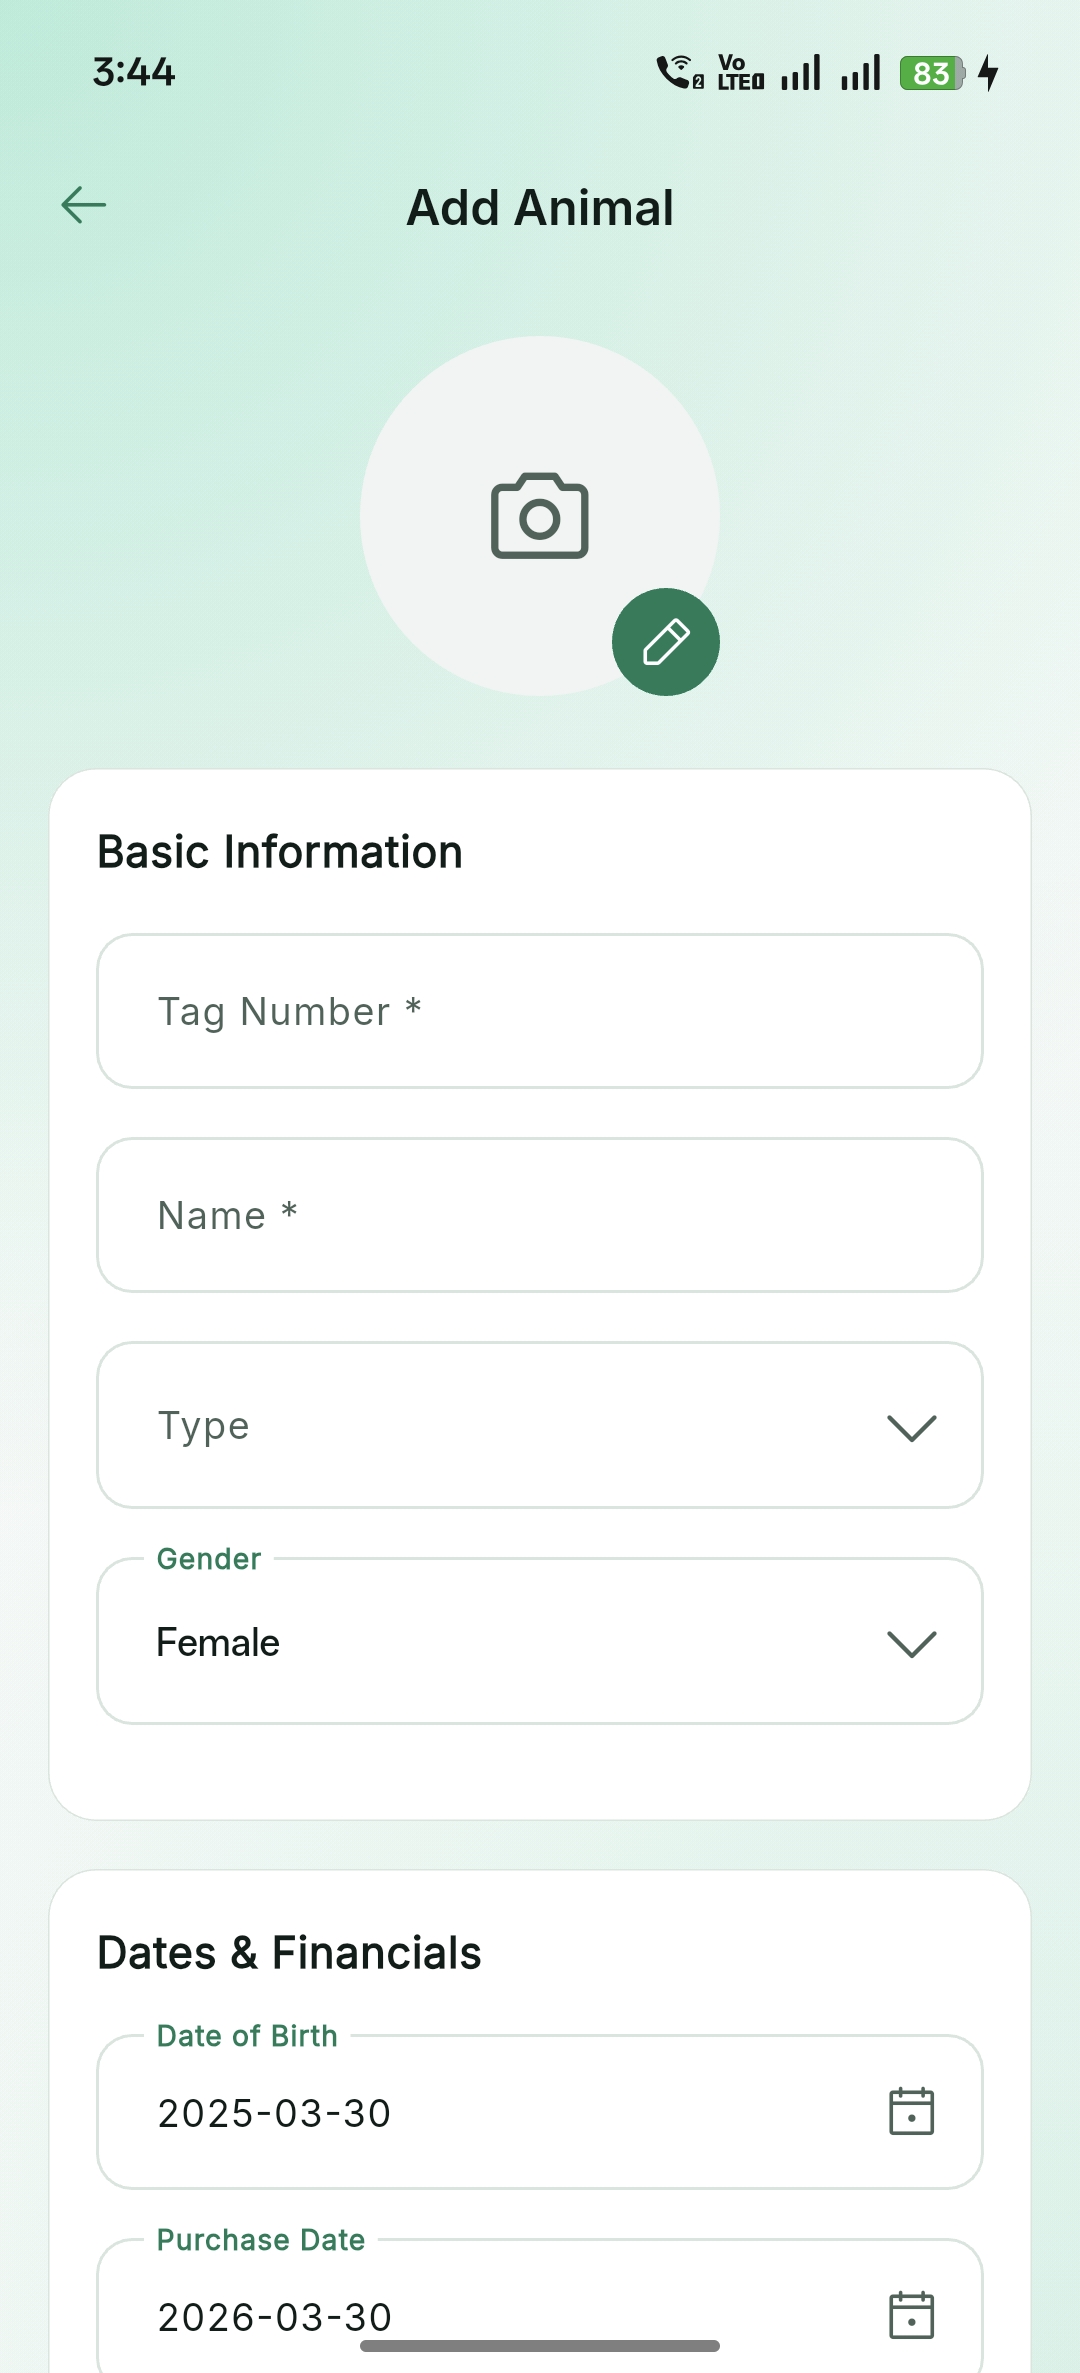
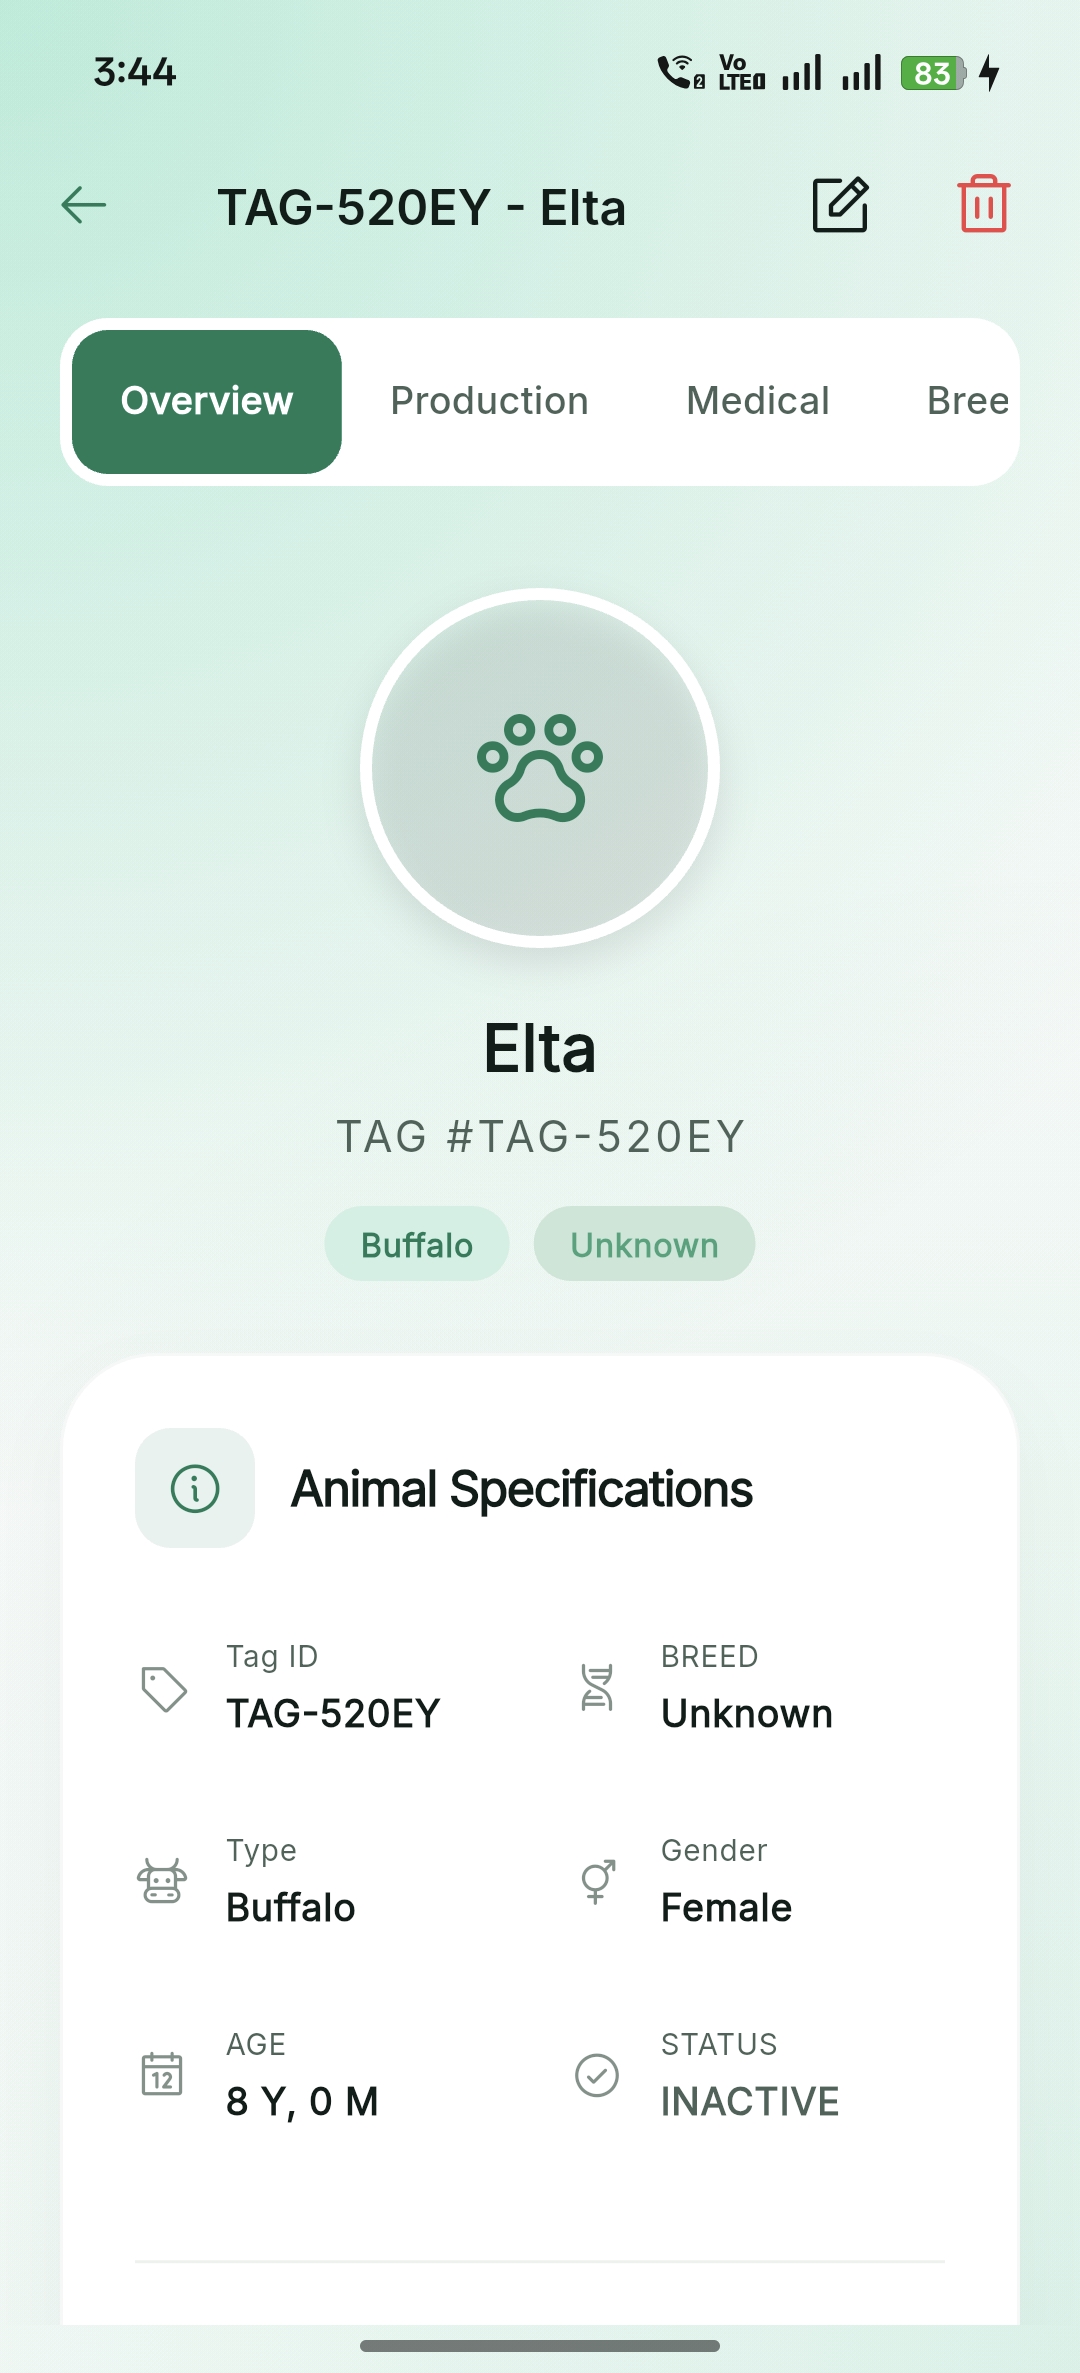
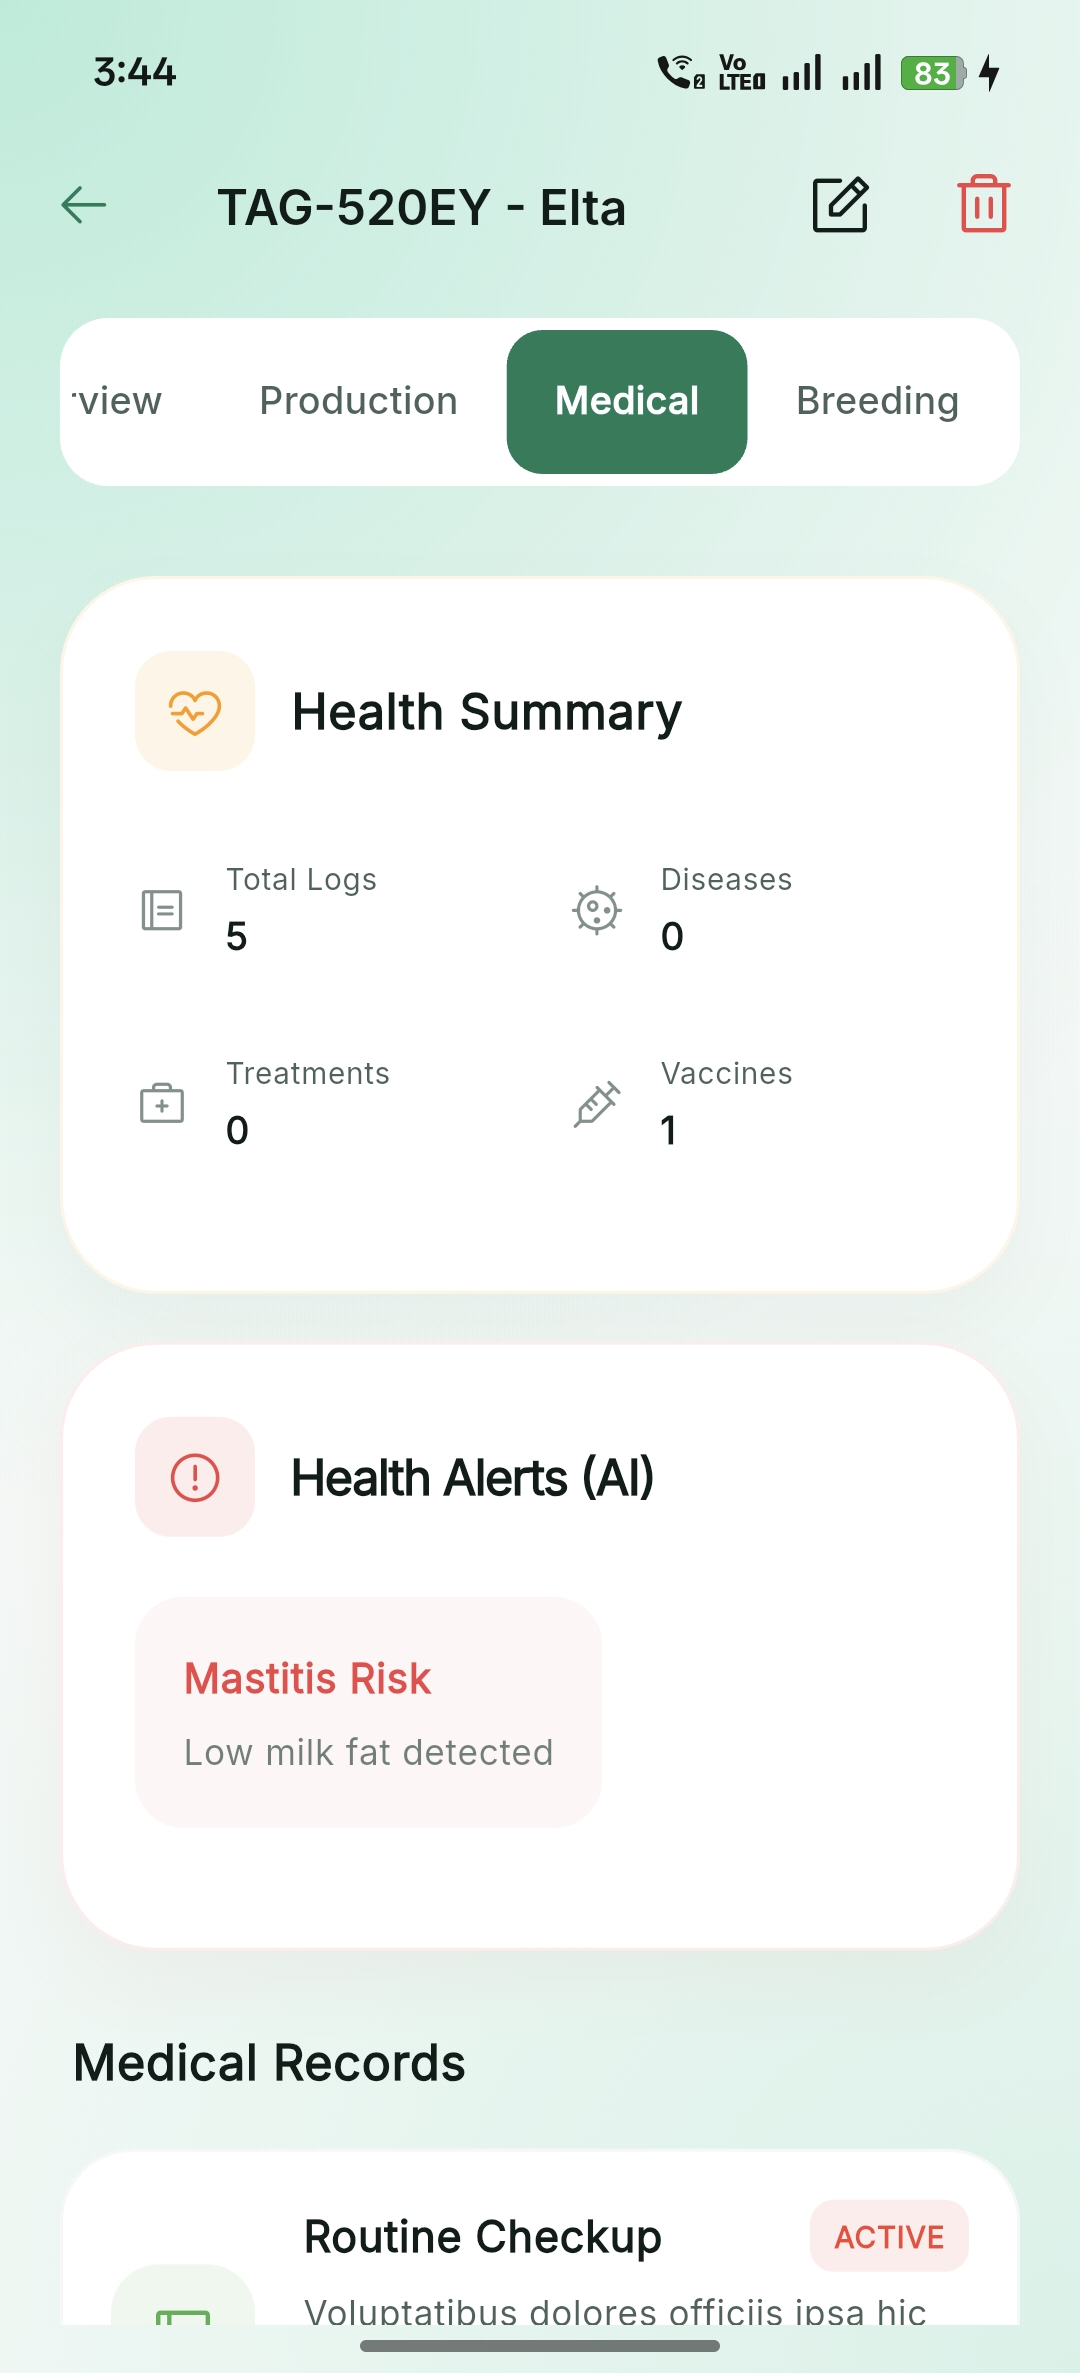
Animal Management
Comprehensive livestock tracking including profile creation, production history, medical logs, and breeding records.
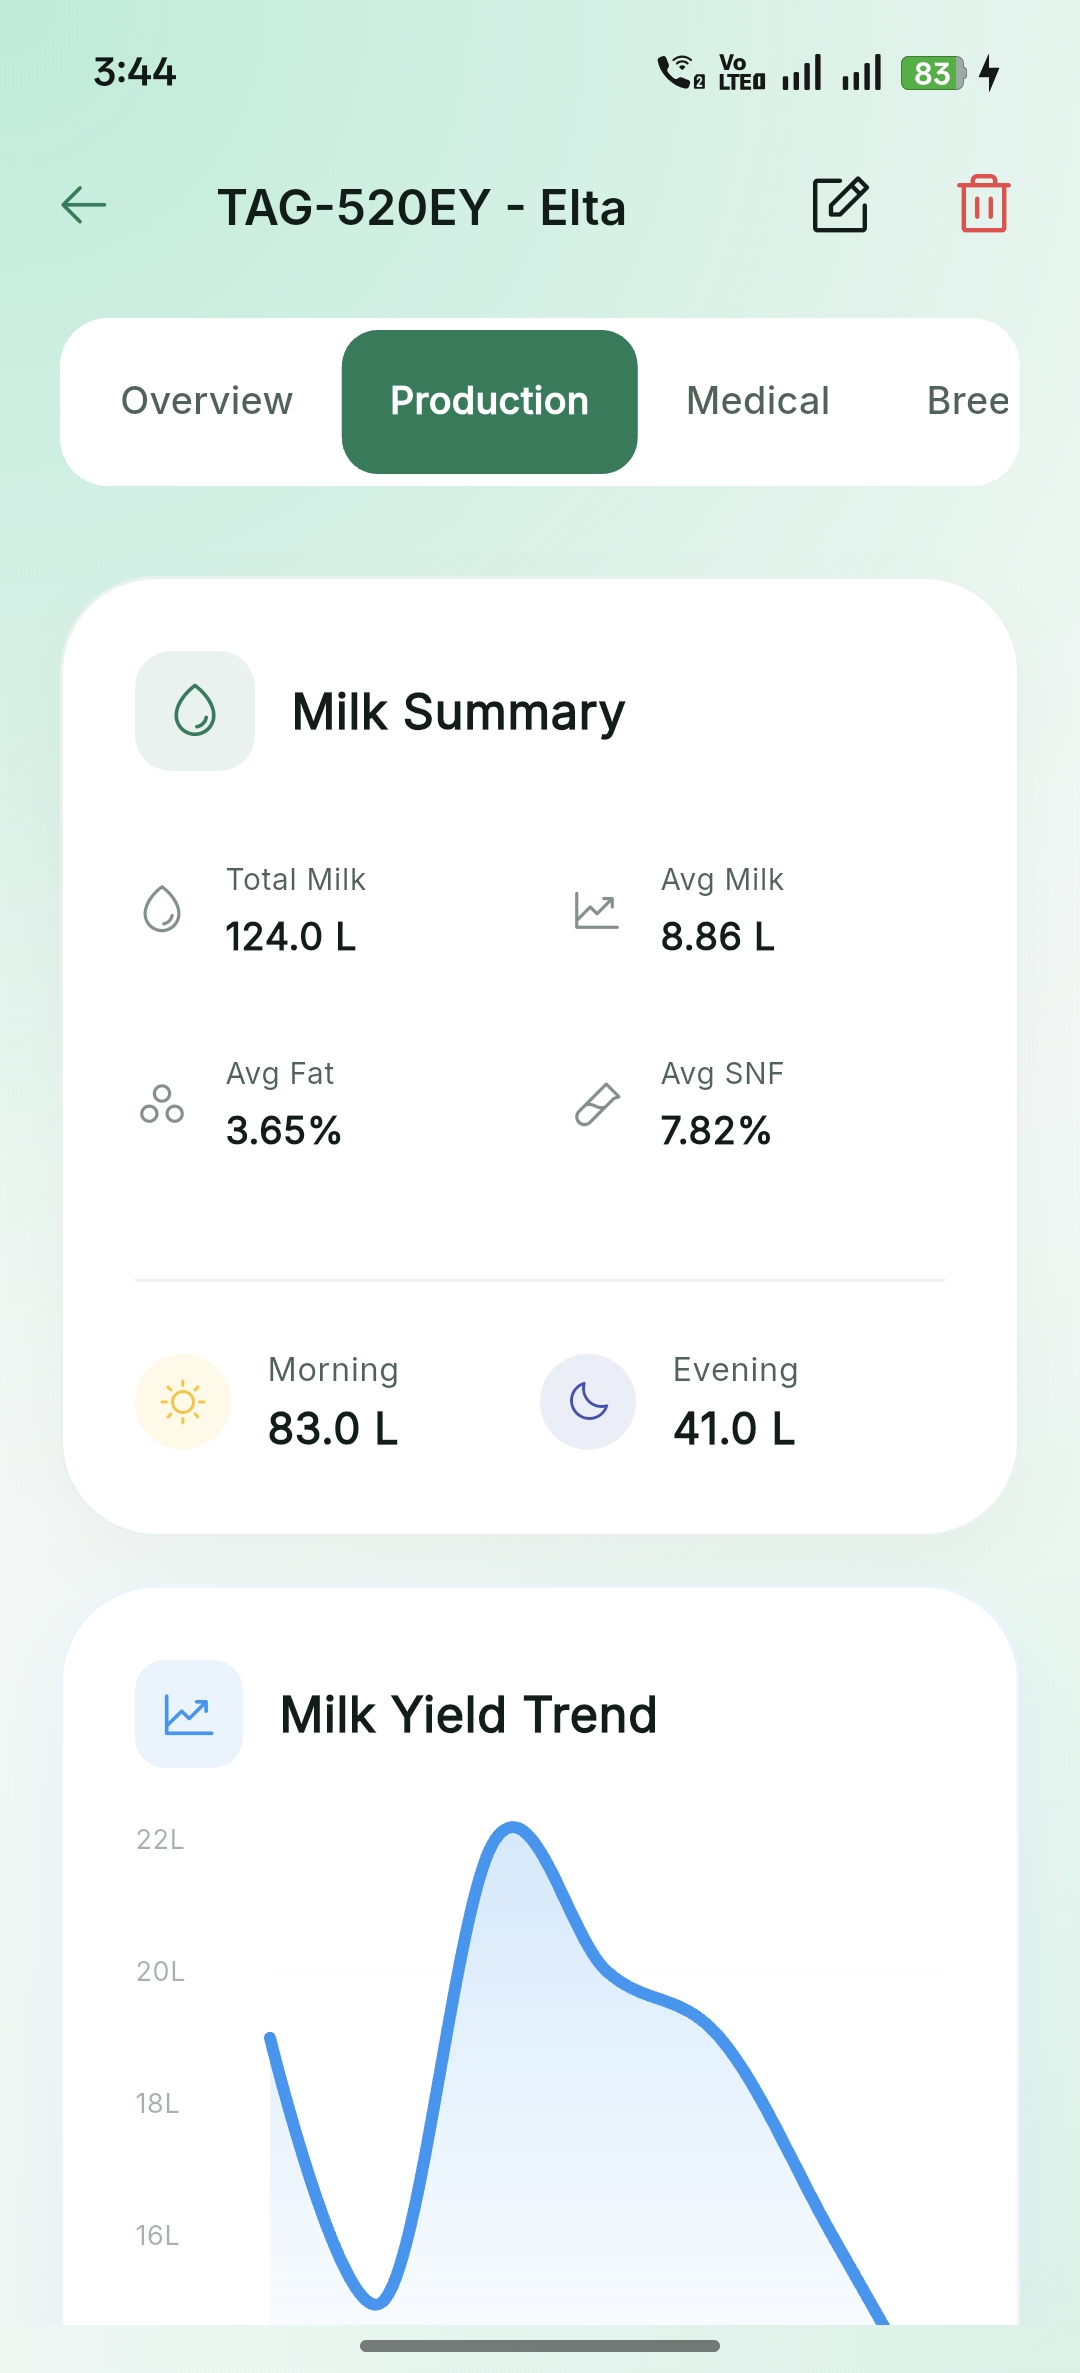
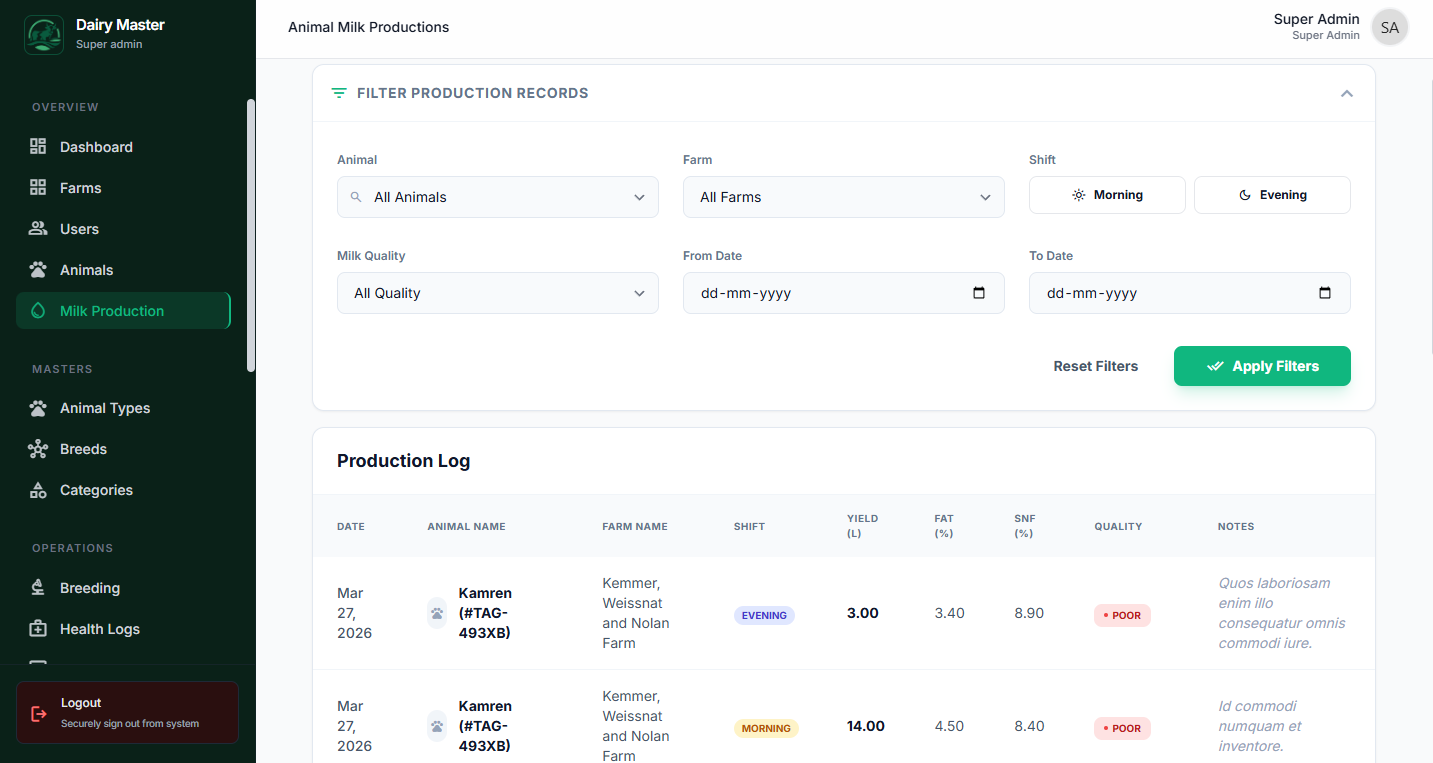
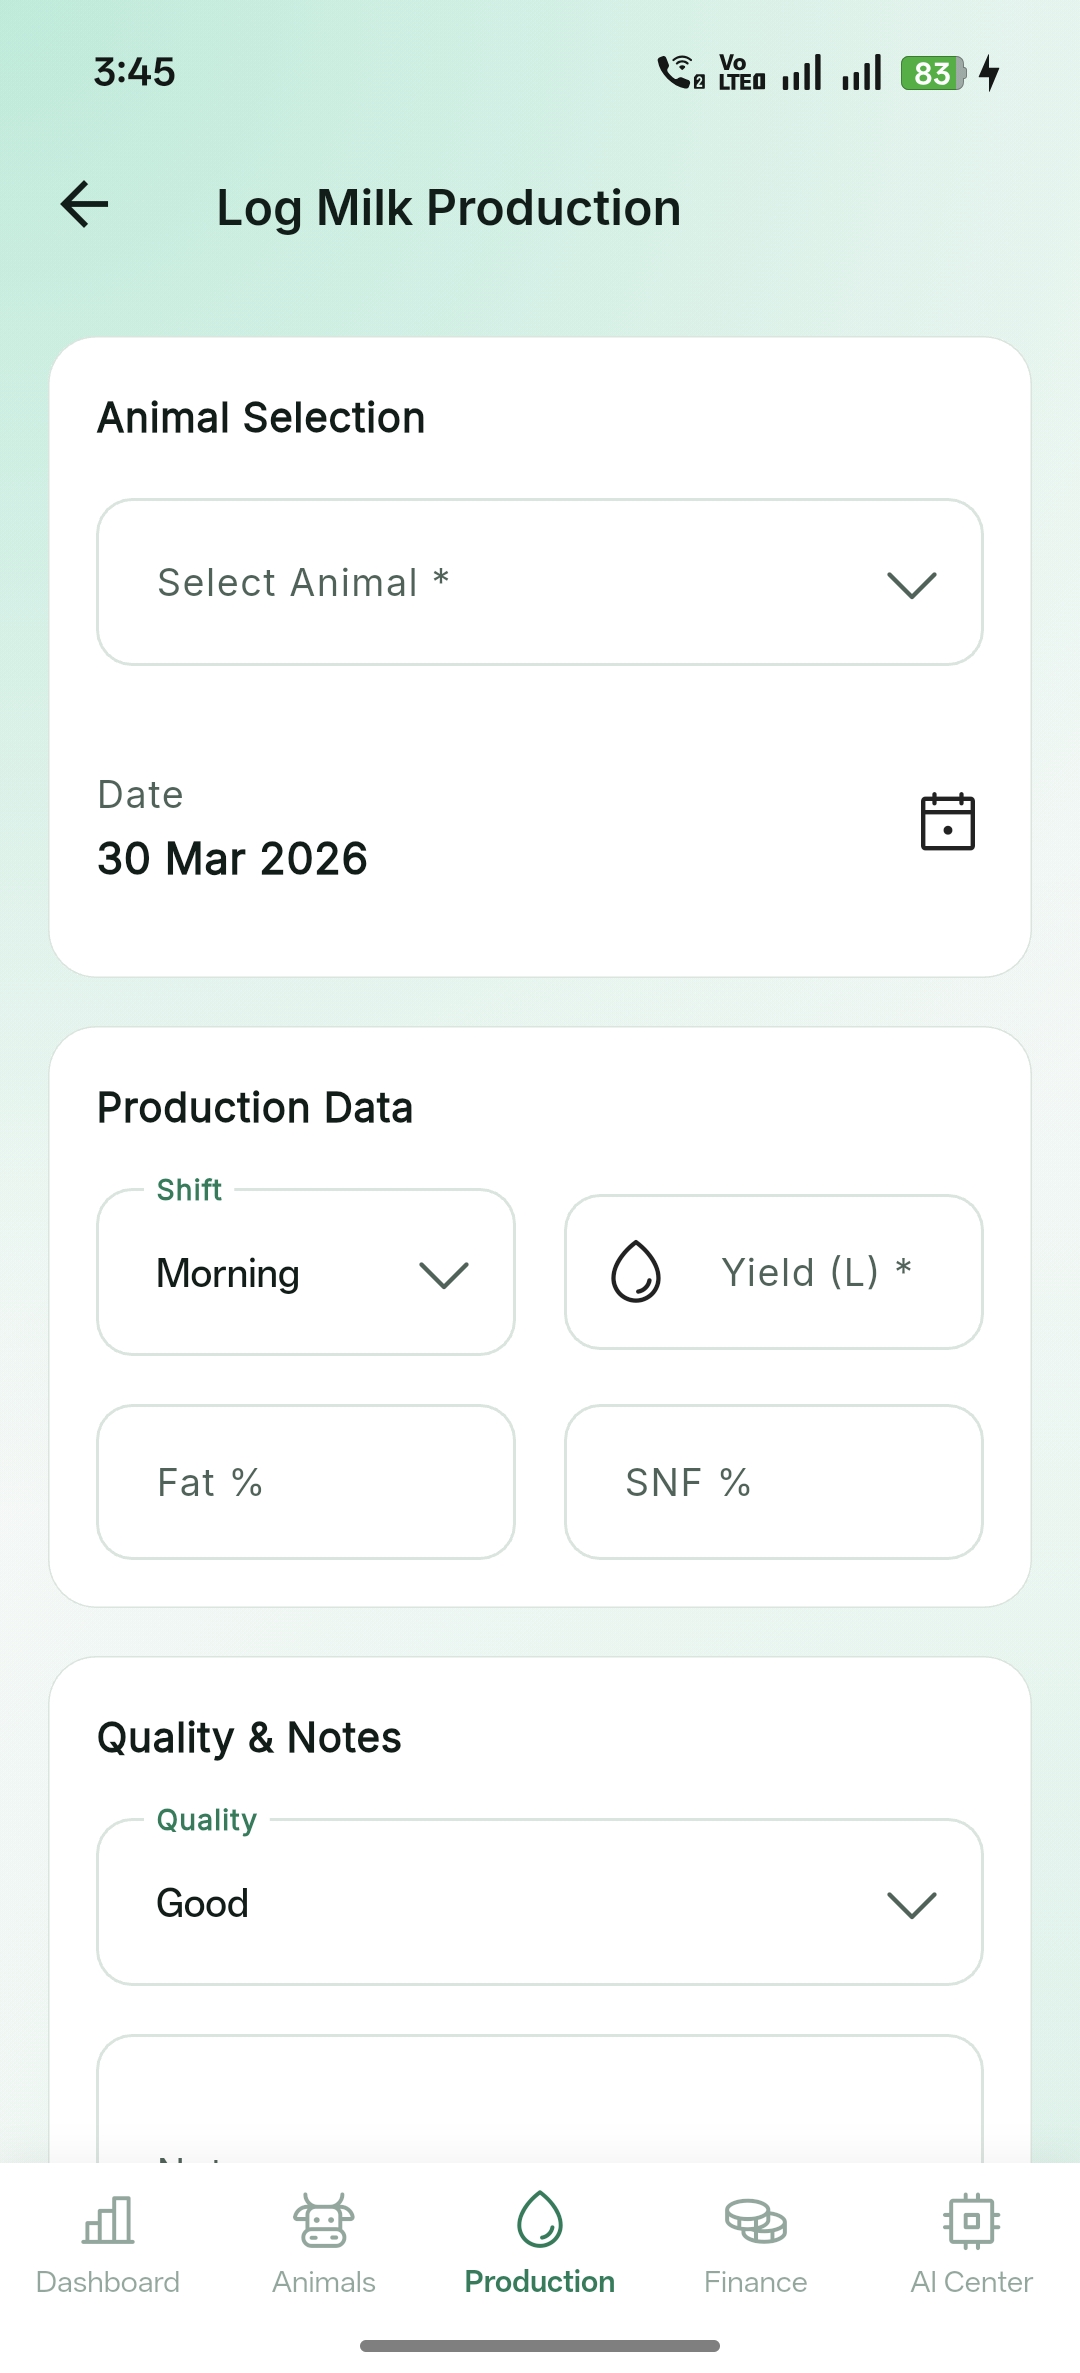
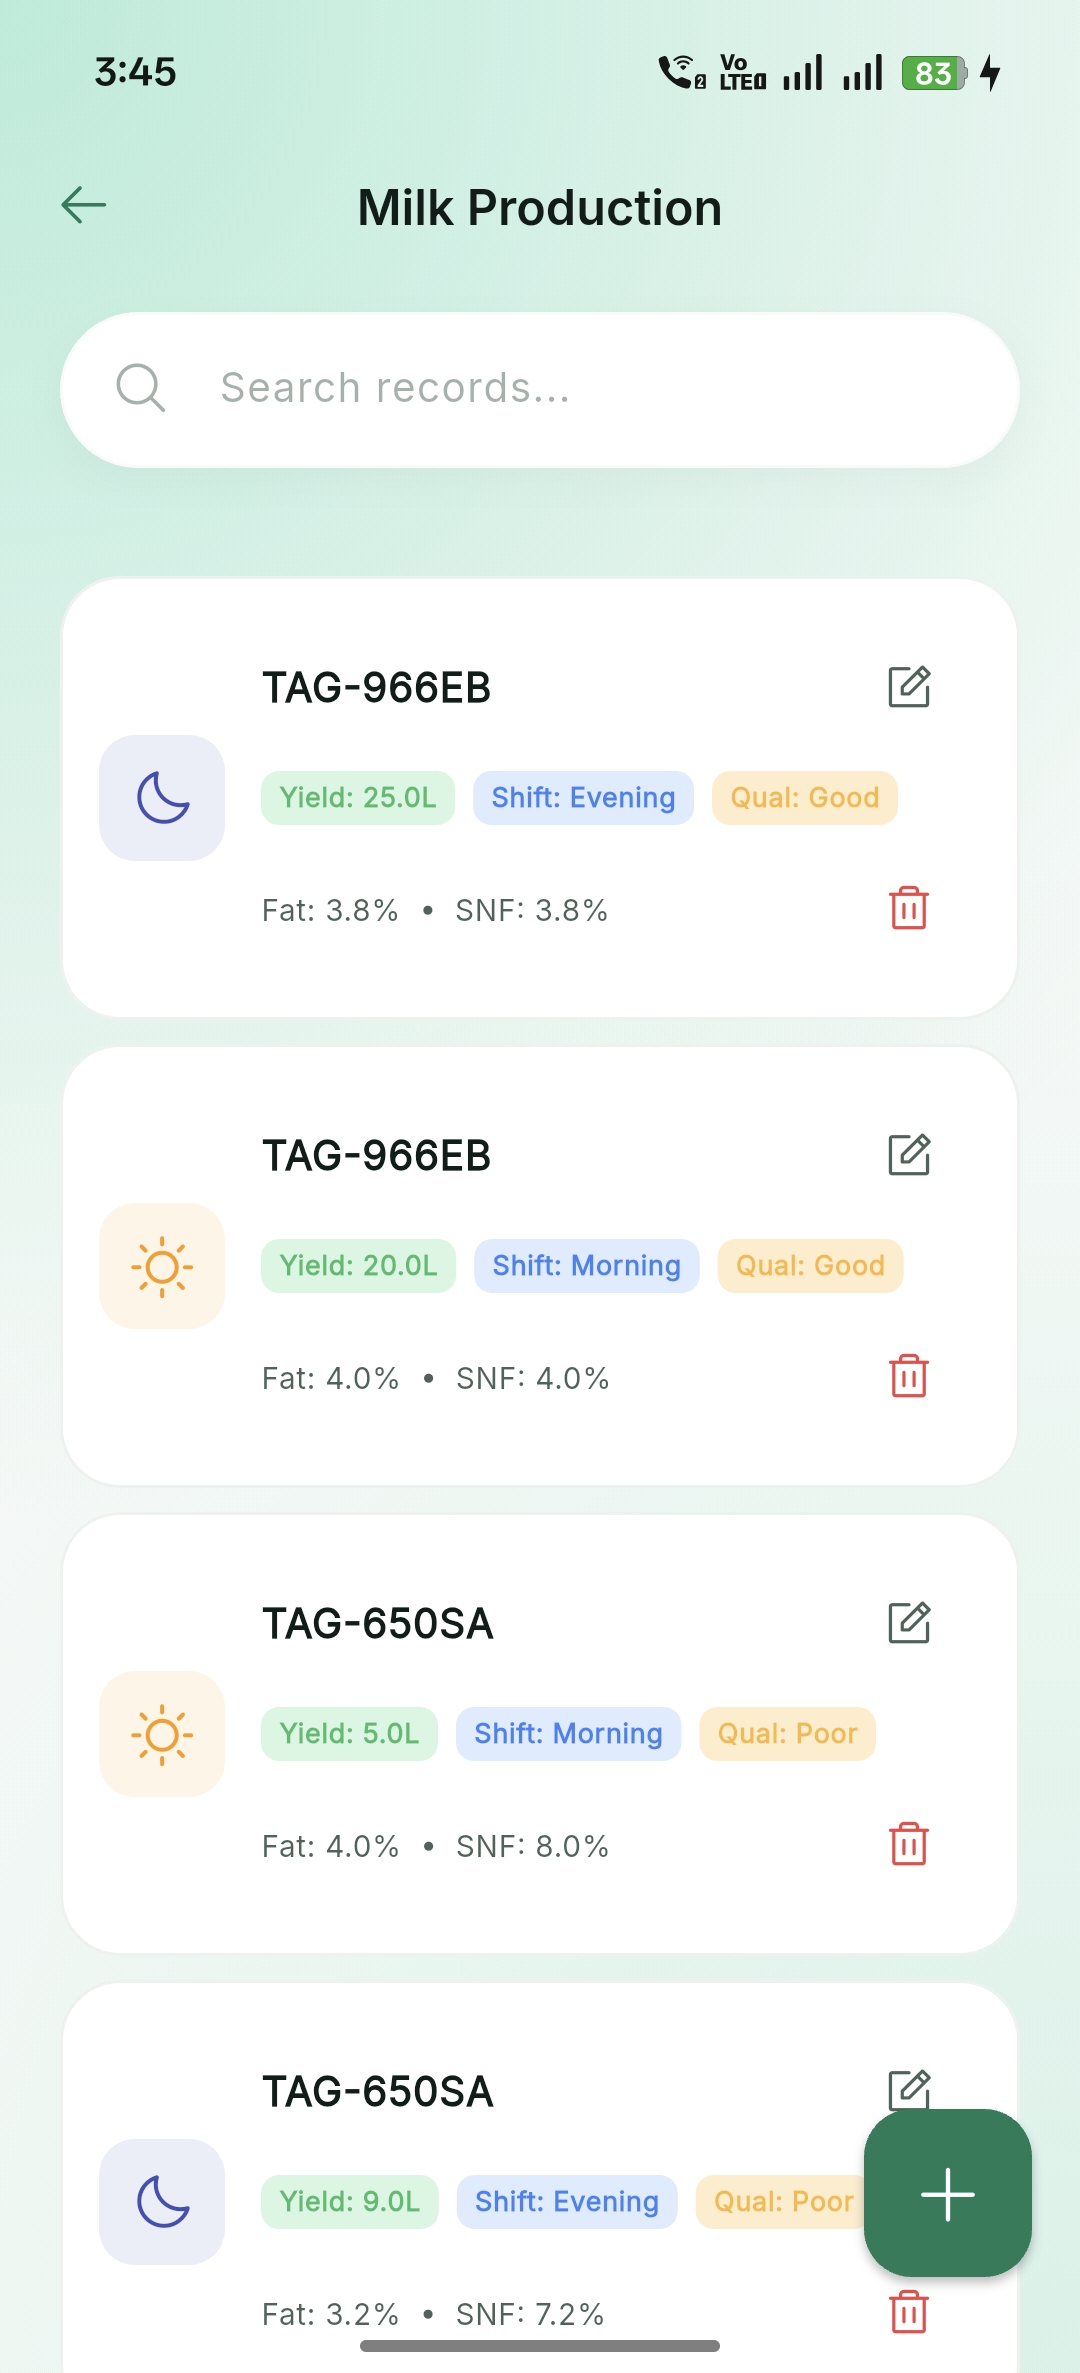
Milk Production
Log and track daily milk yields per animal or group. Monitor production trends over time.

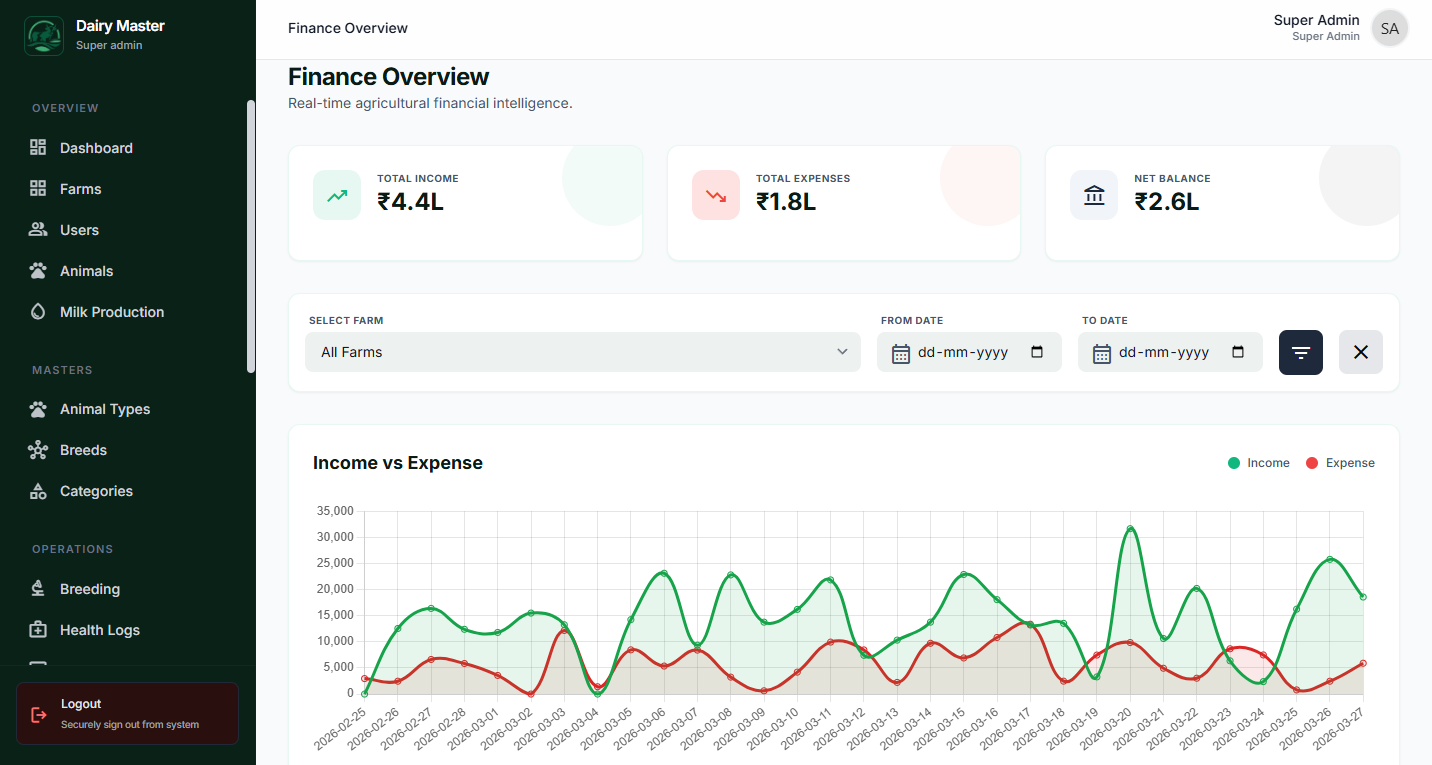
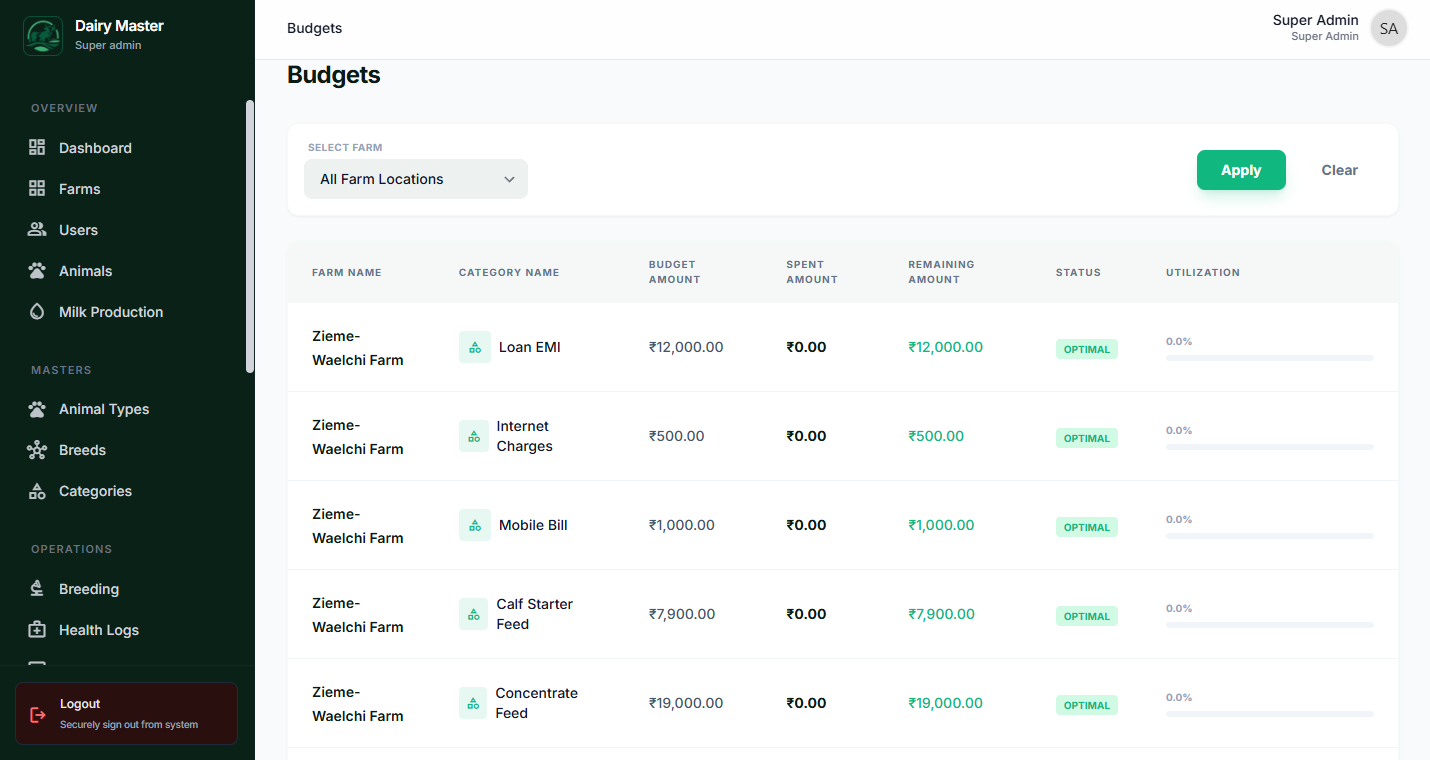
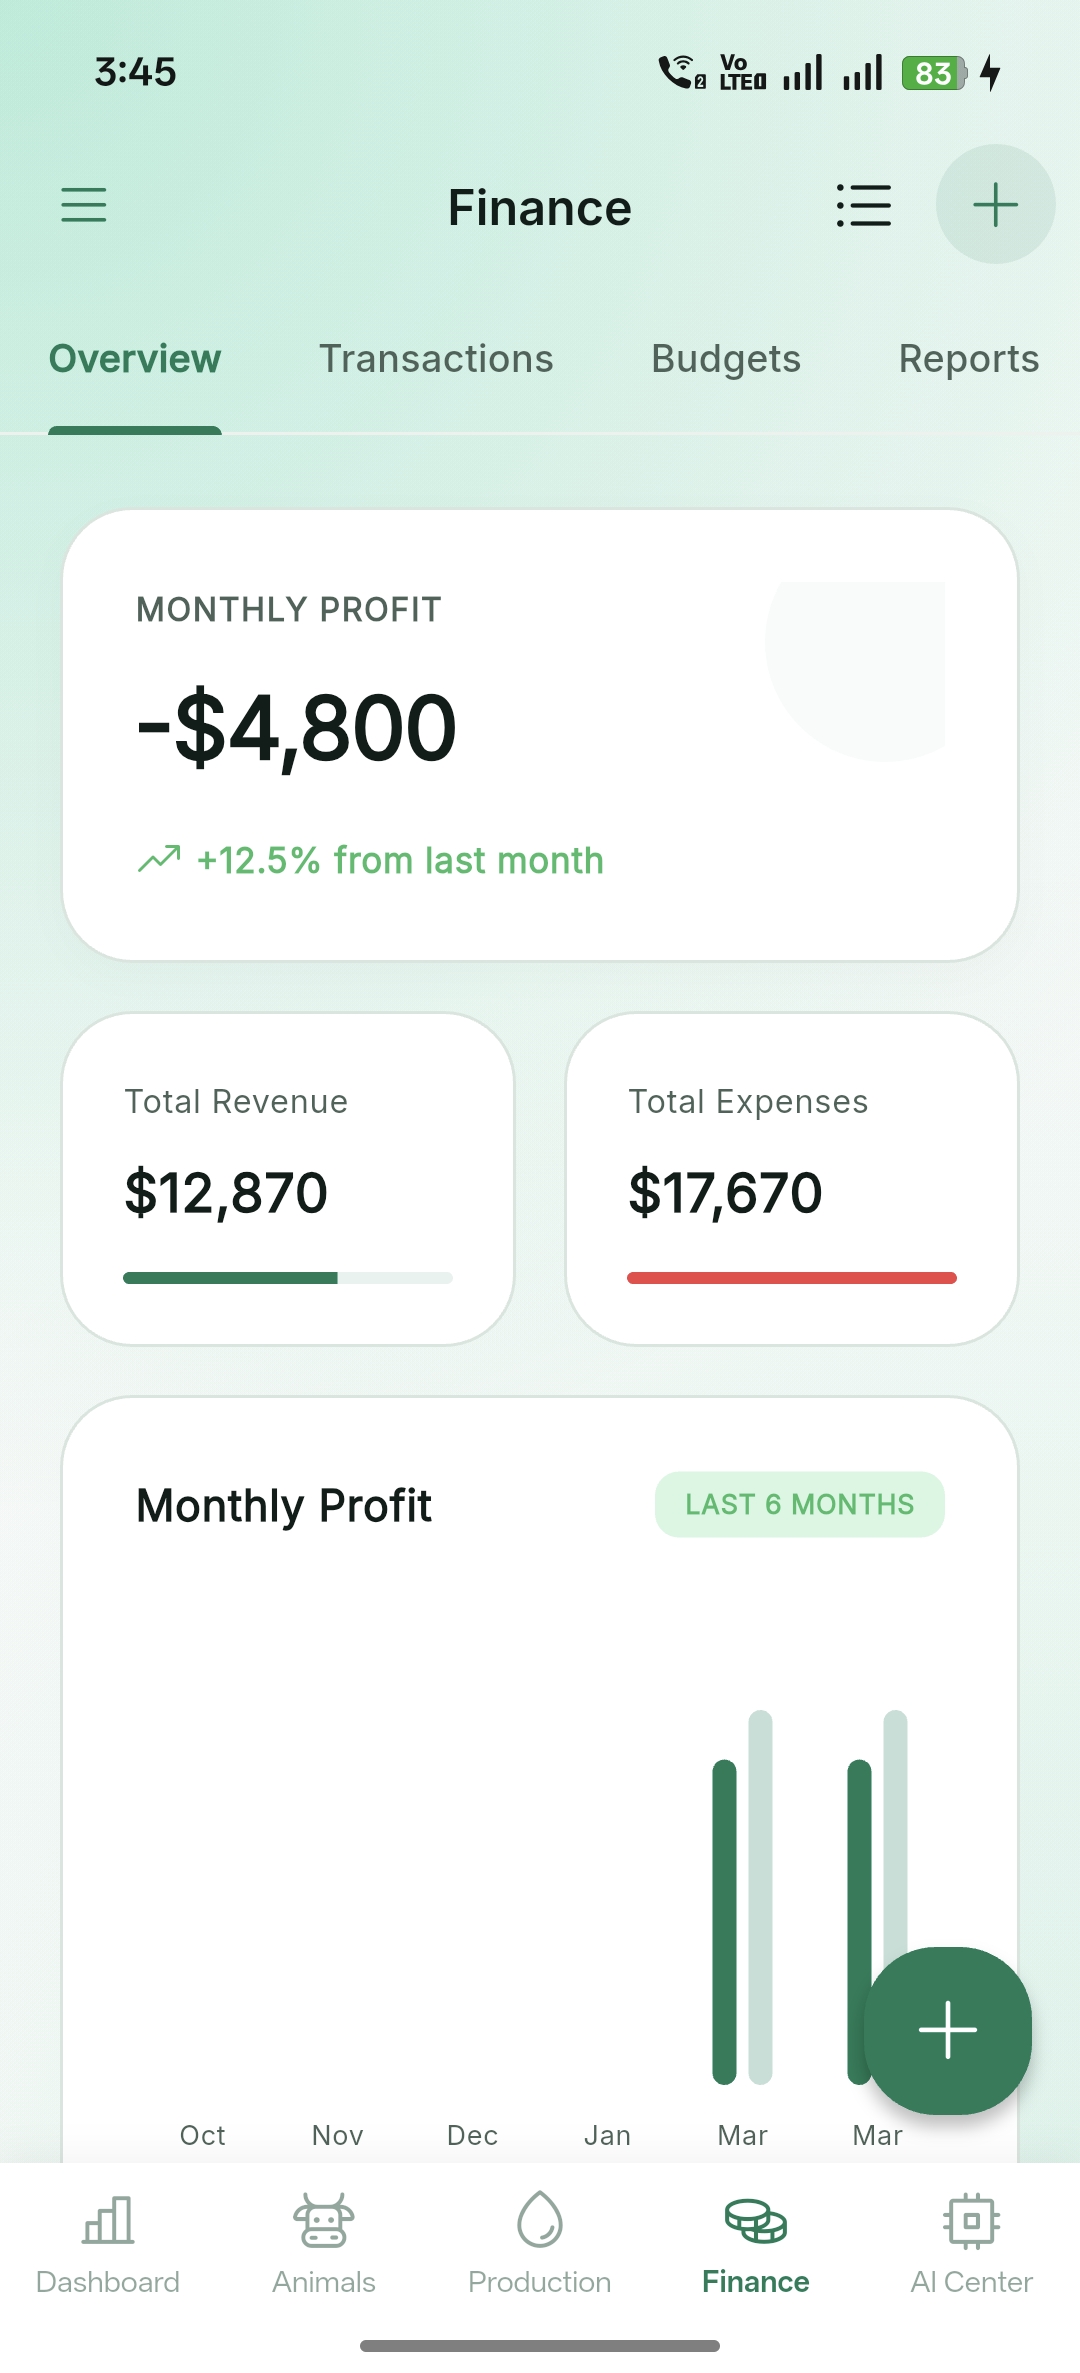
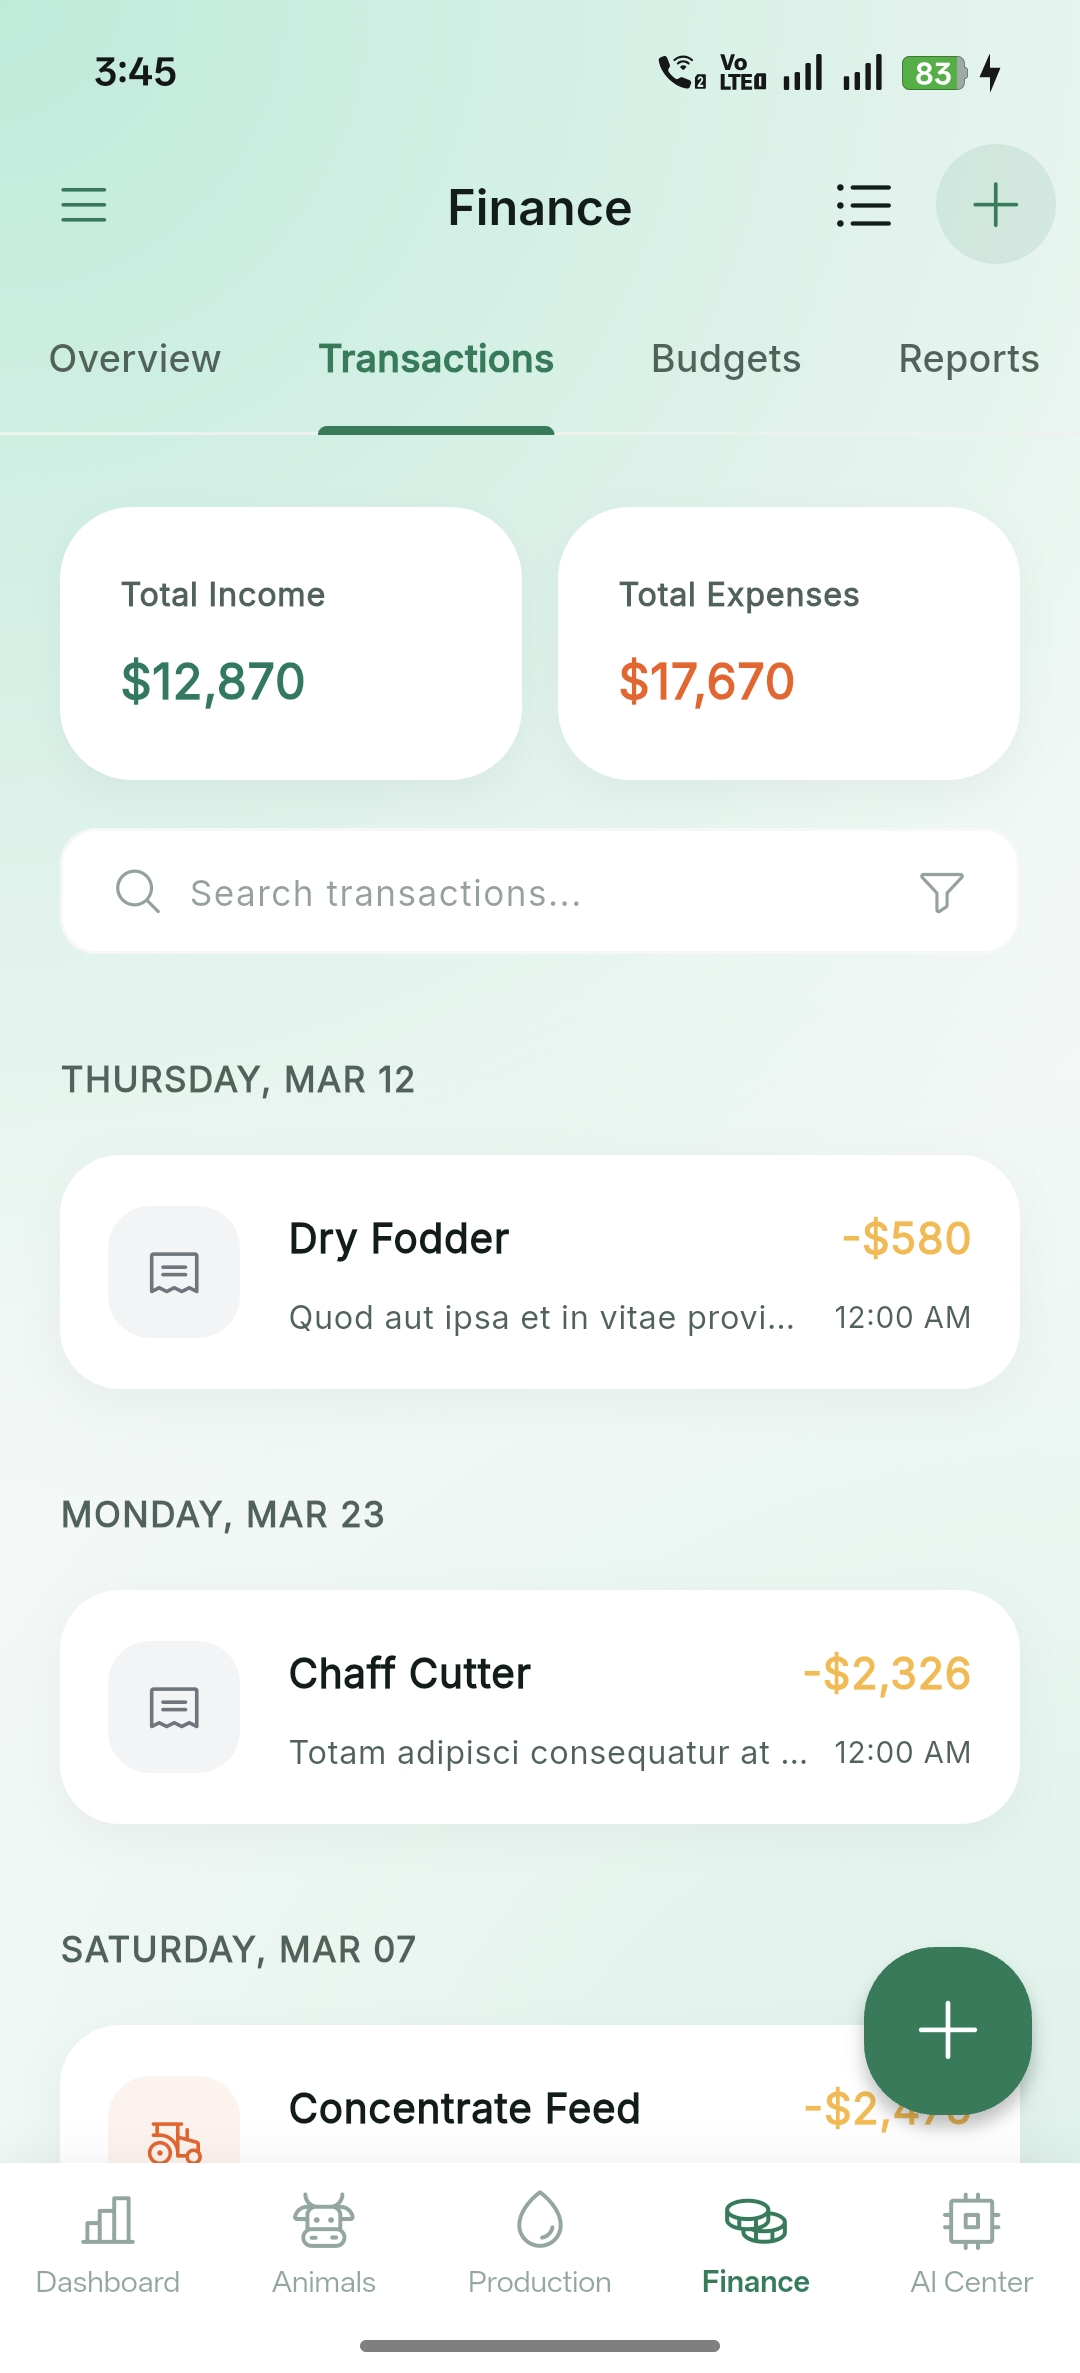
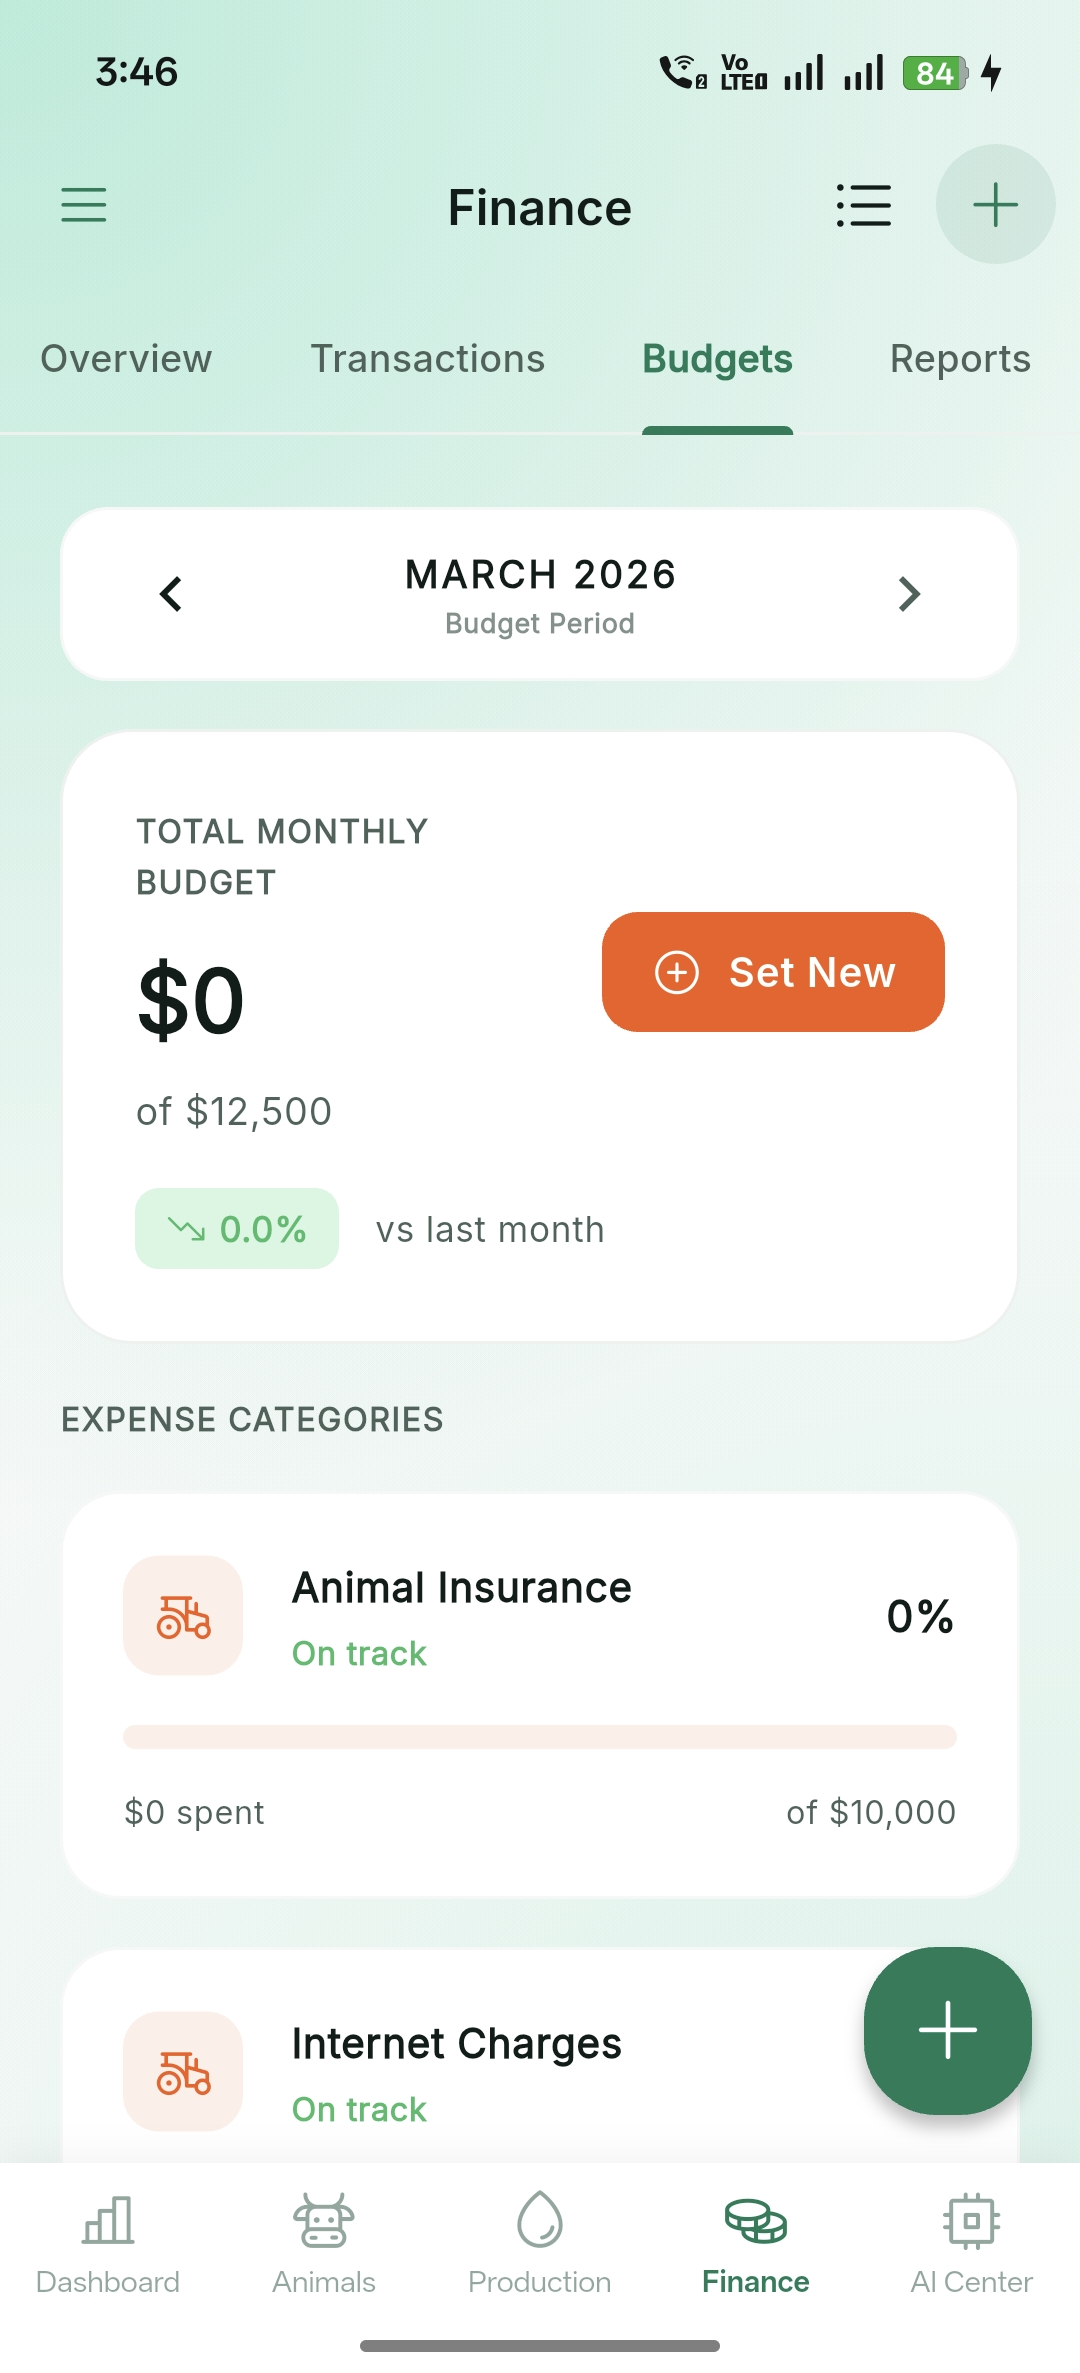
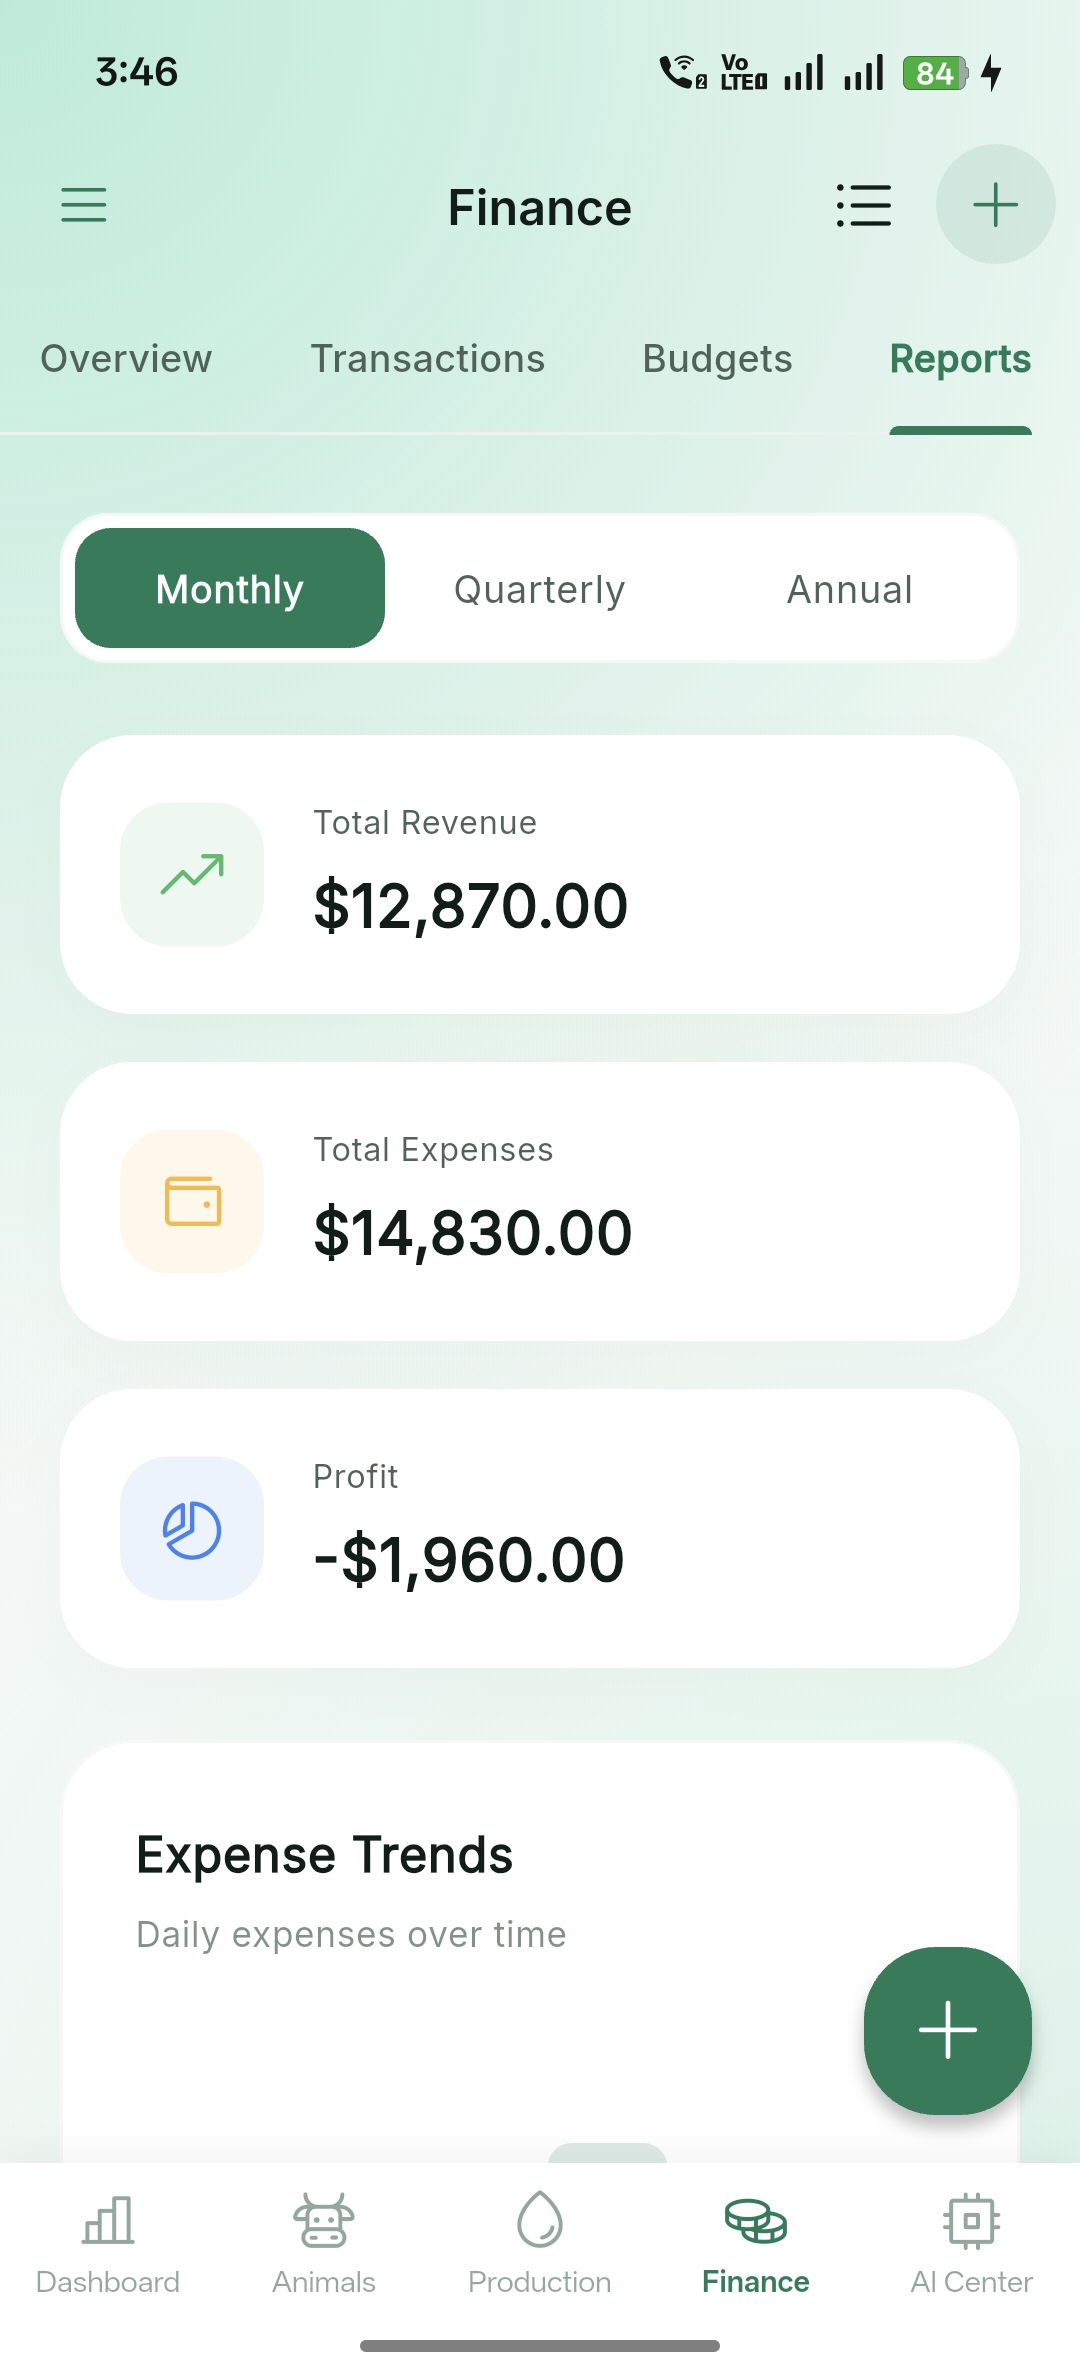
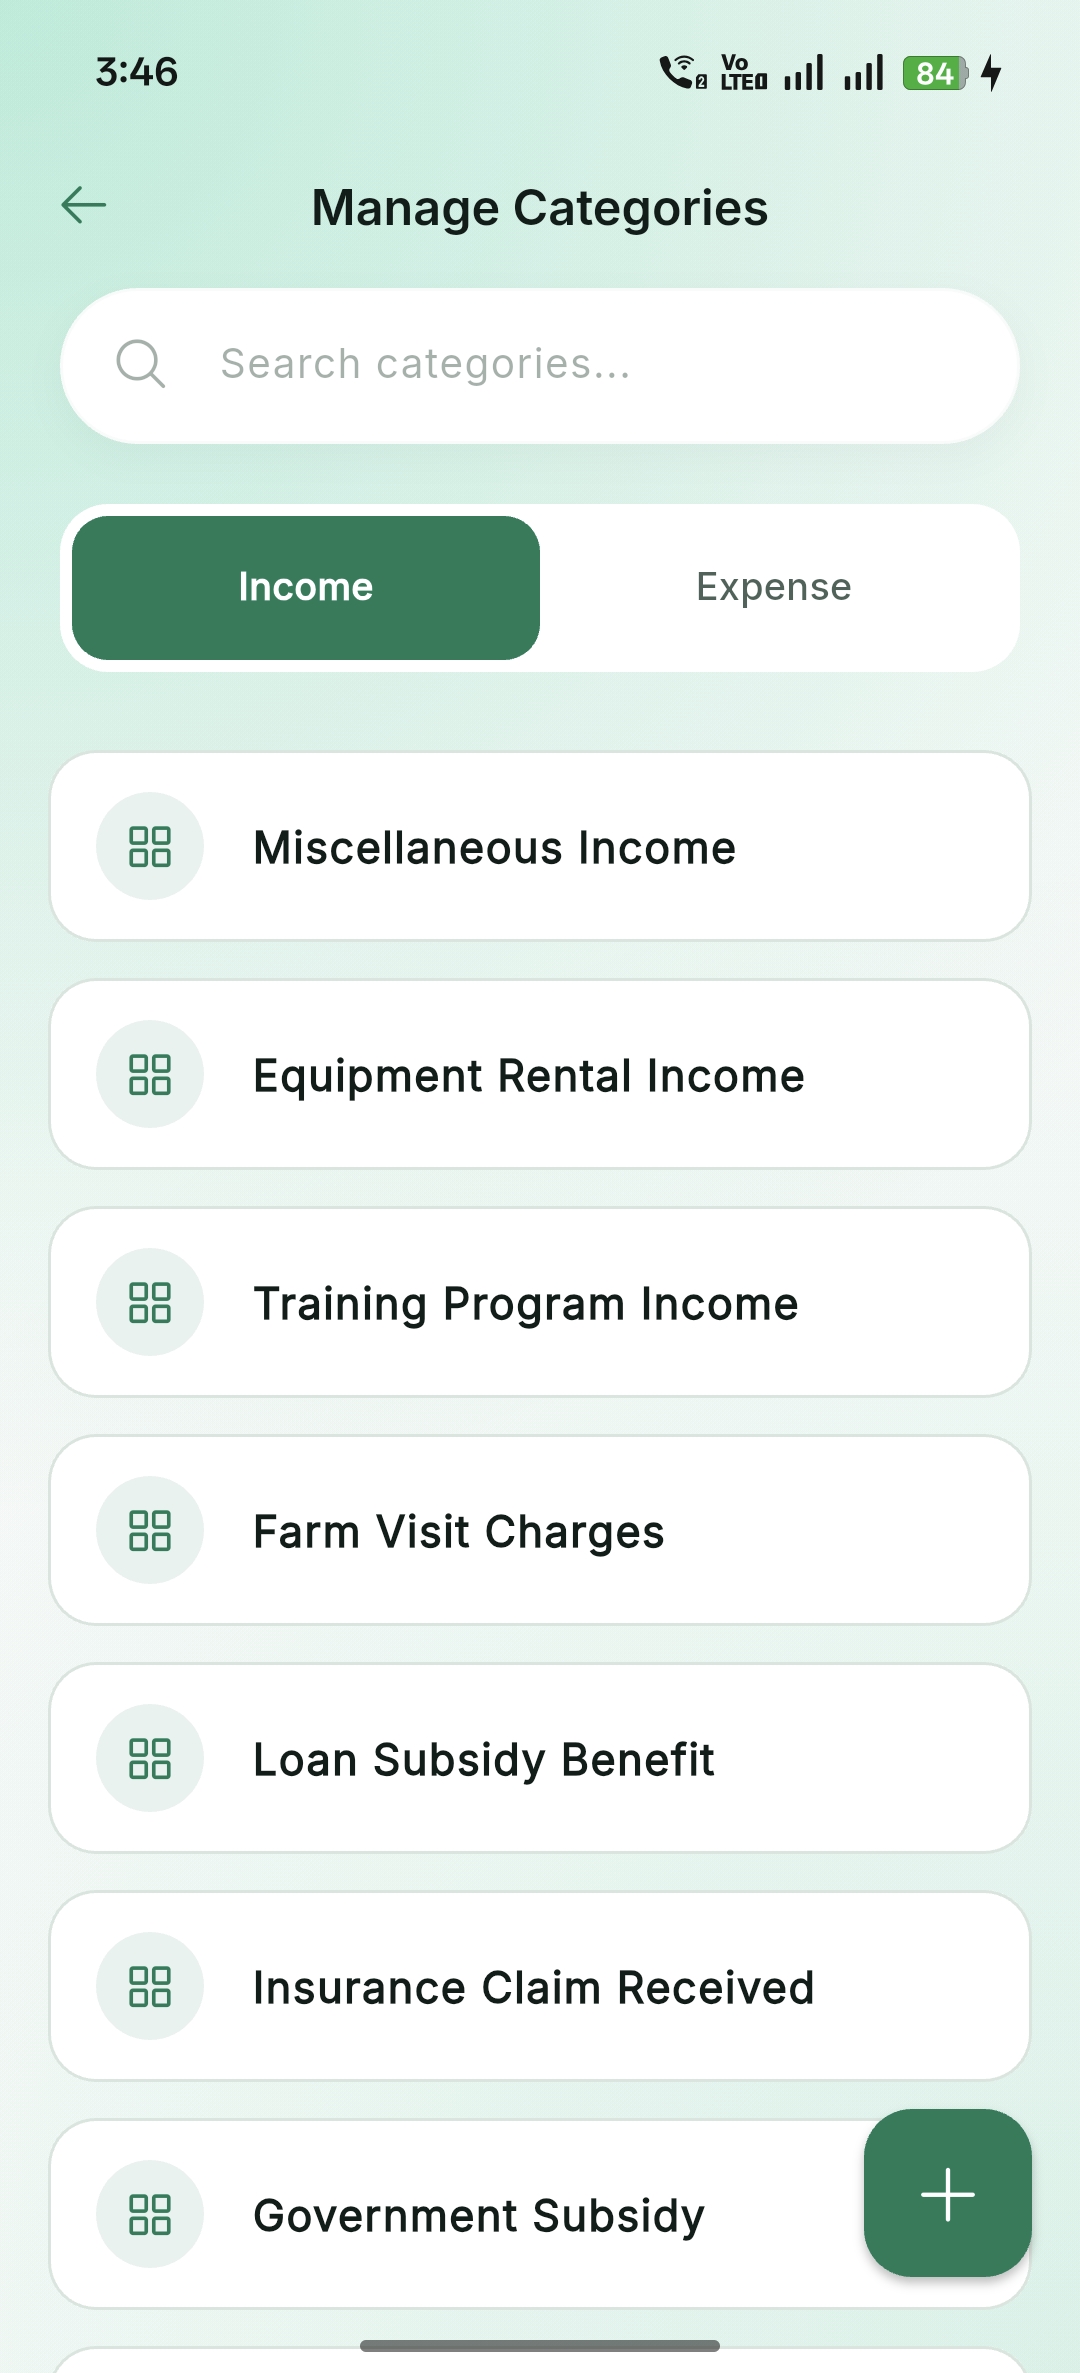
Financial Management
Track Every cent. Manage incomes, expenses, budgets, and generate detailed financial reports.

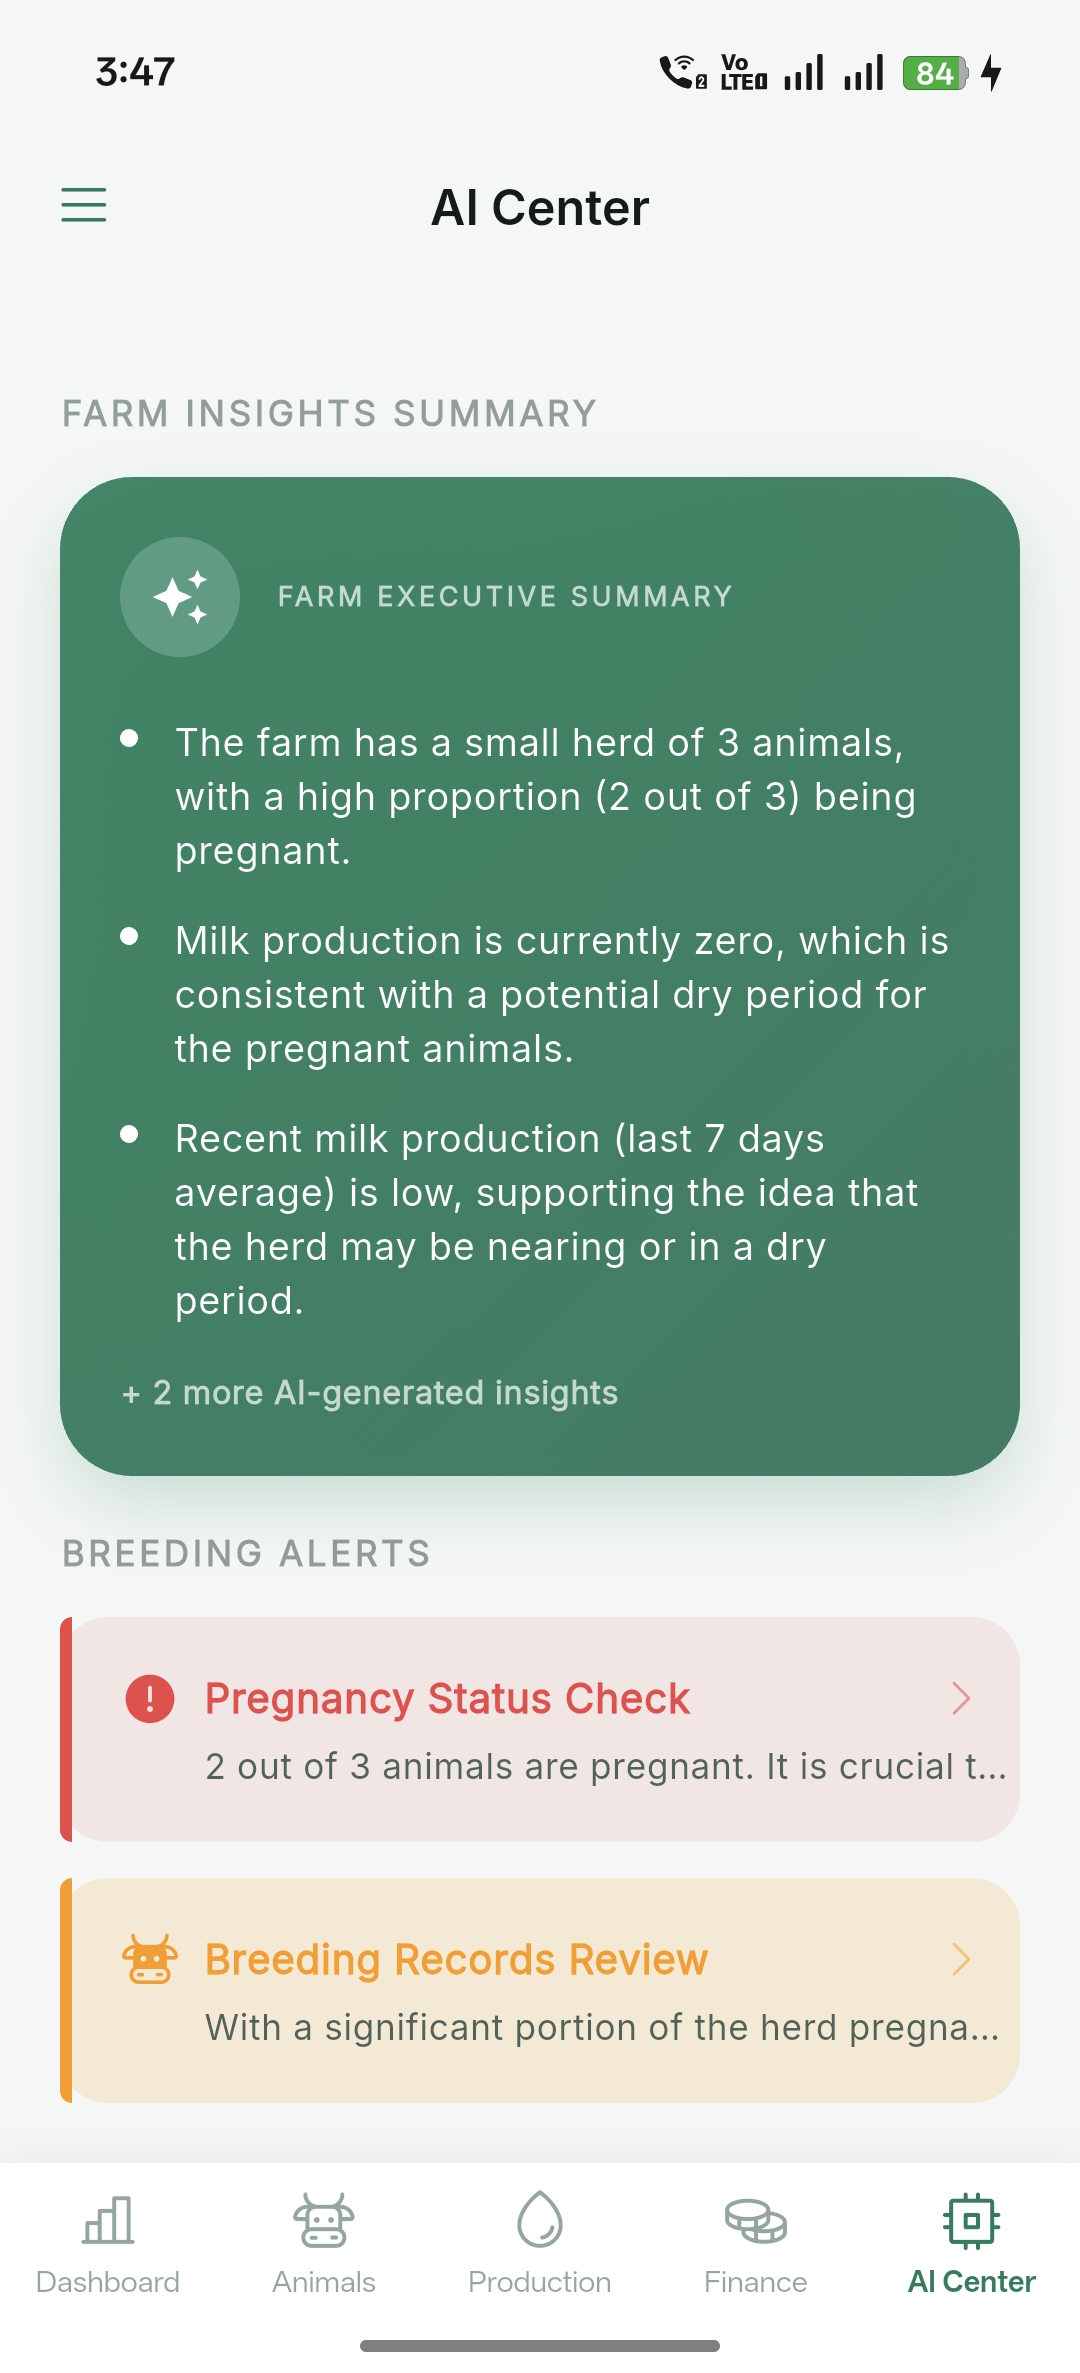
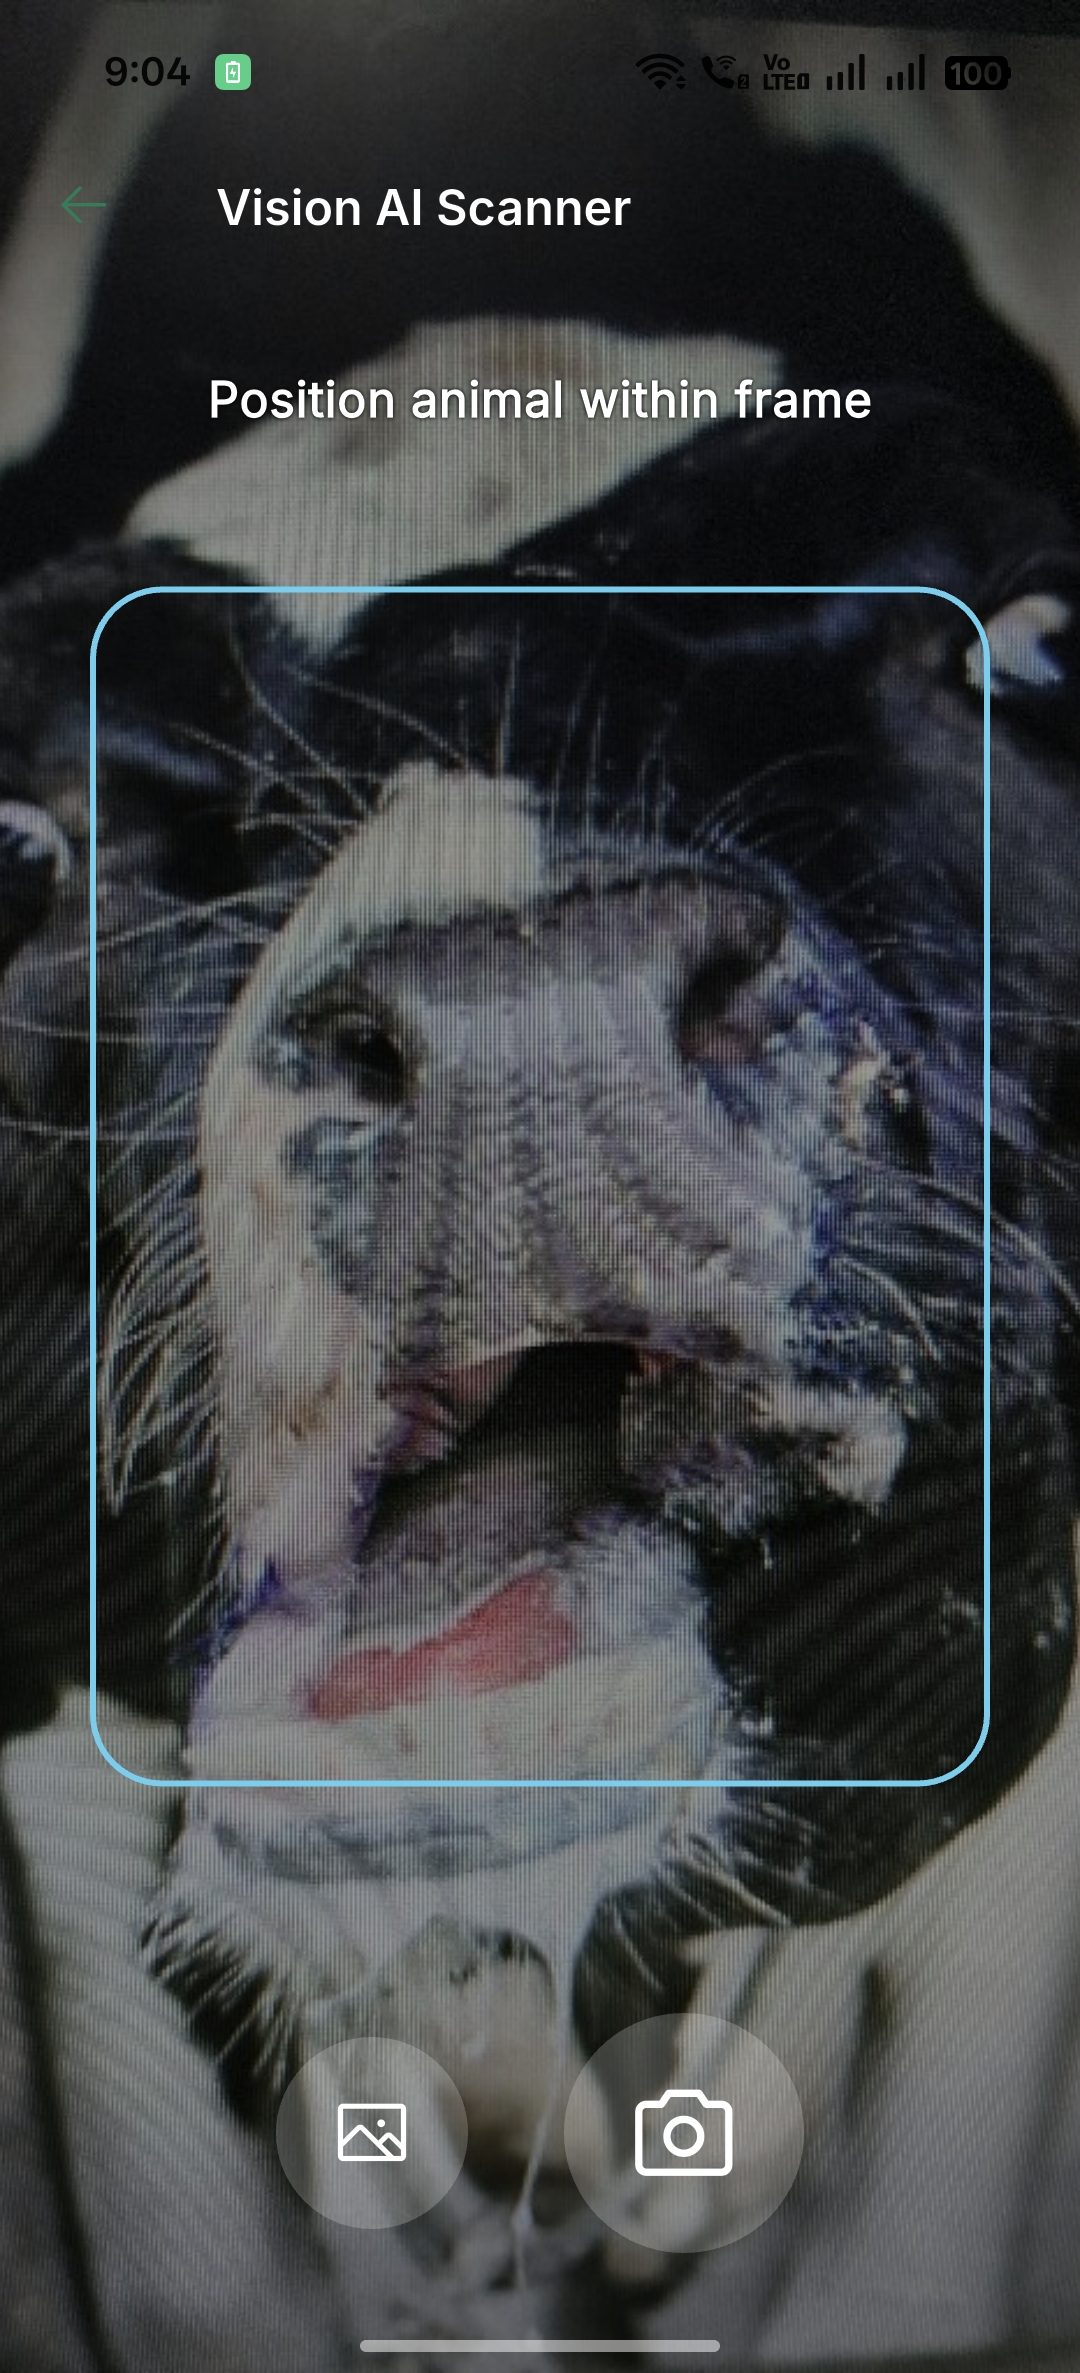
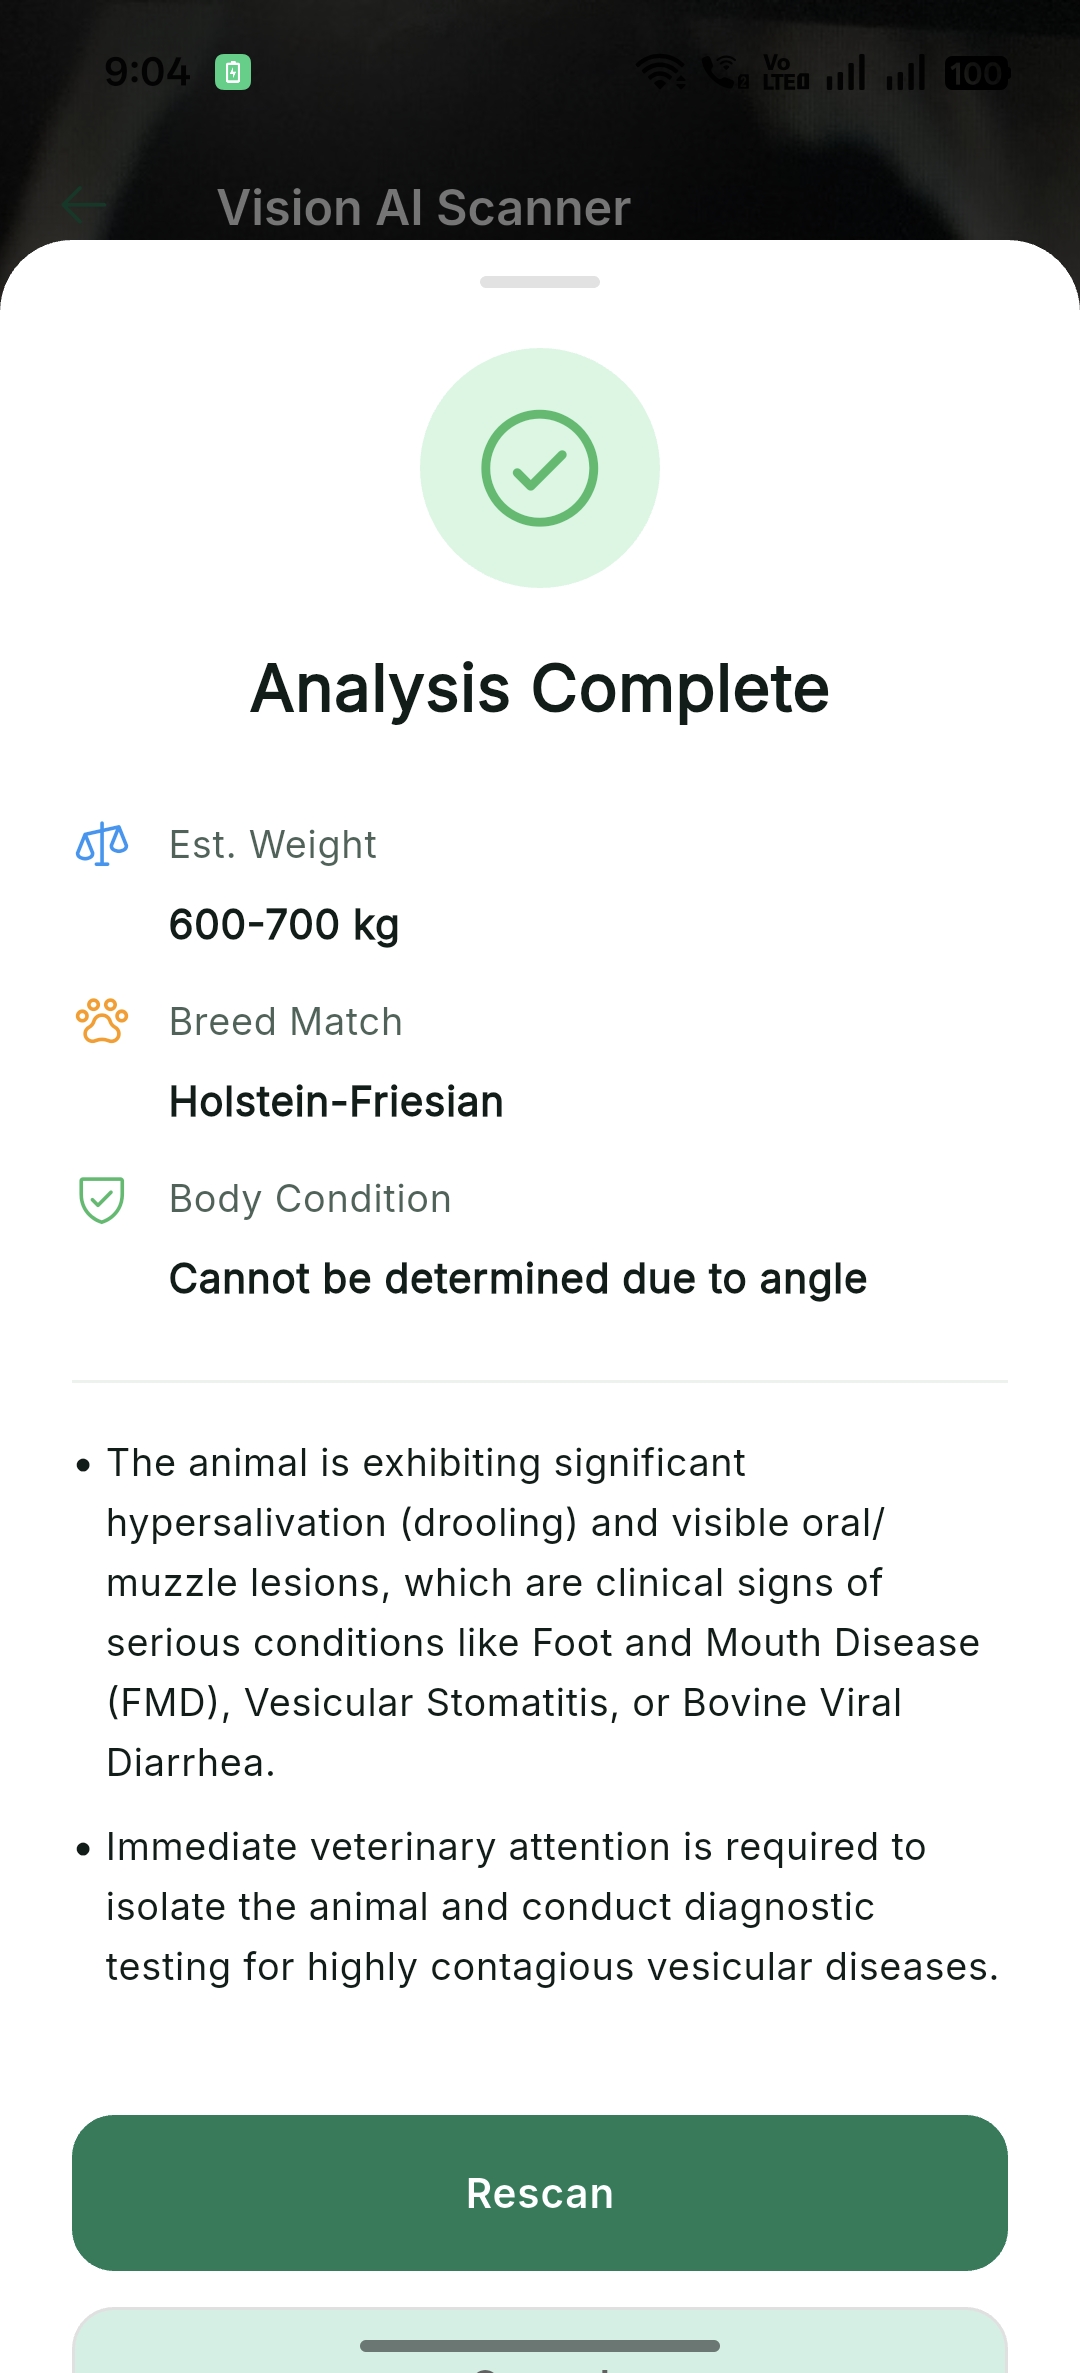
AI Center (Gemini Powered)
Leveraging Google Gemini AI for advanced vision analysis and livestock health assessments from photos.
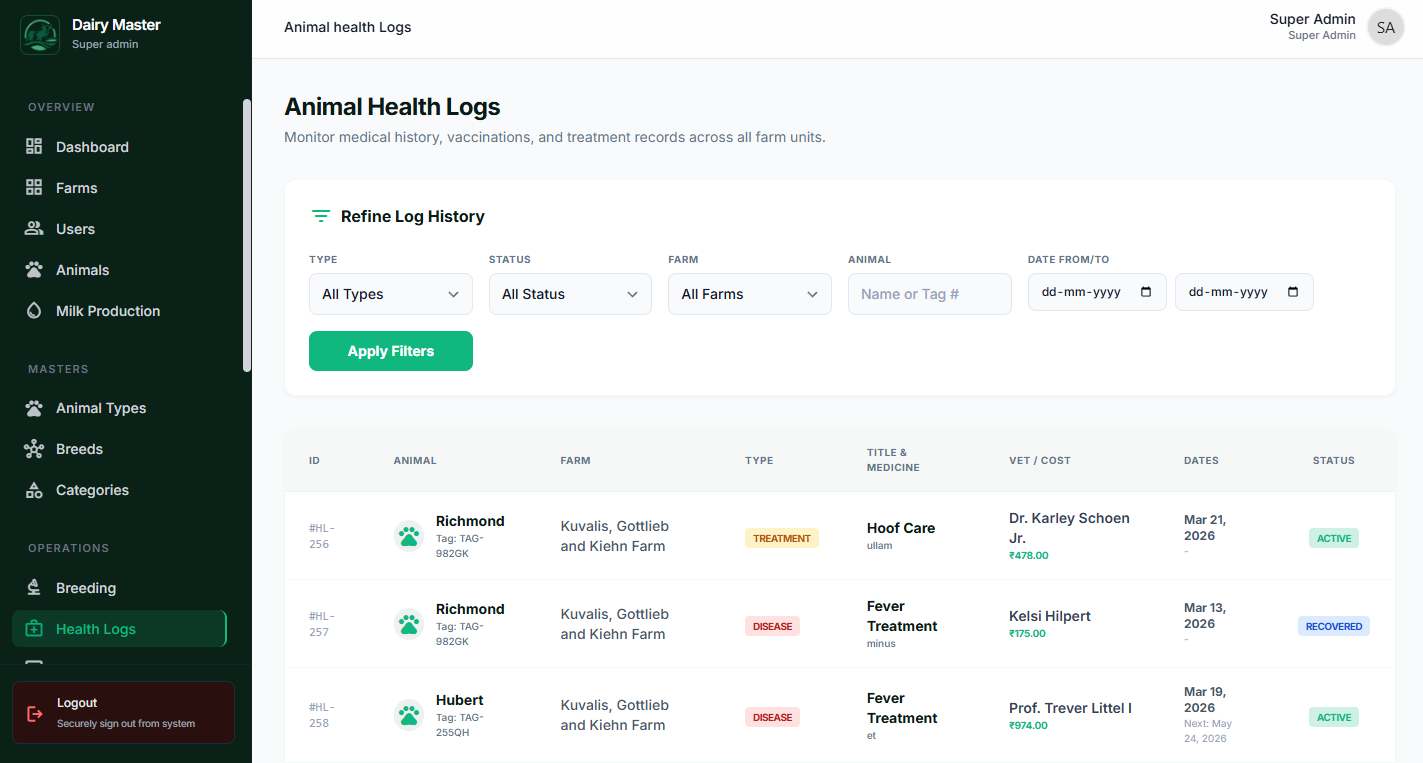
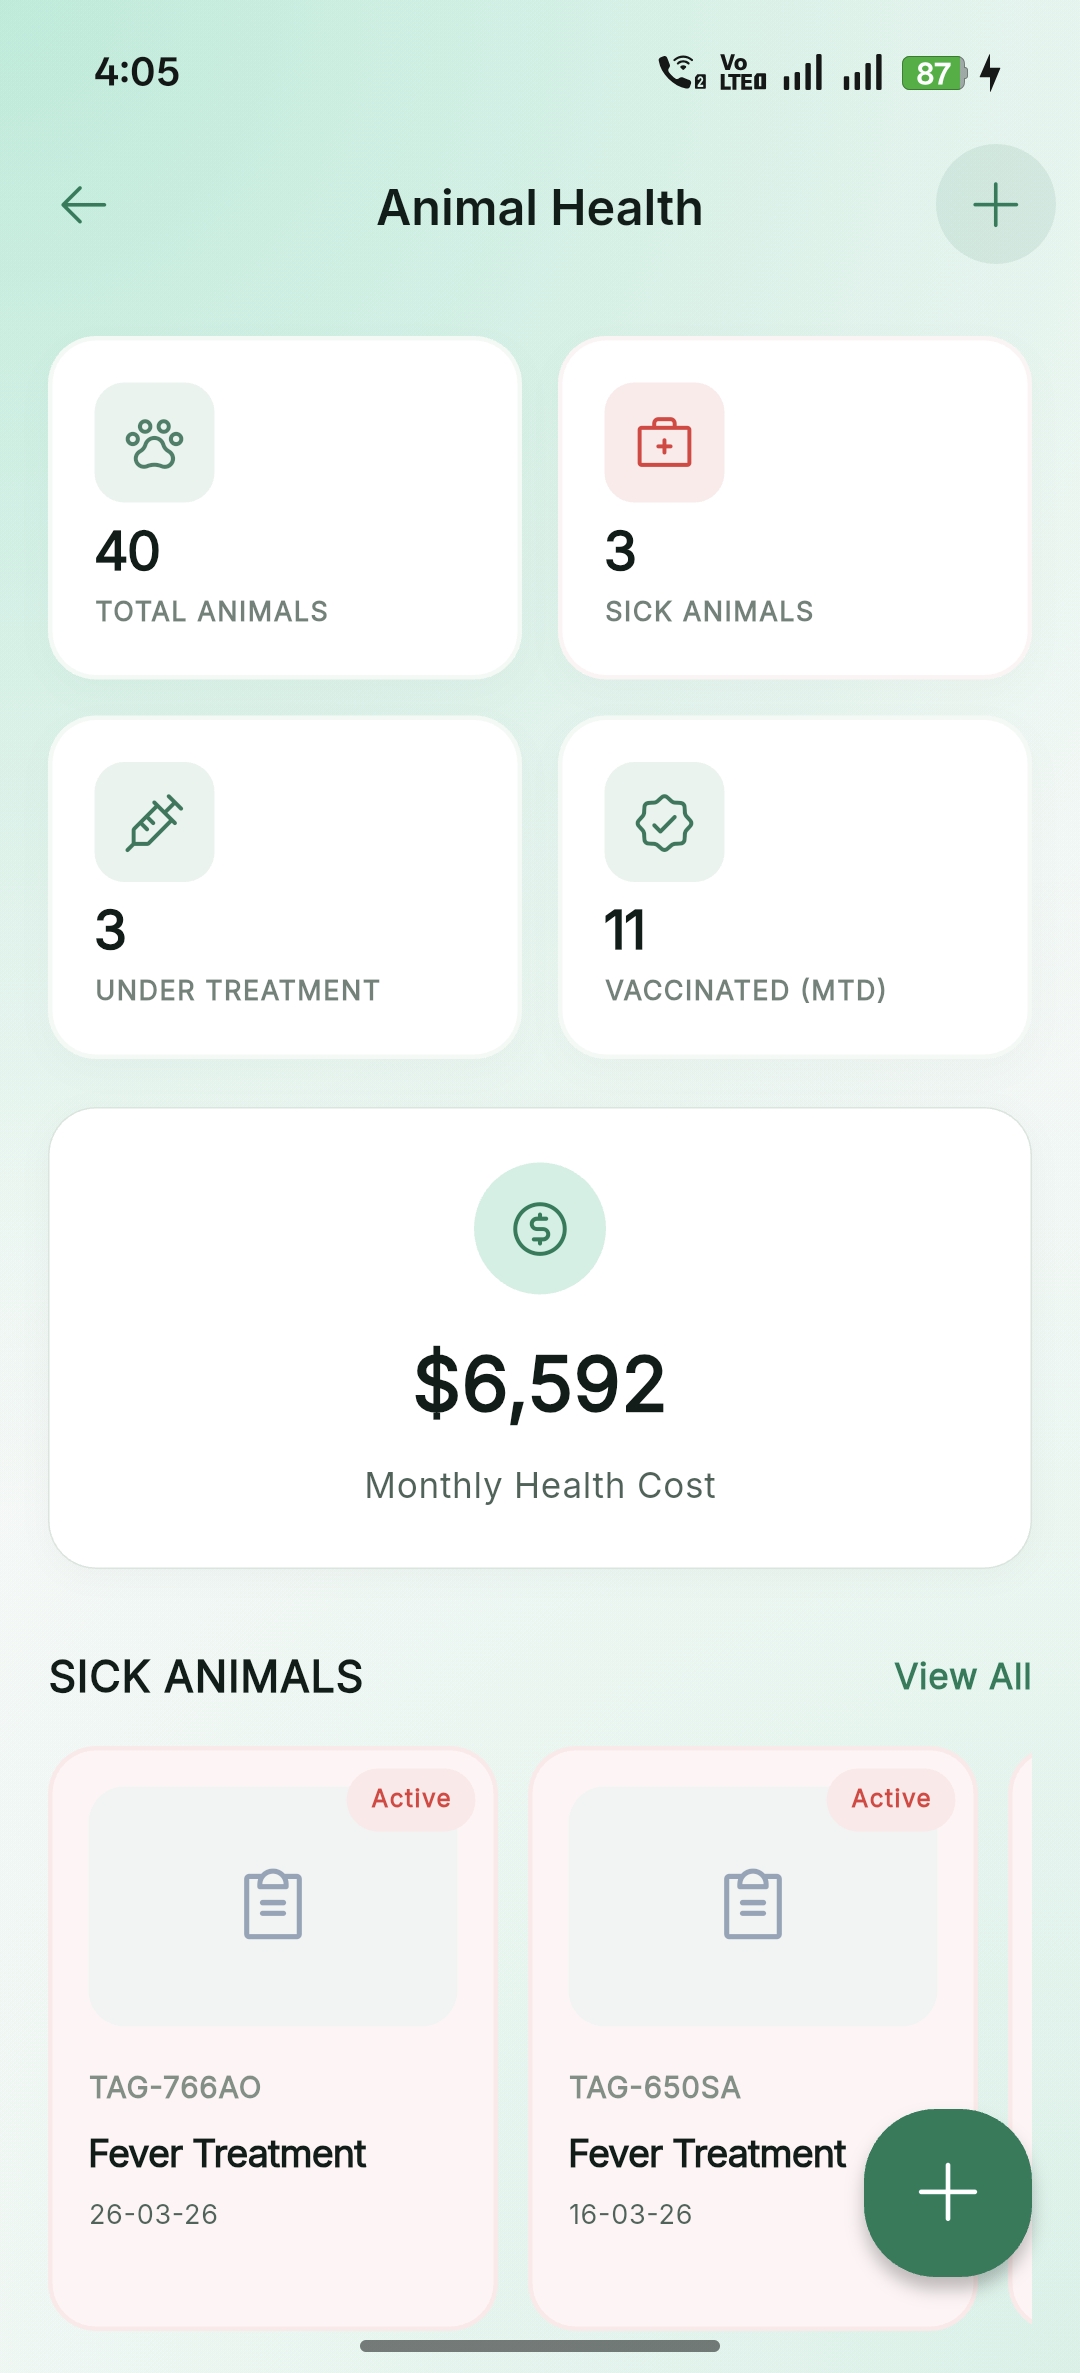
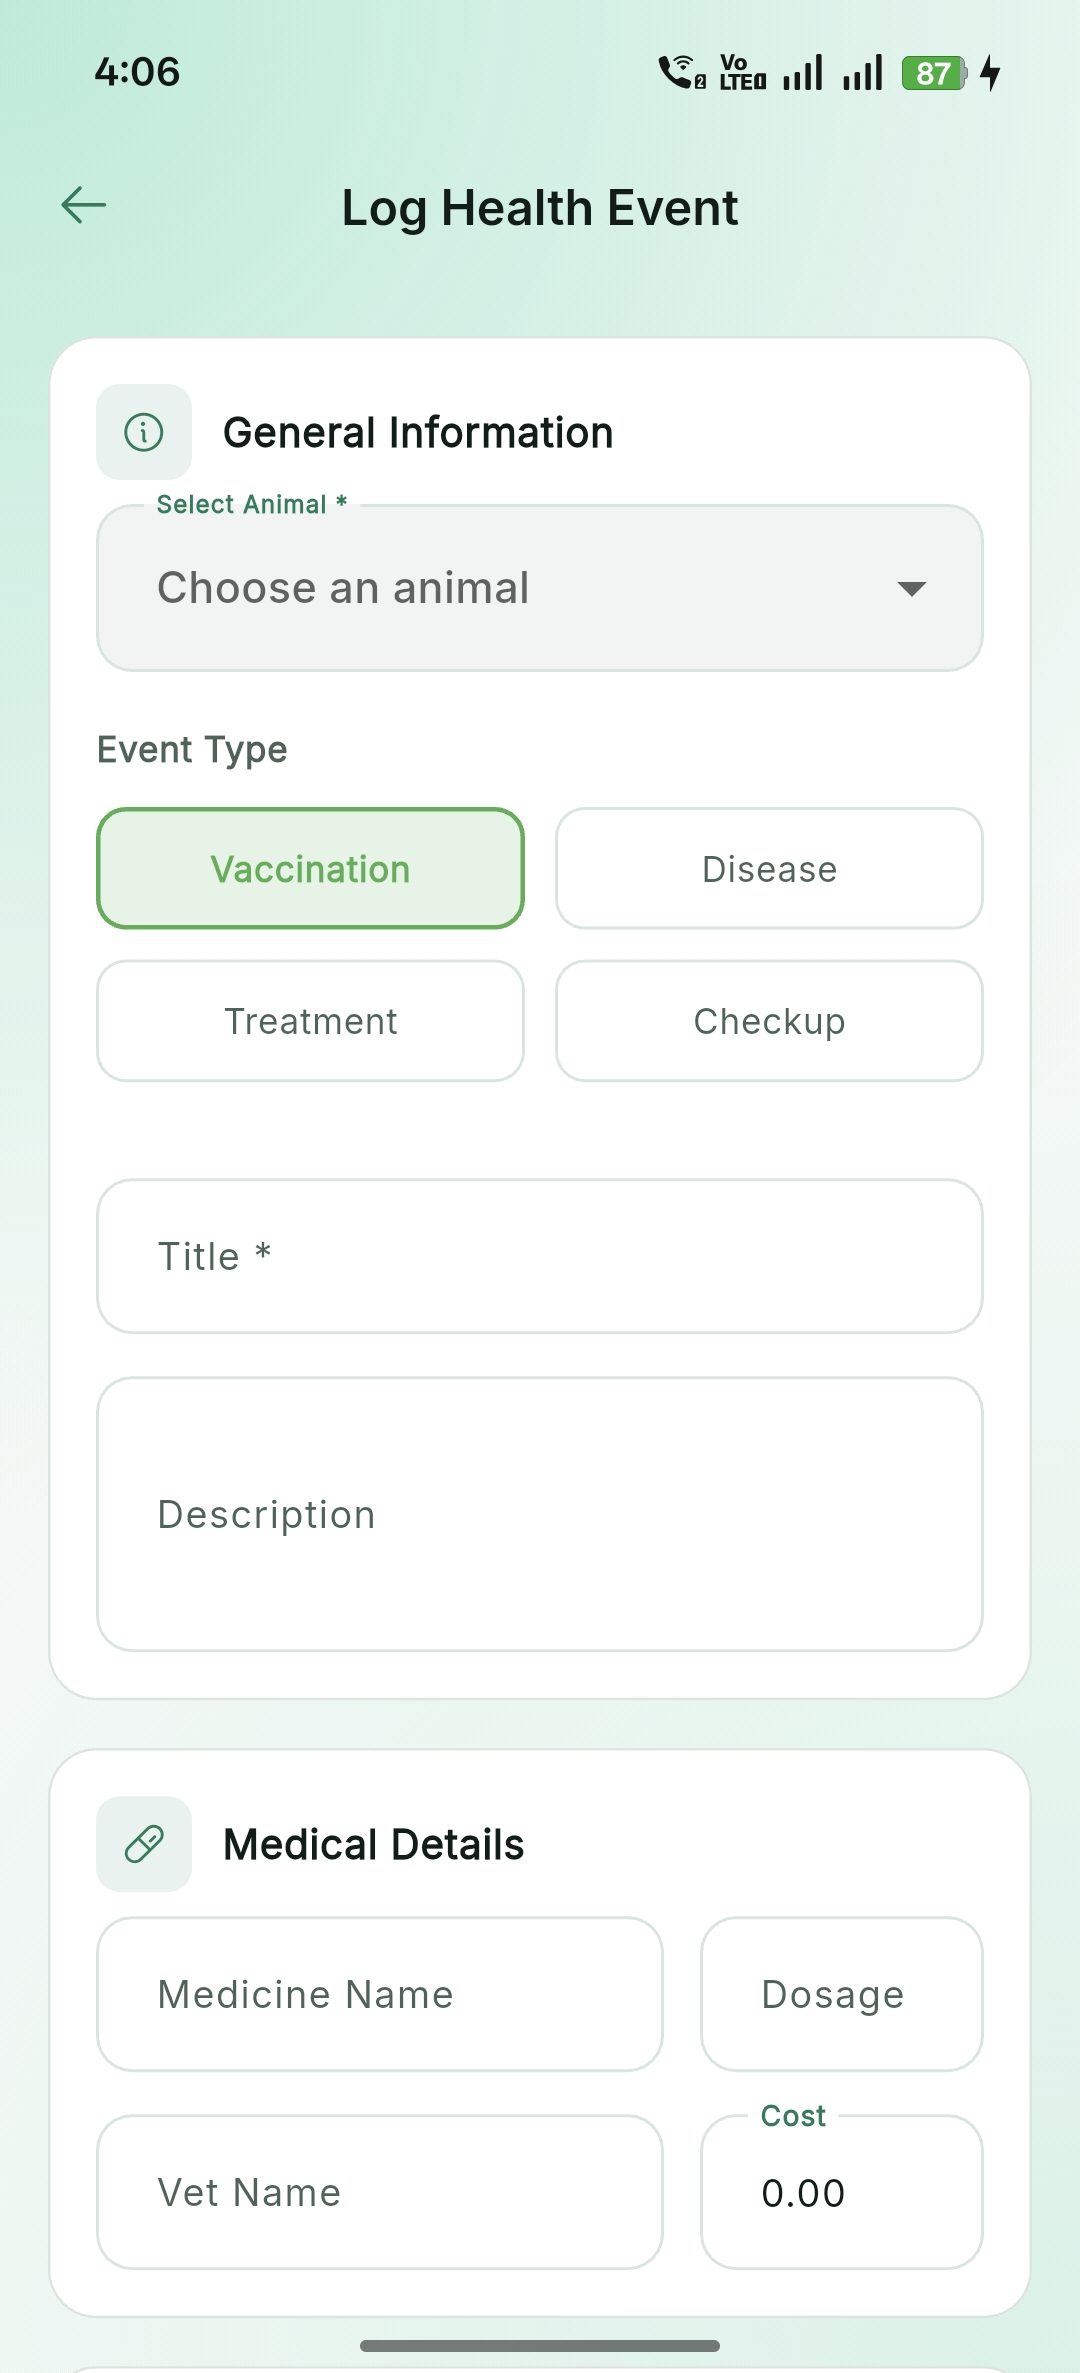
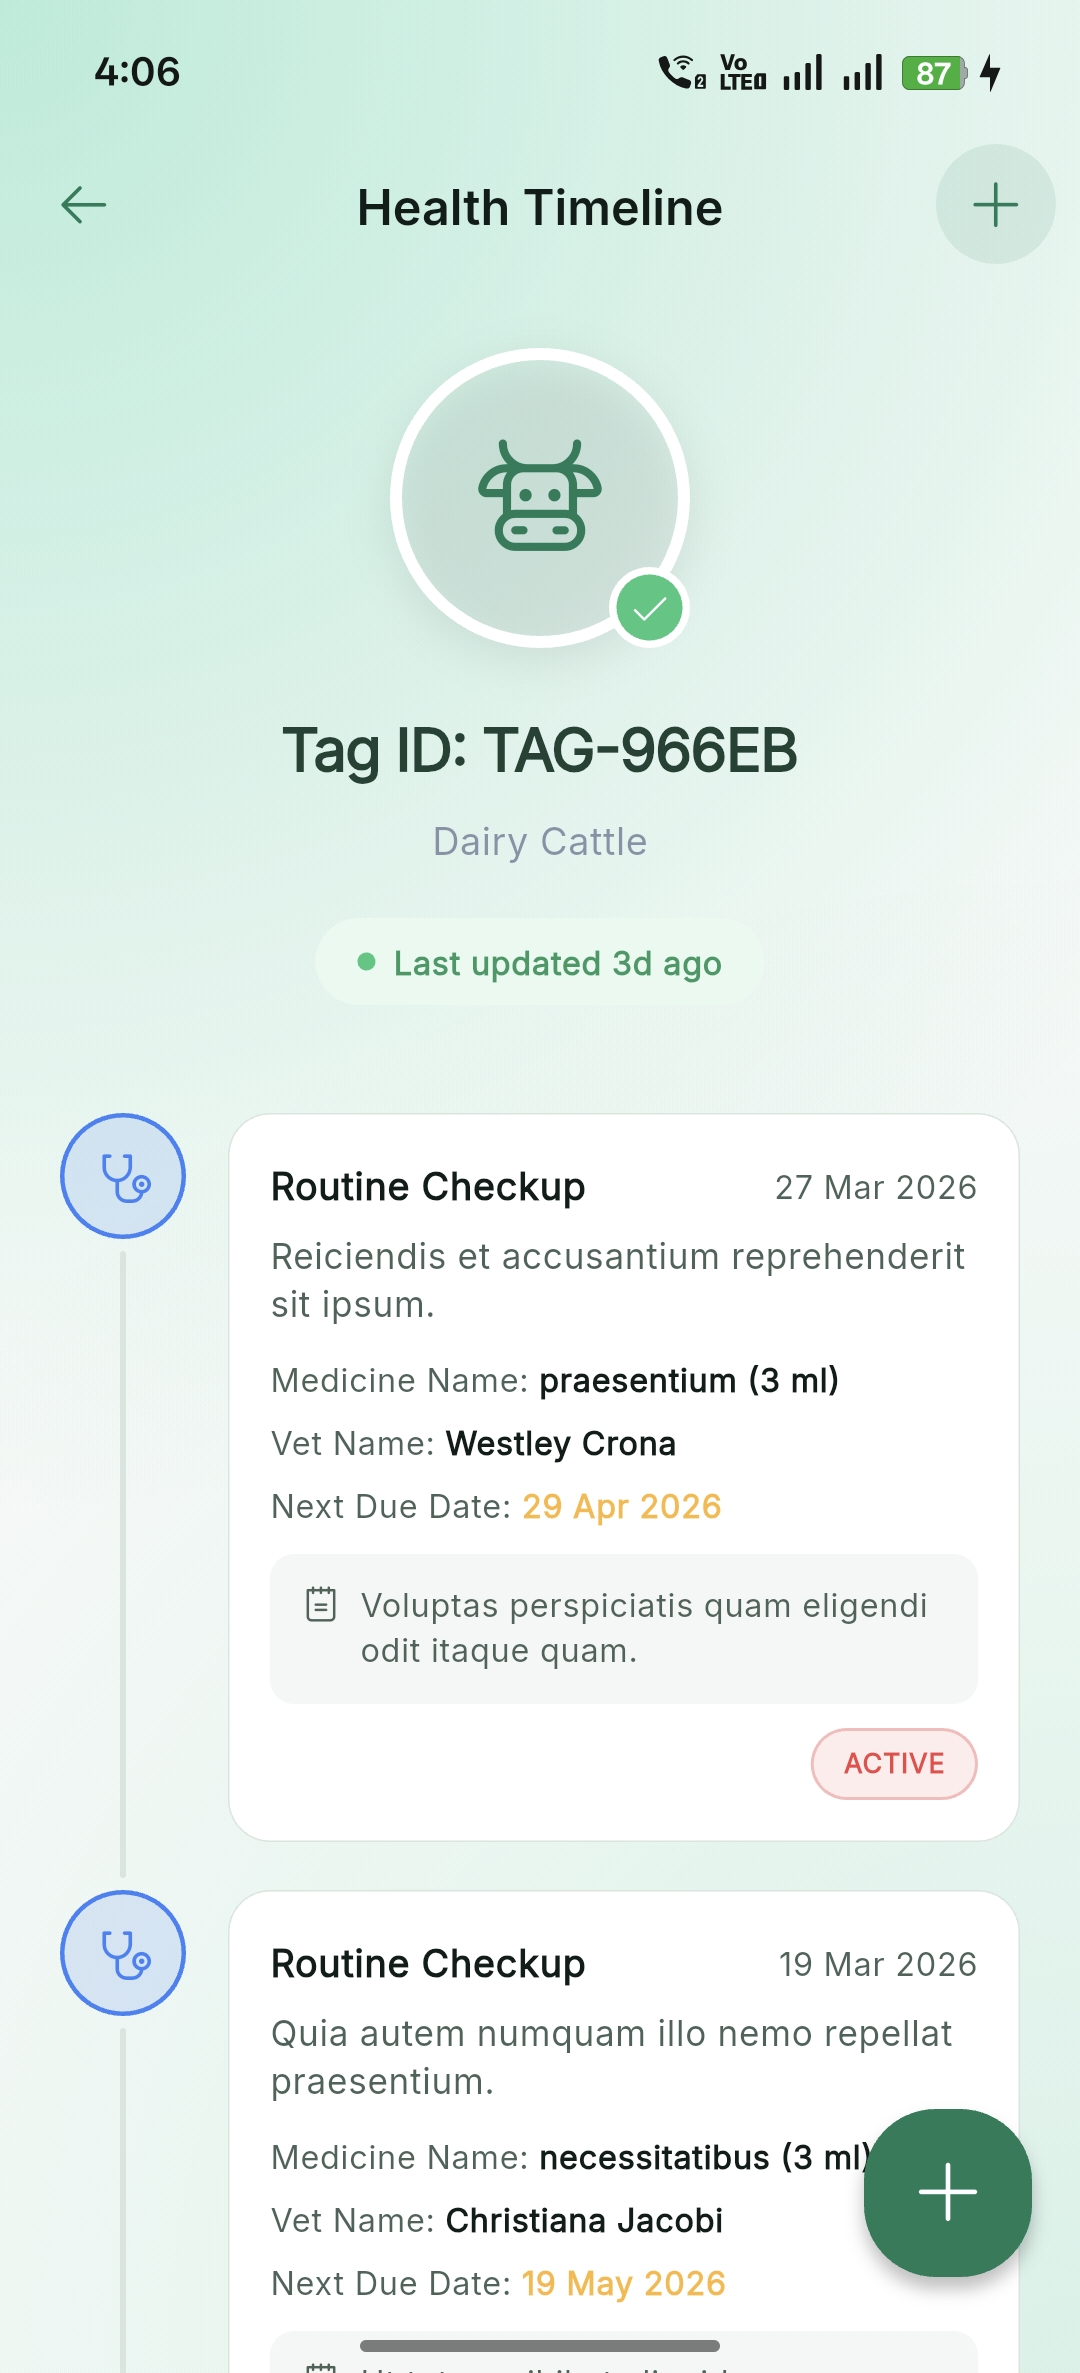
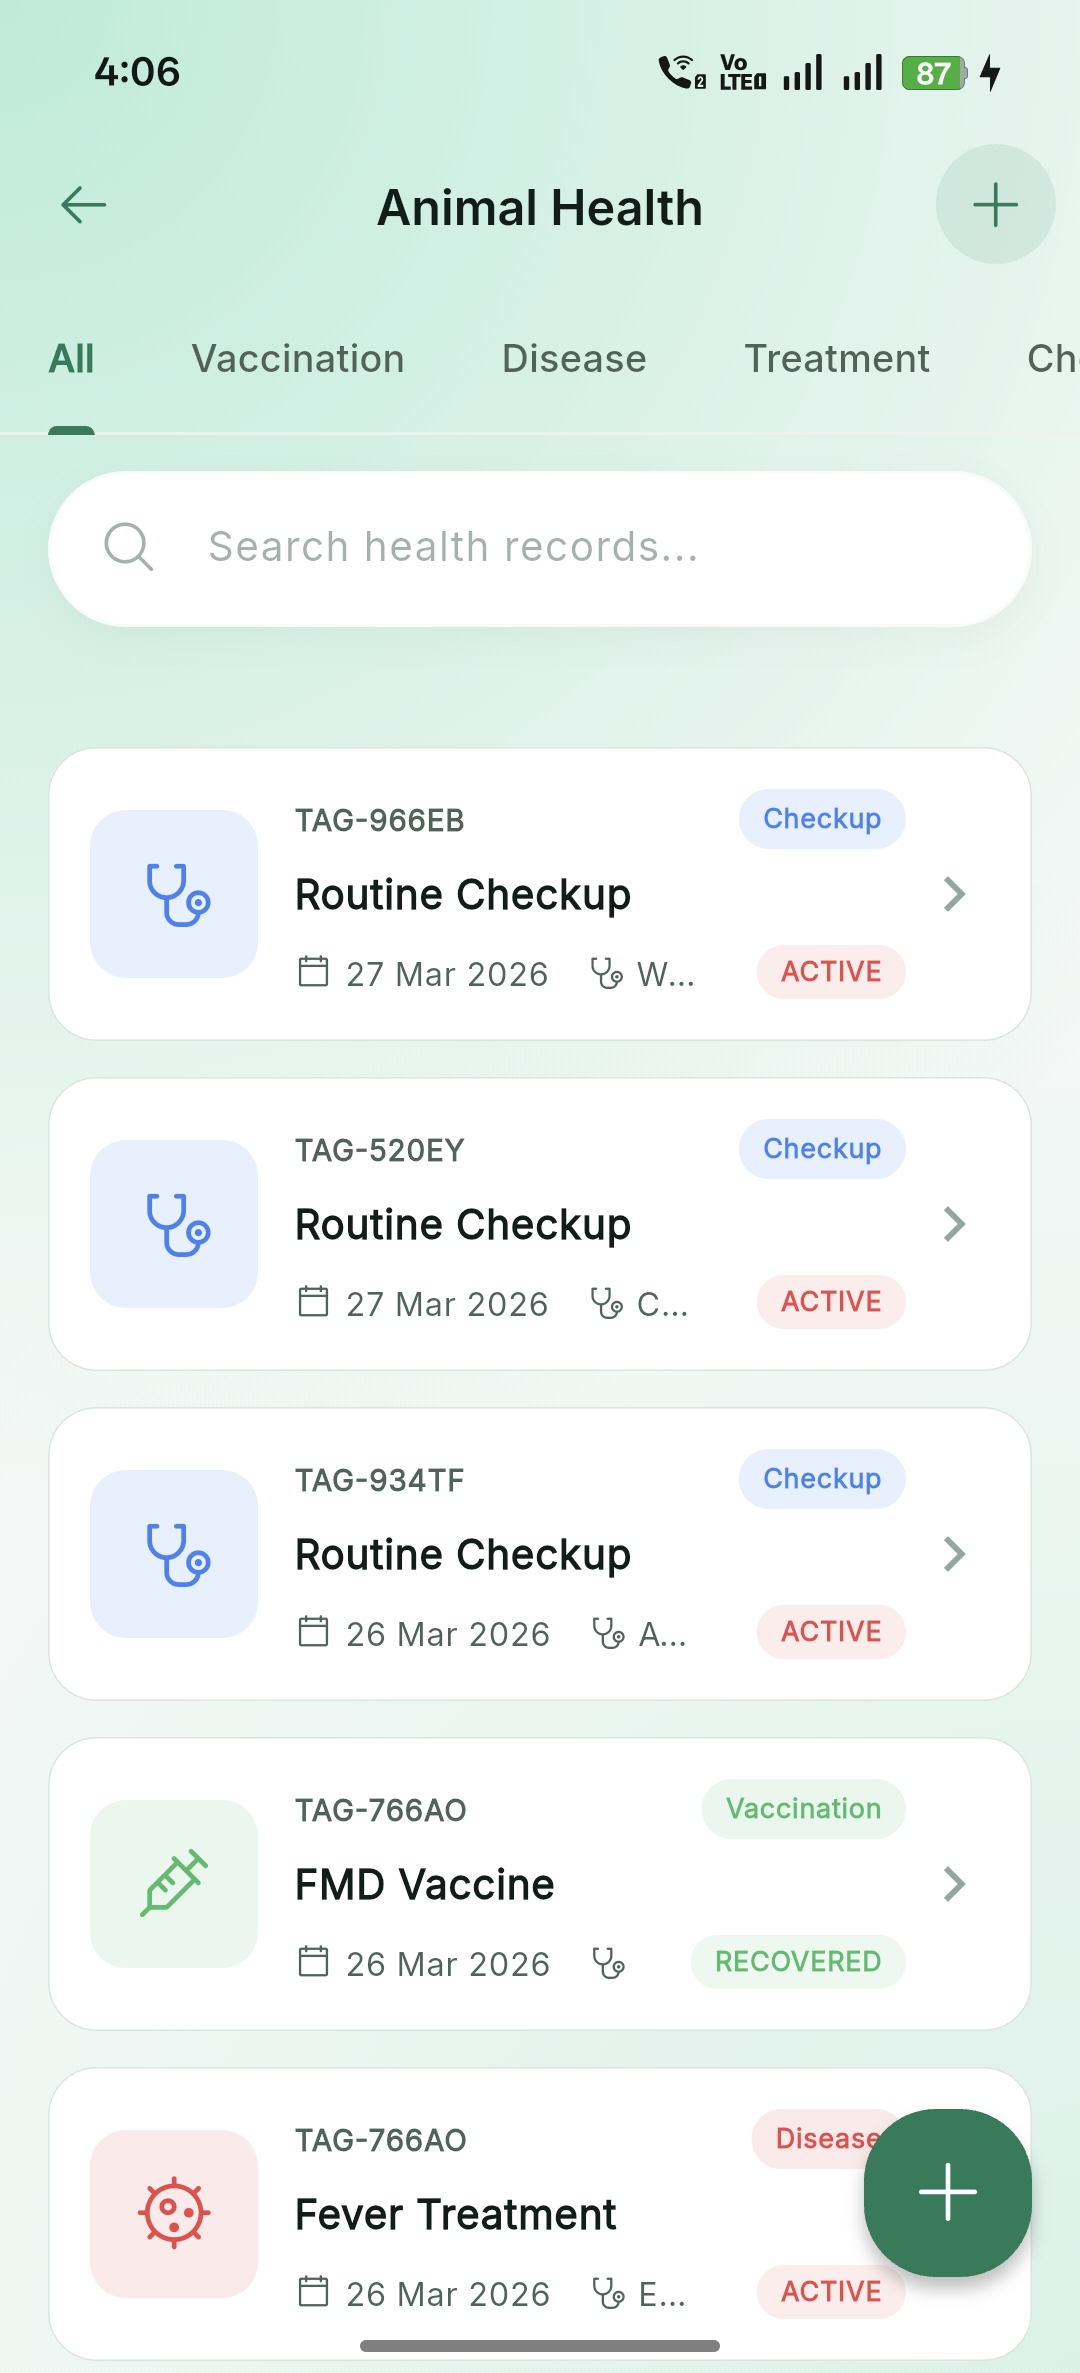
Health & Veterinary
Monitor animal health, schedule vaccinations, and maintain a historical timeline of medical events.
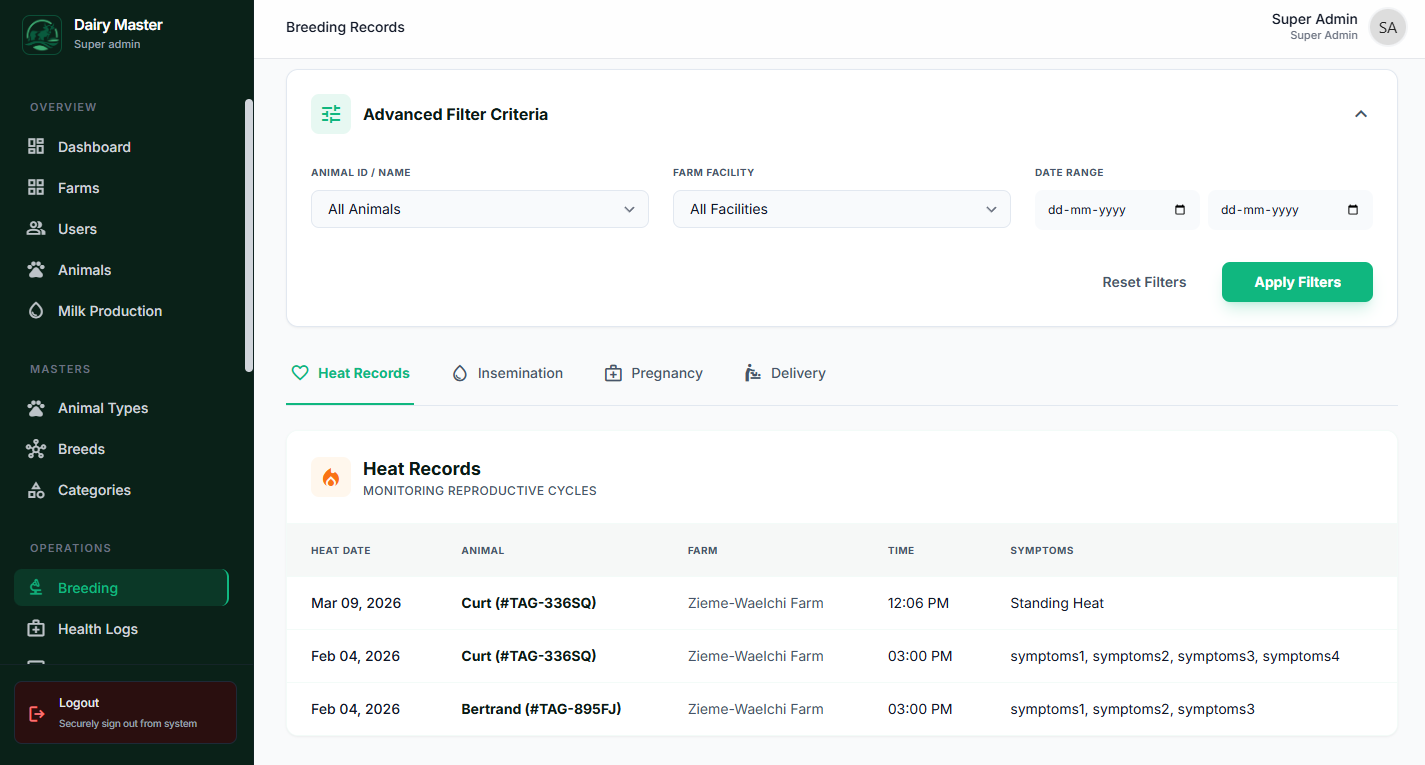
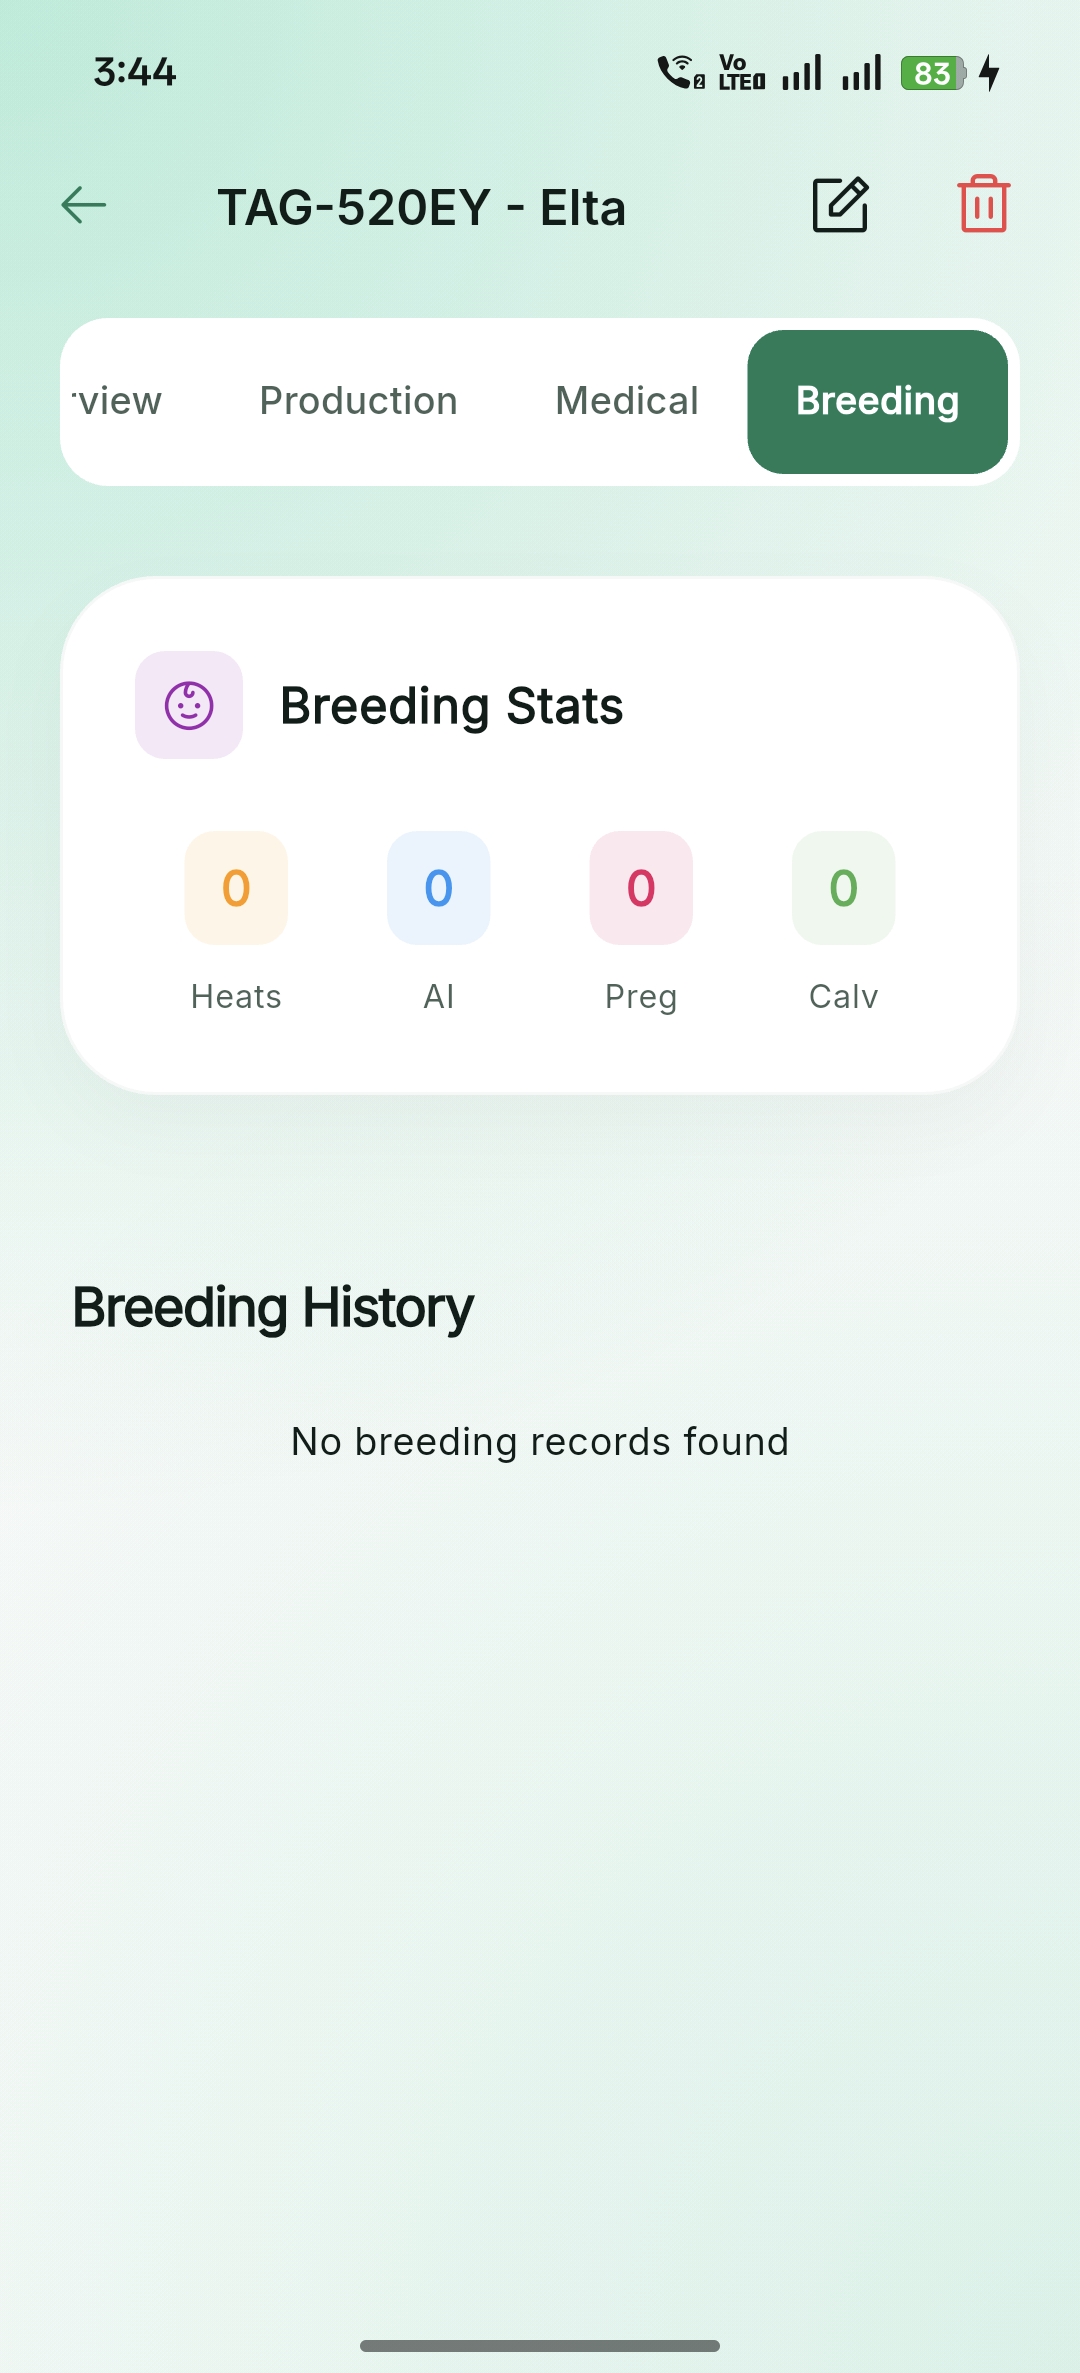
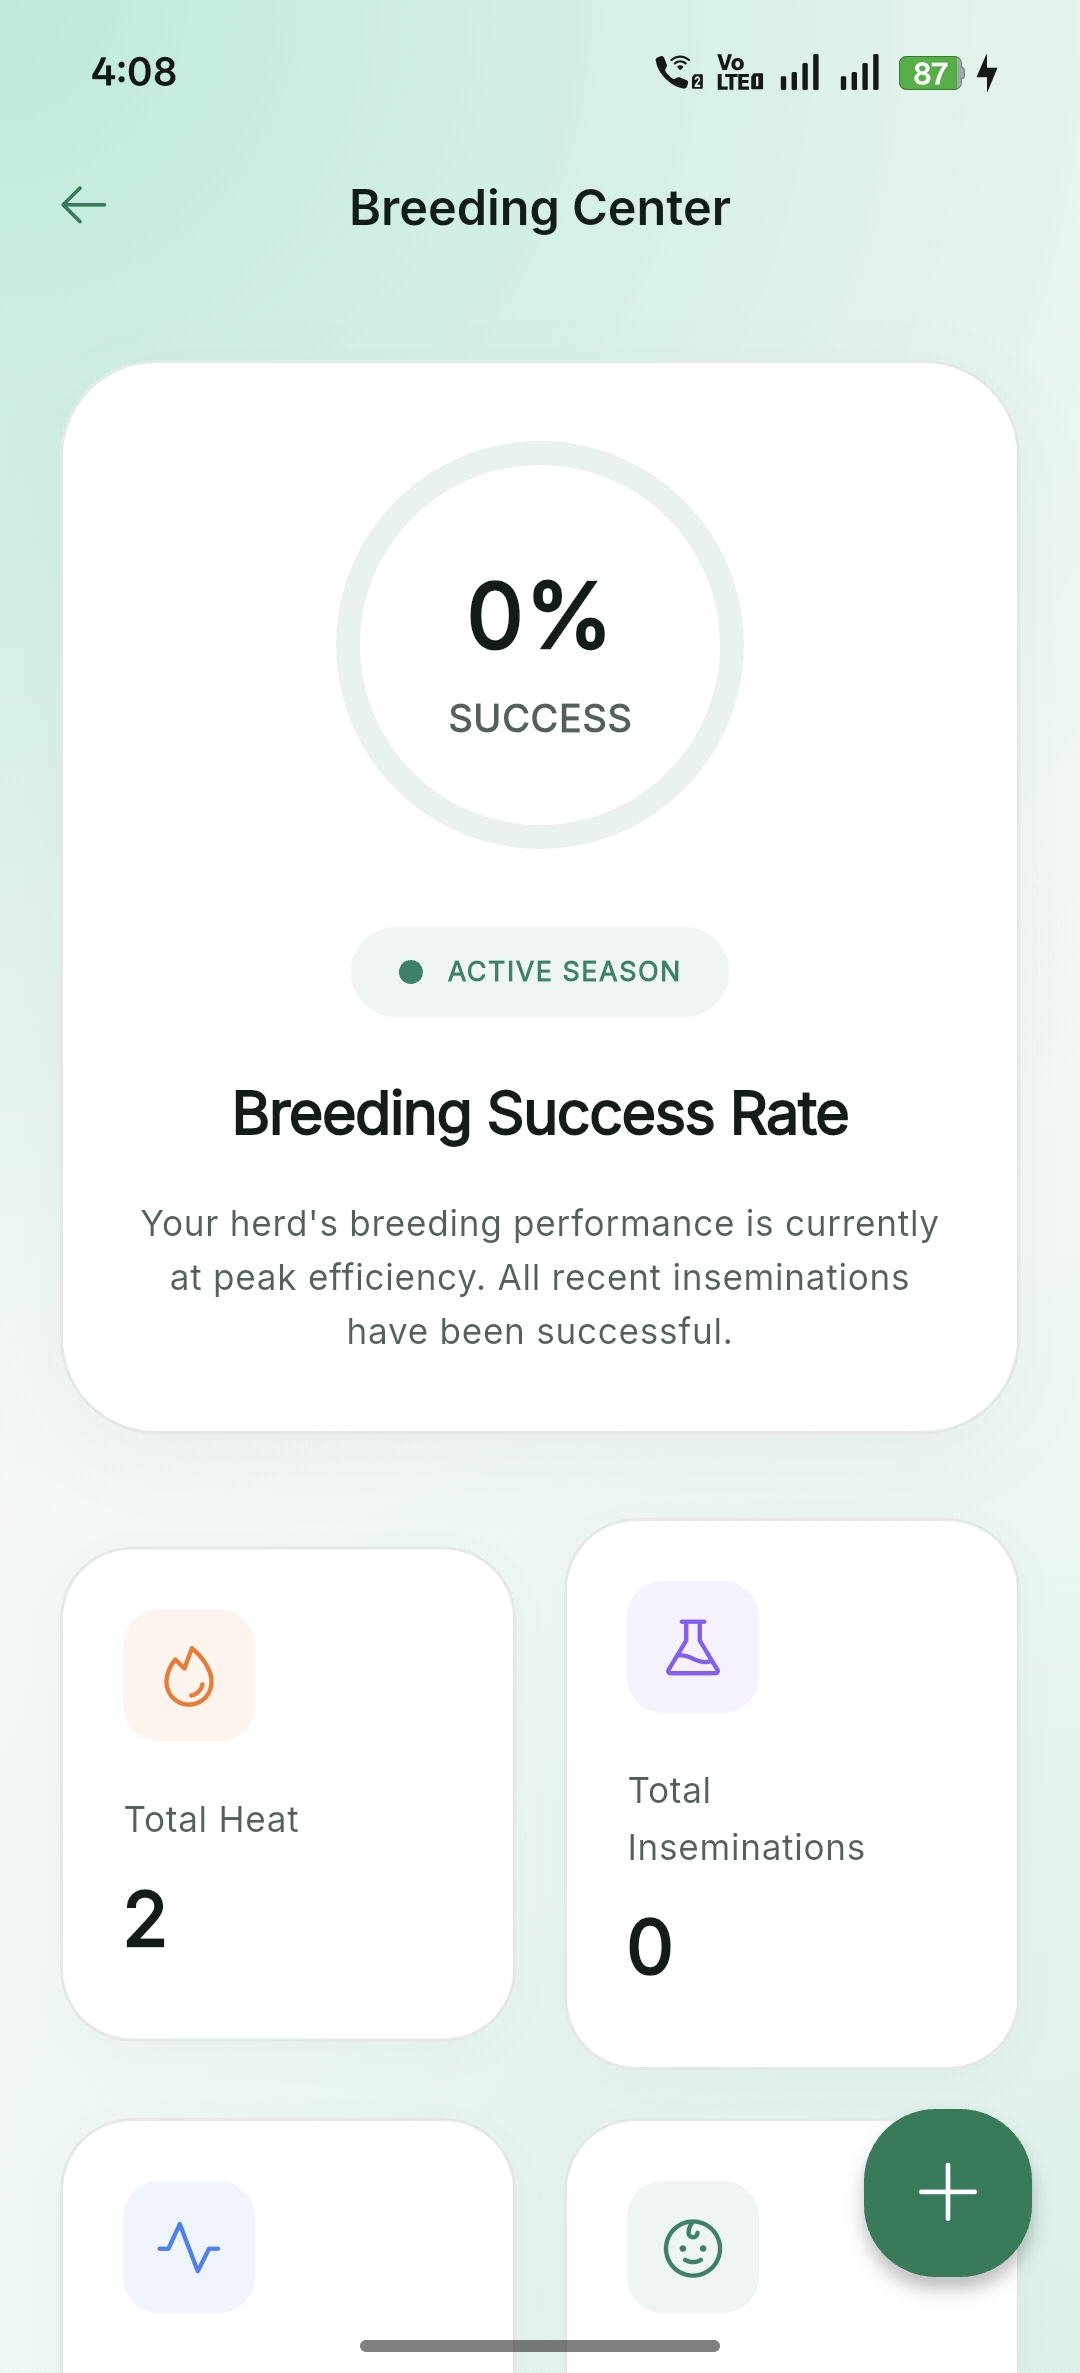
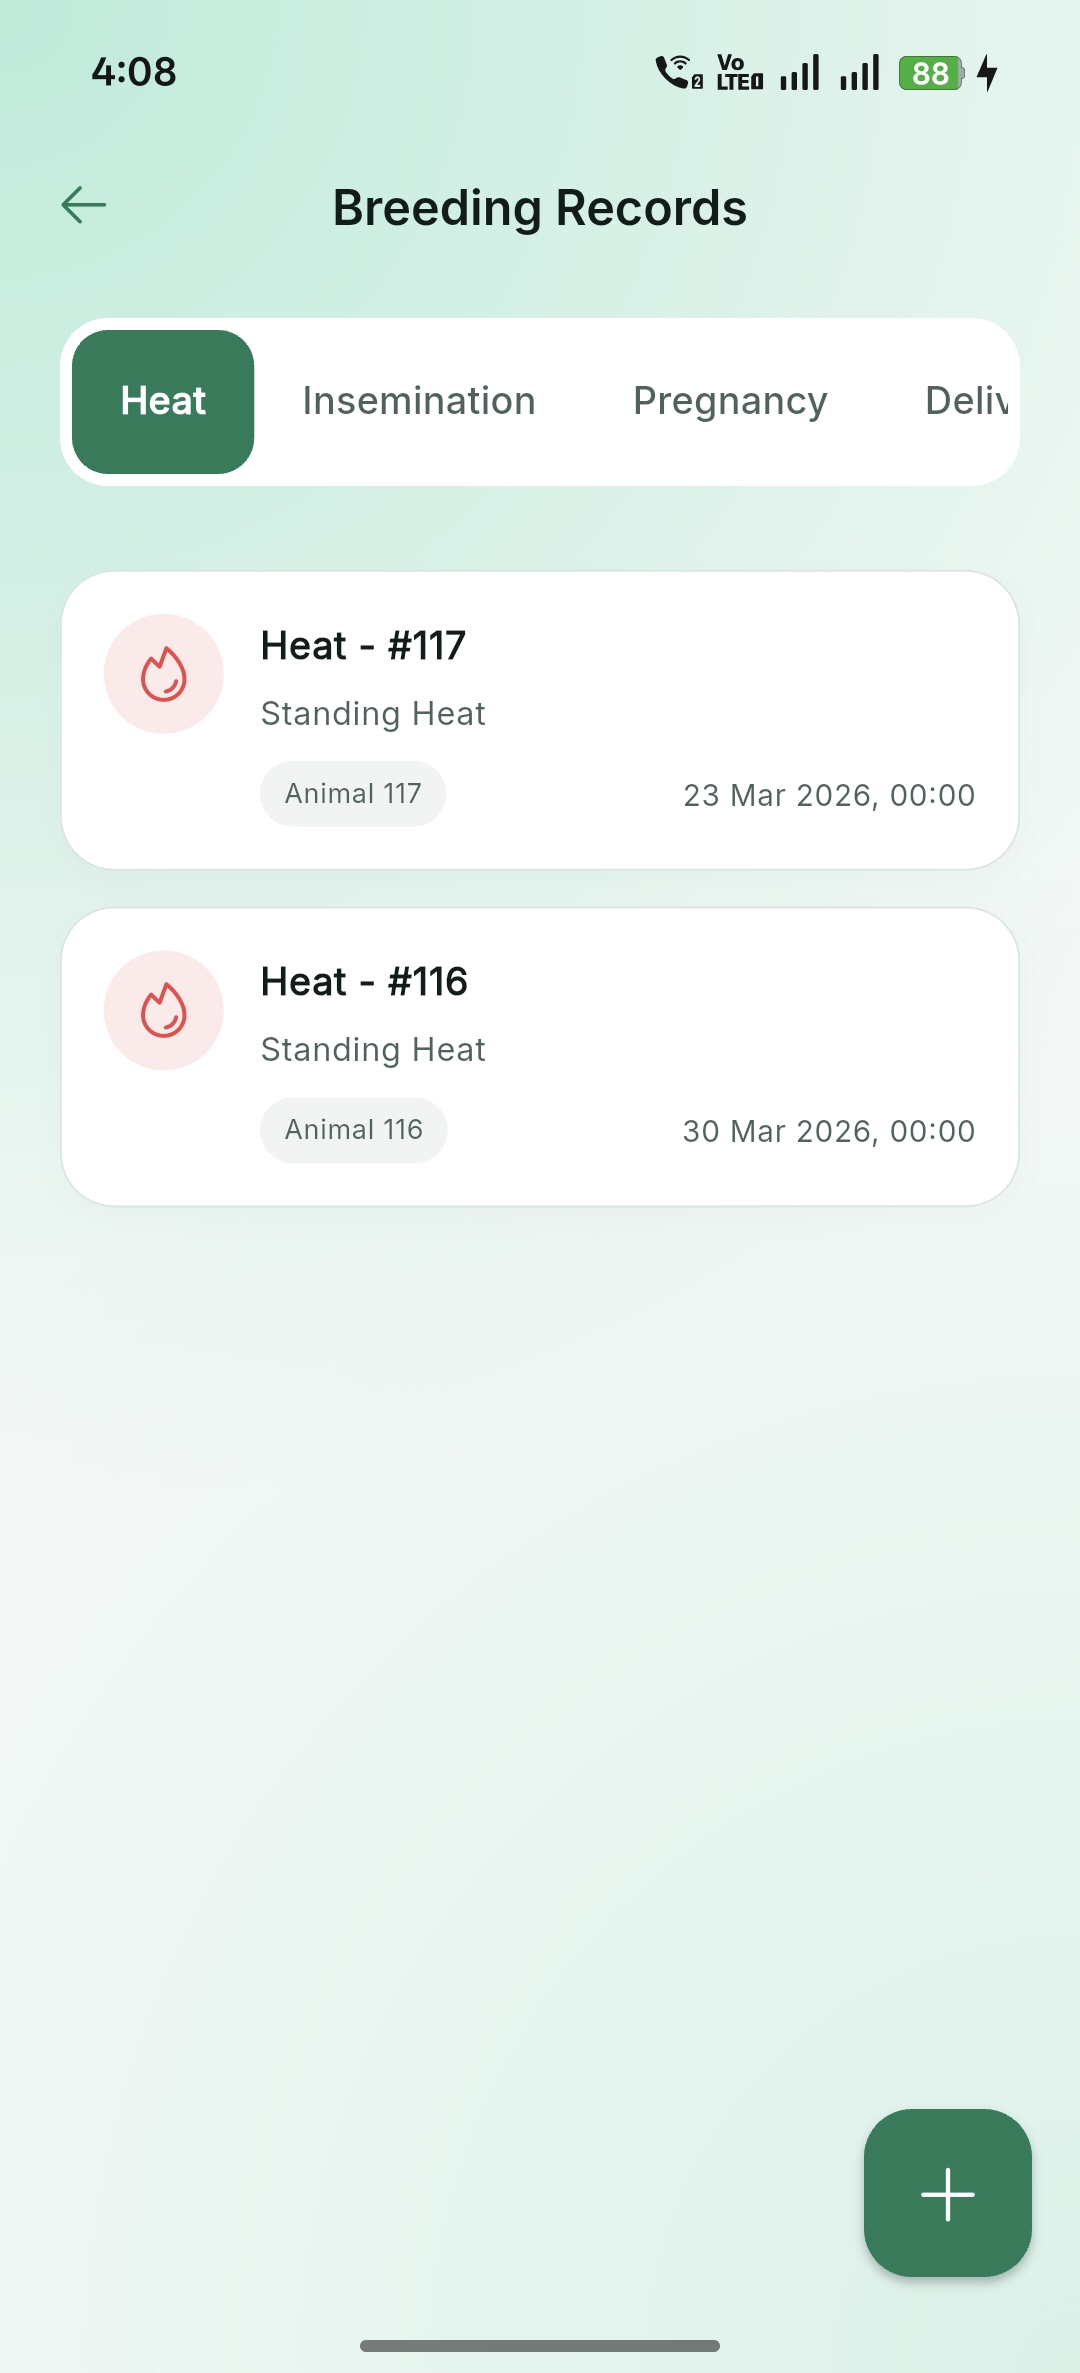
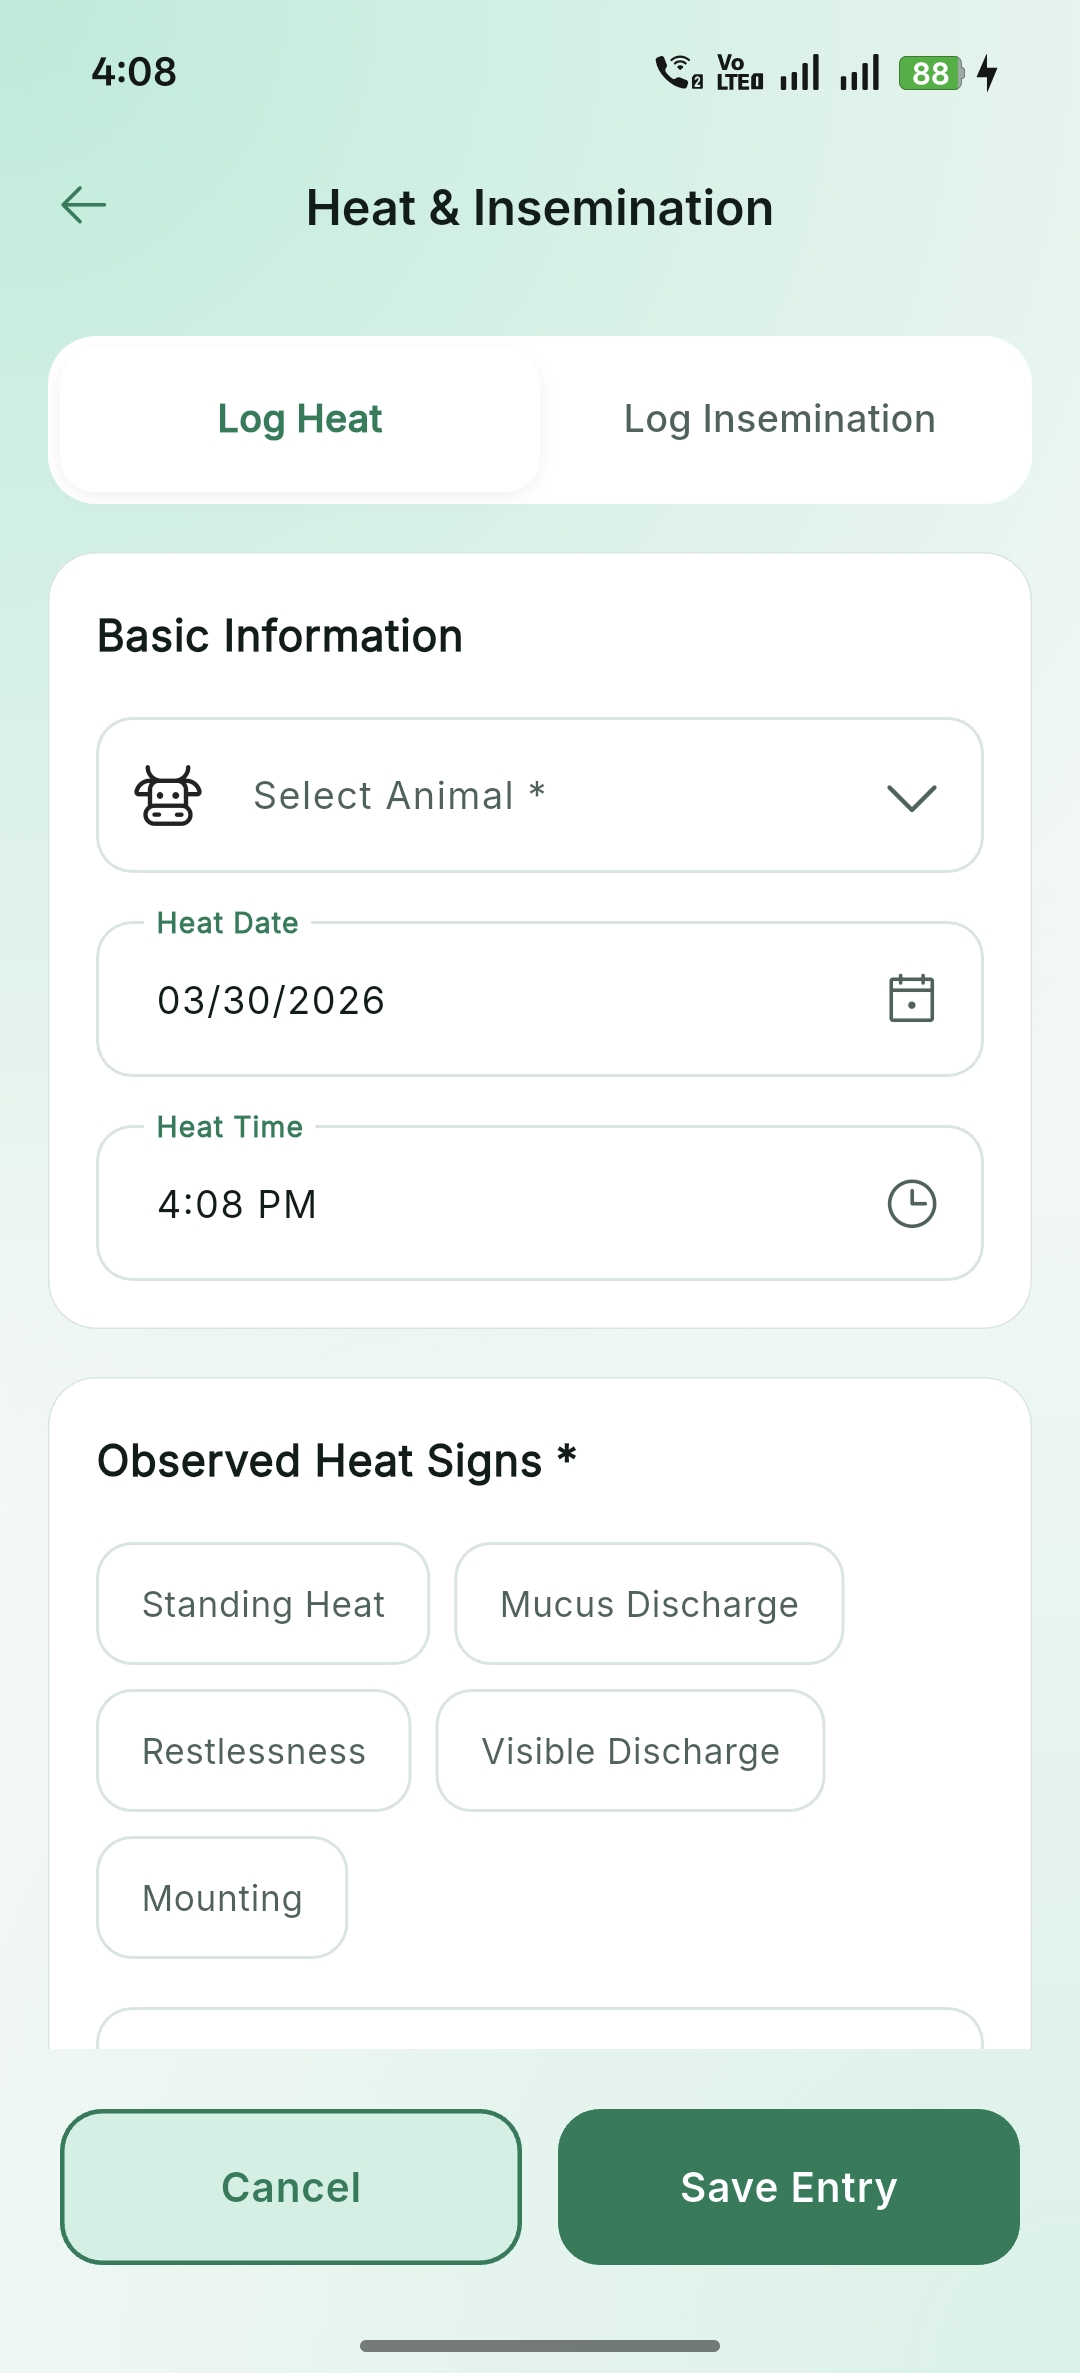
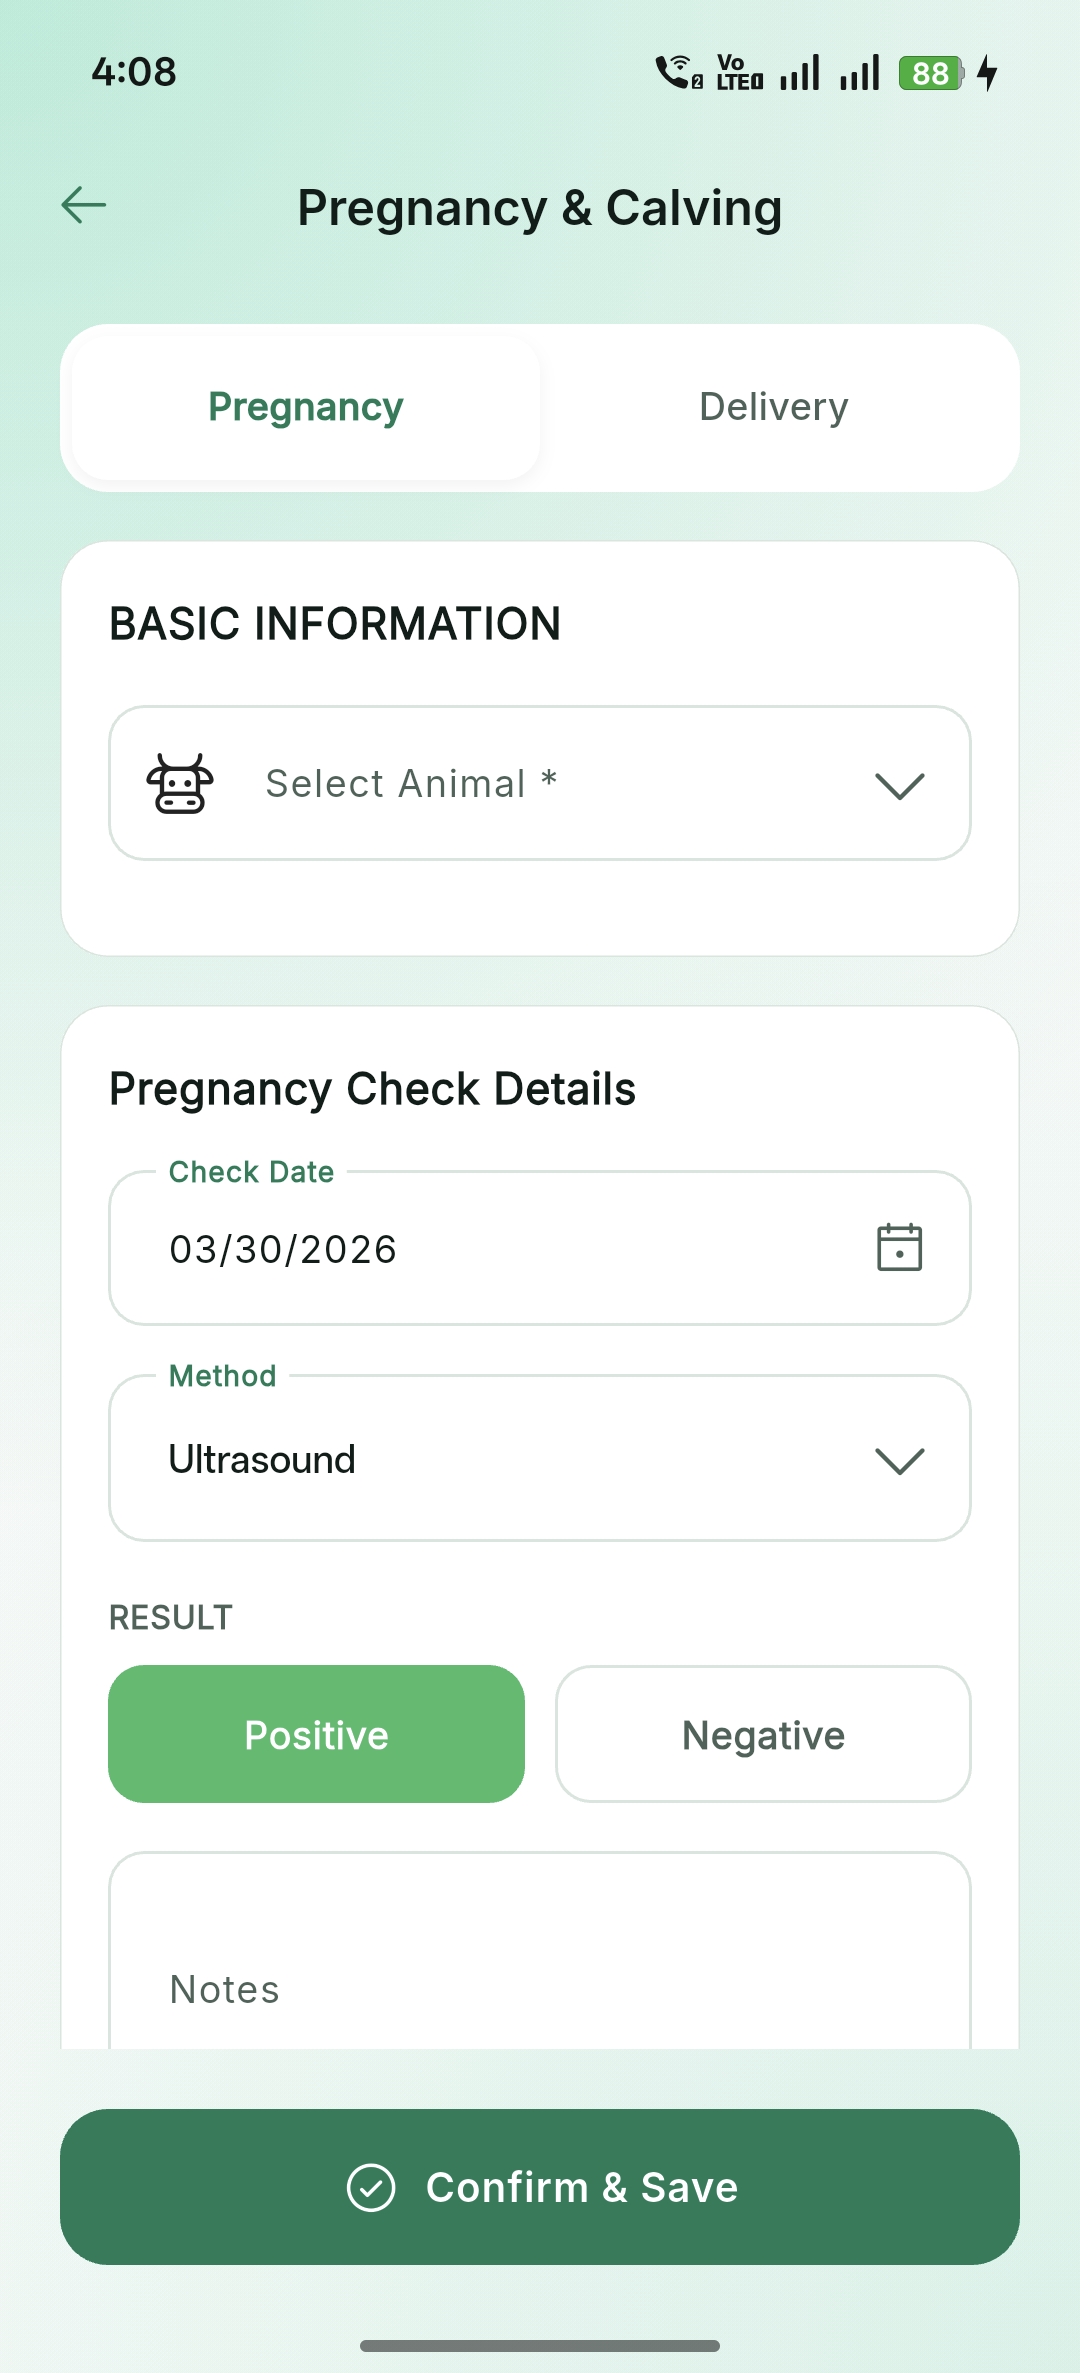
Breeding & Reproduction
Track heat cycles, insemination records, and pregnancy progress for successful herd expansion.
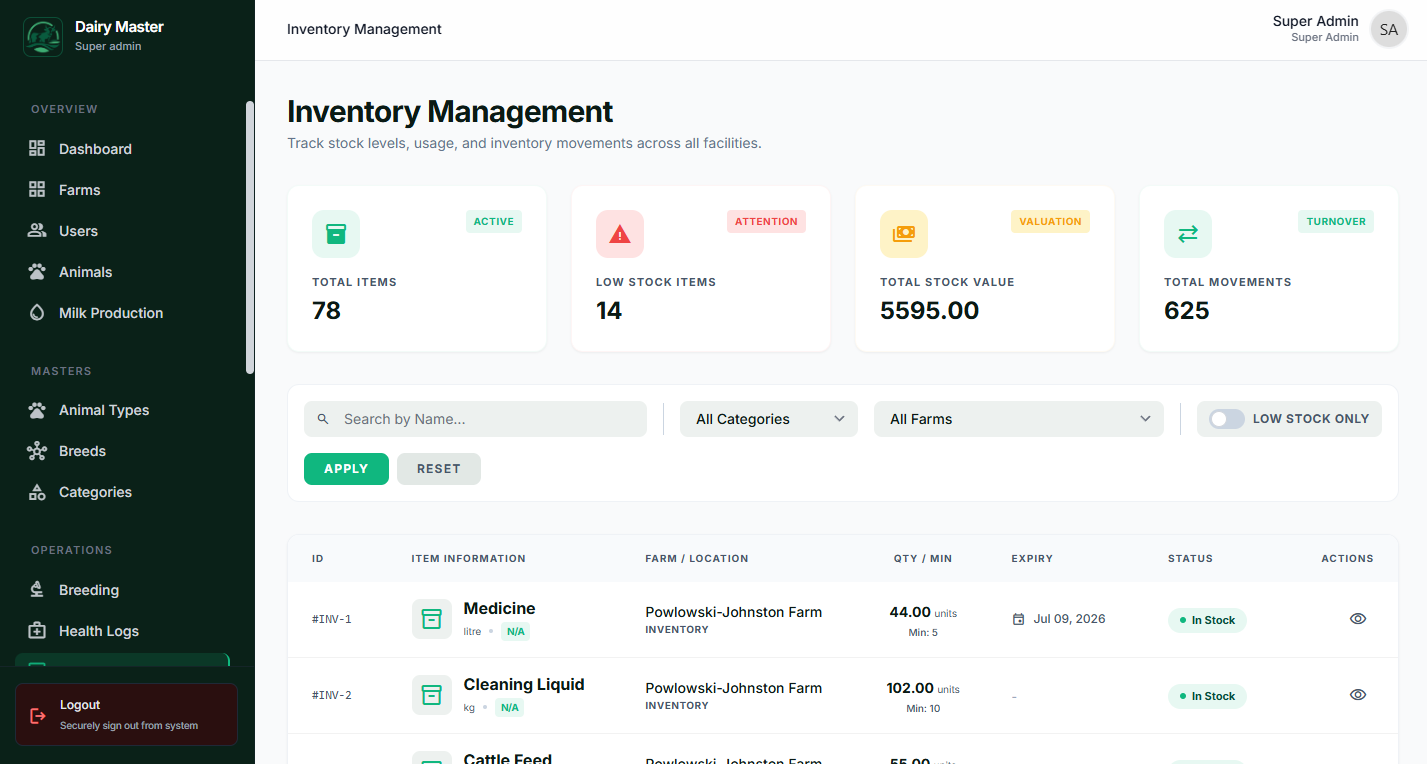
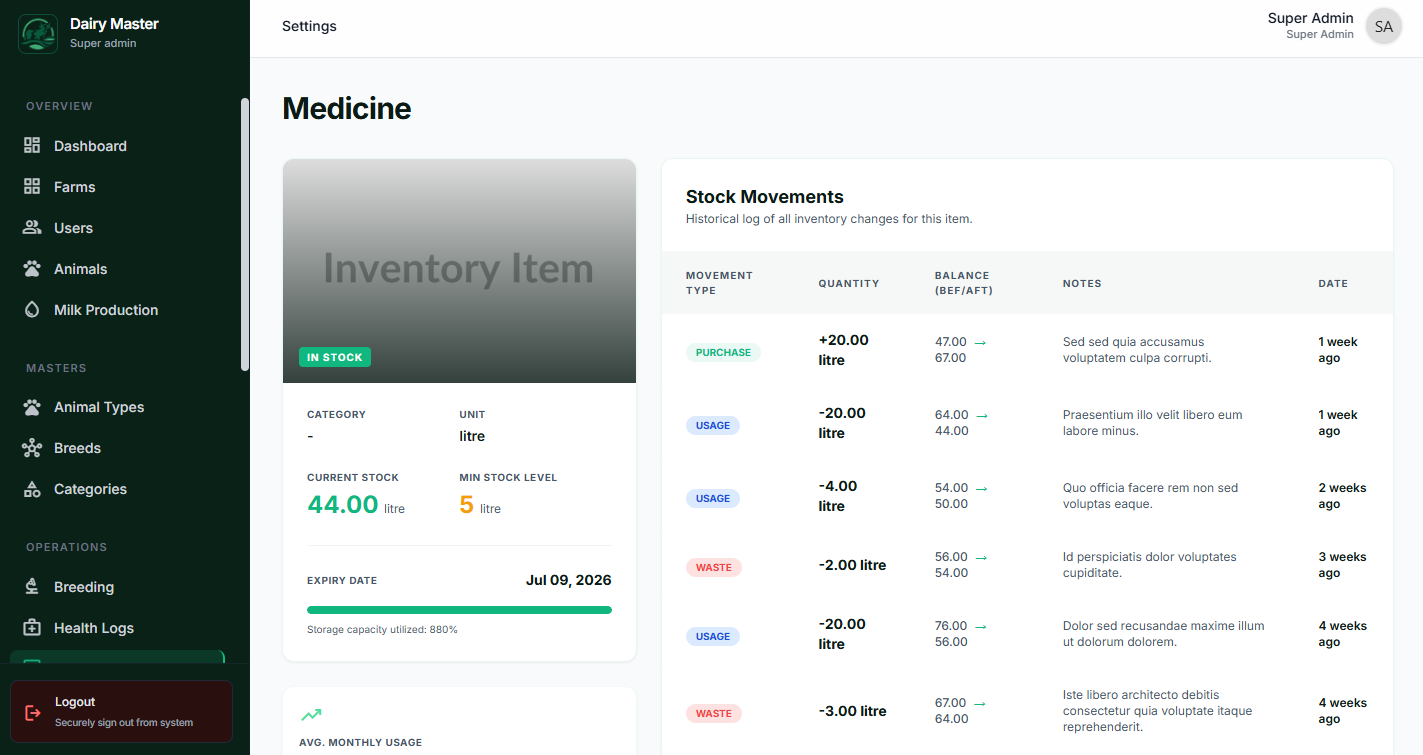
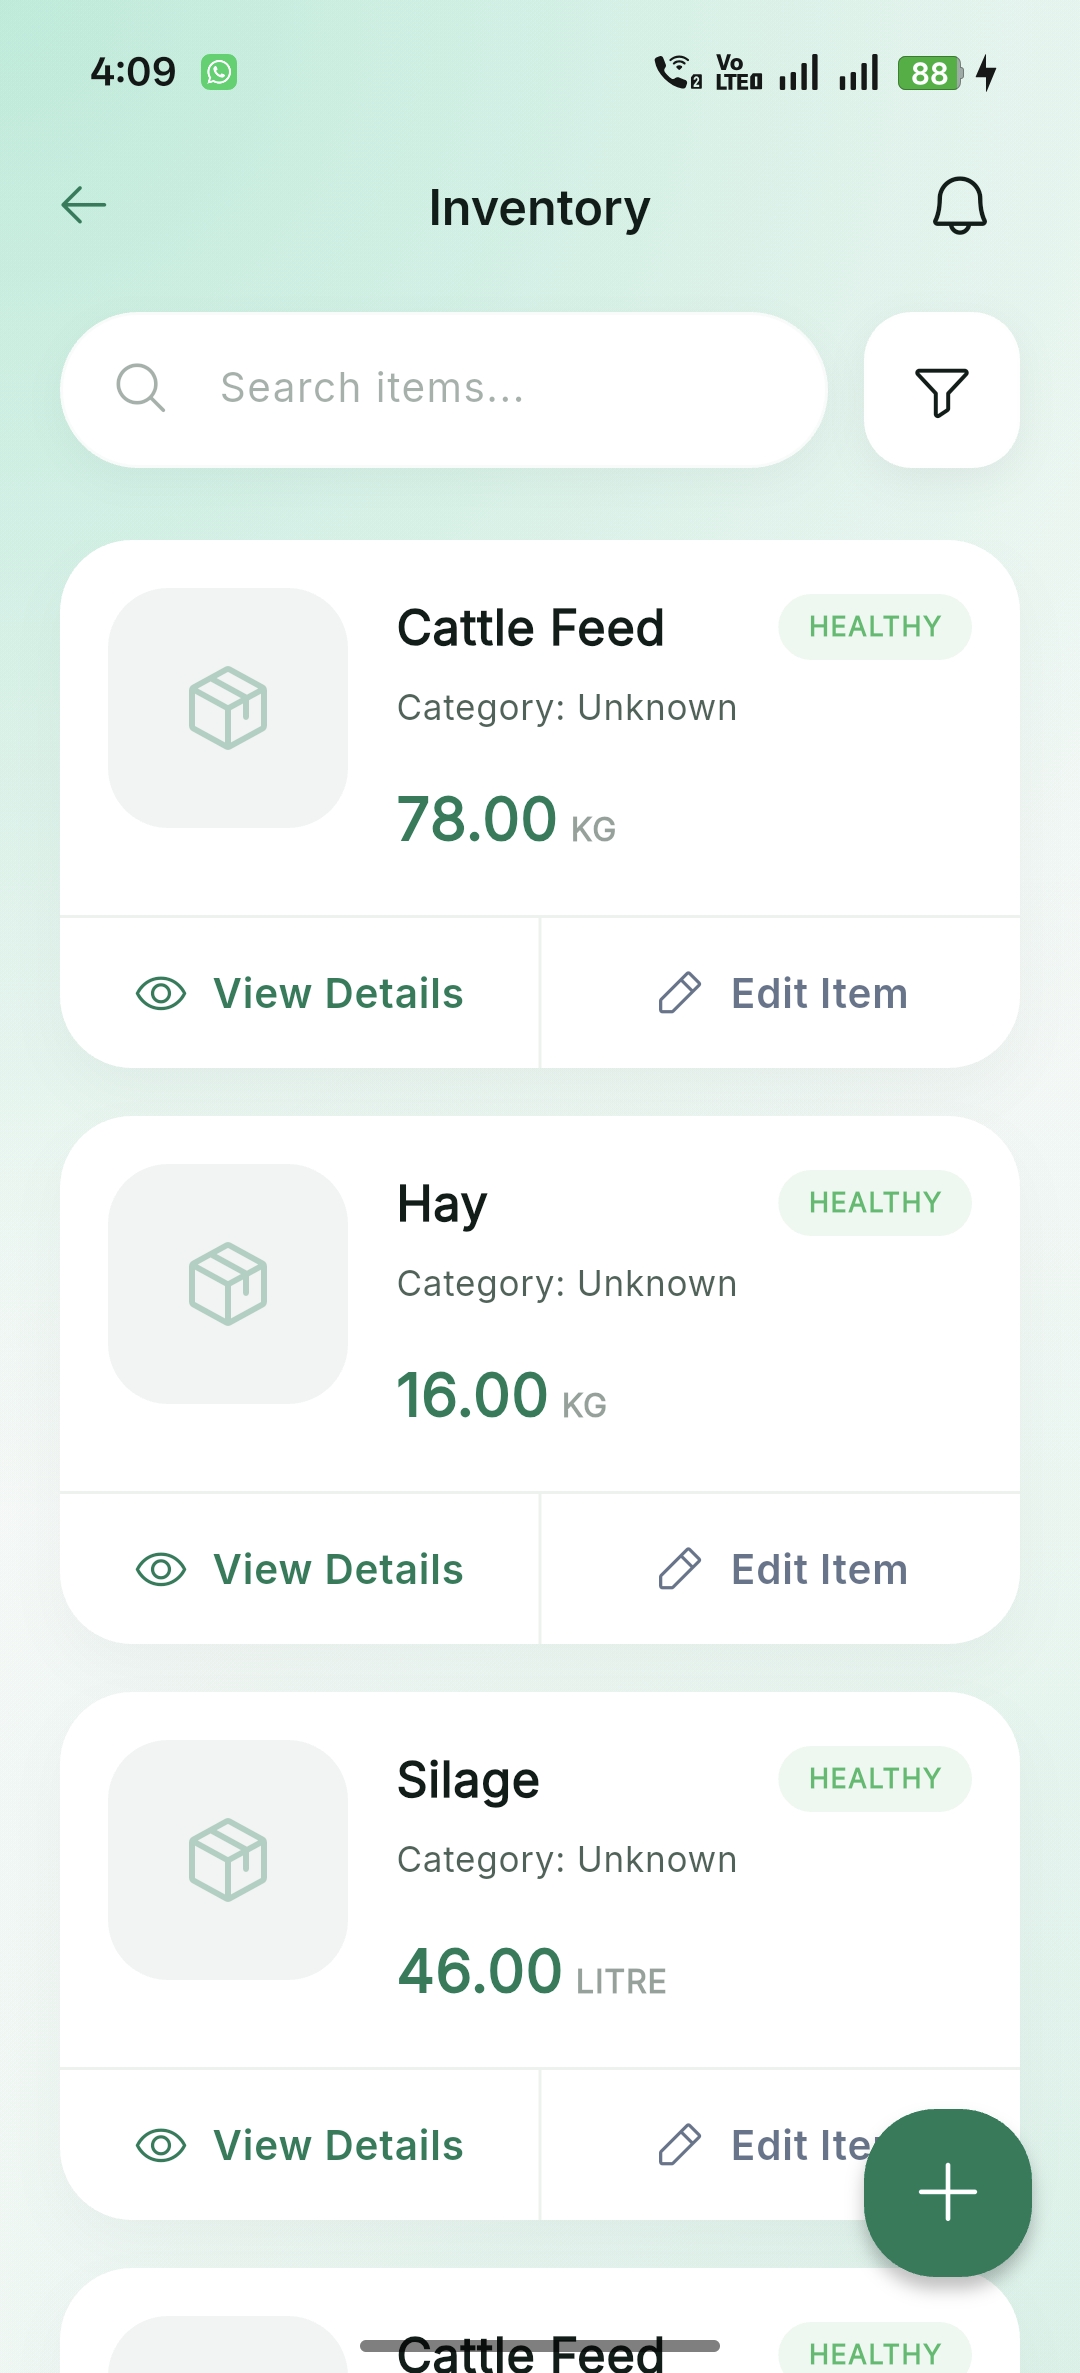
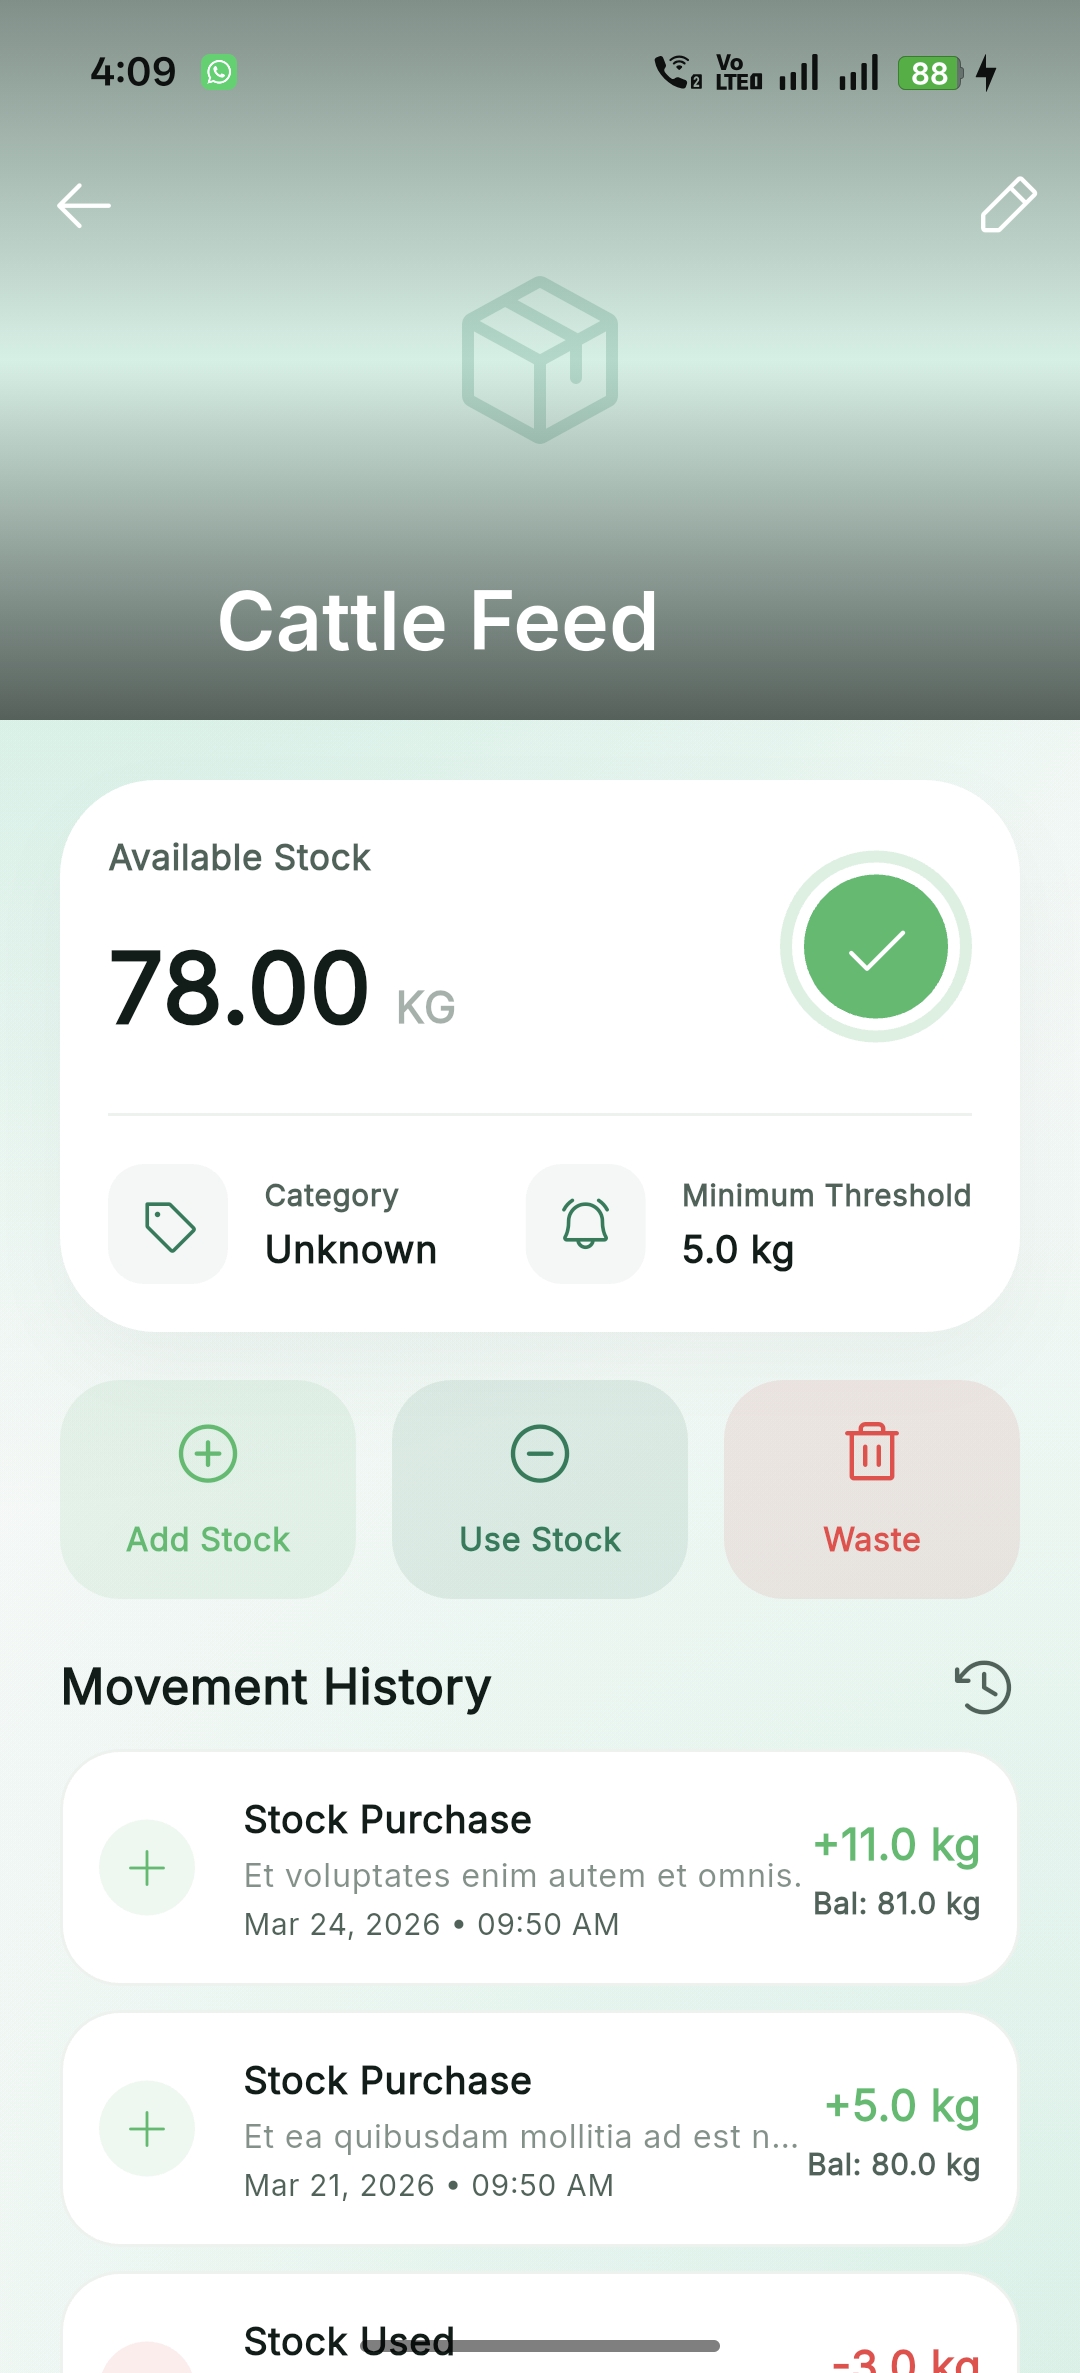
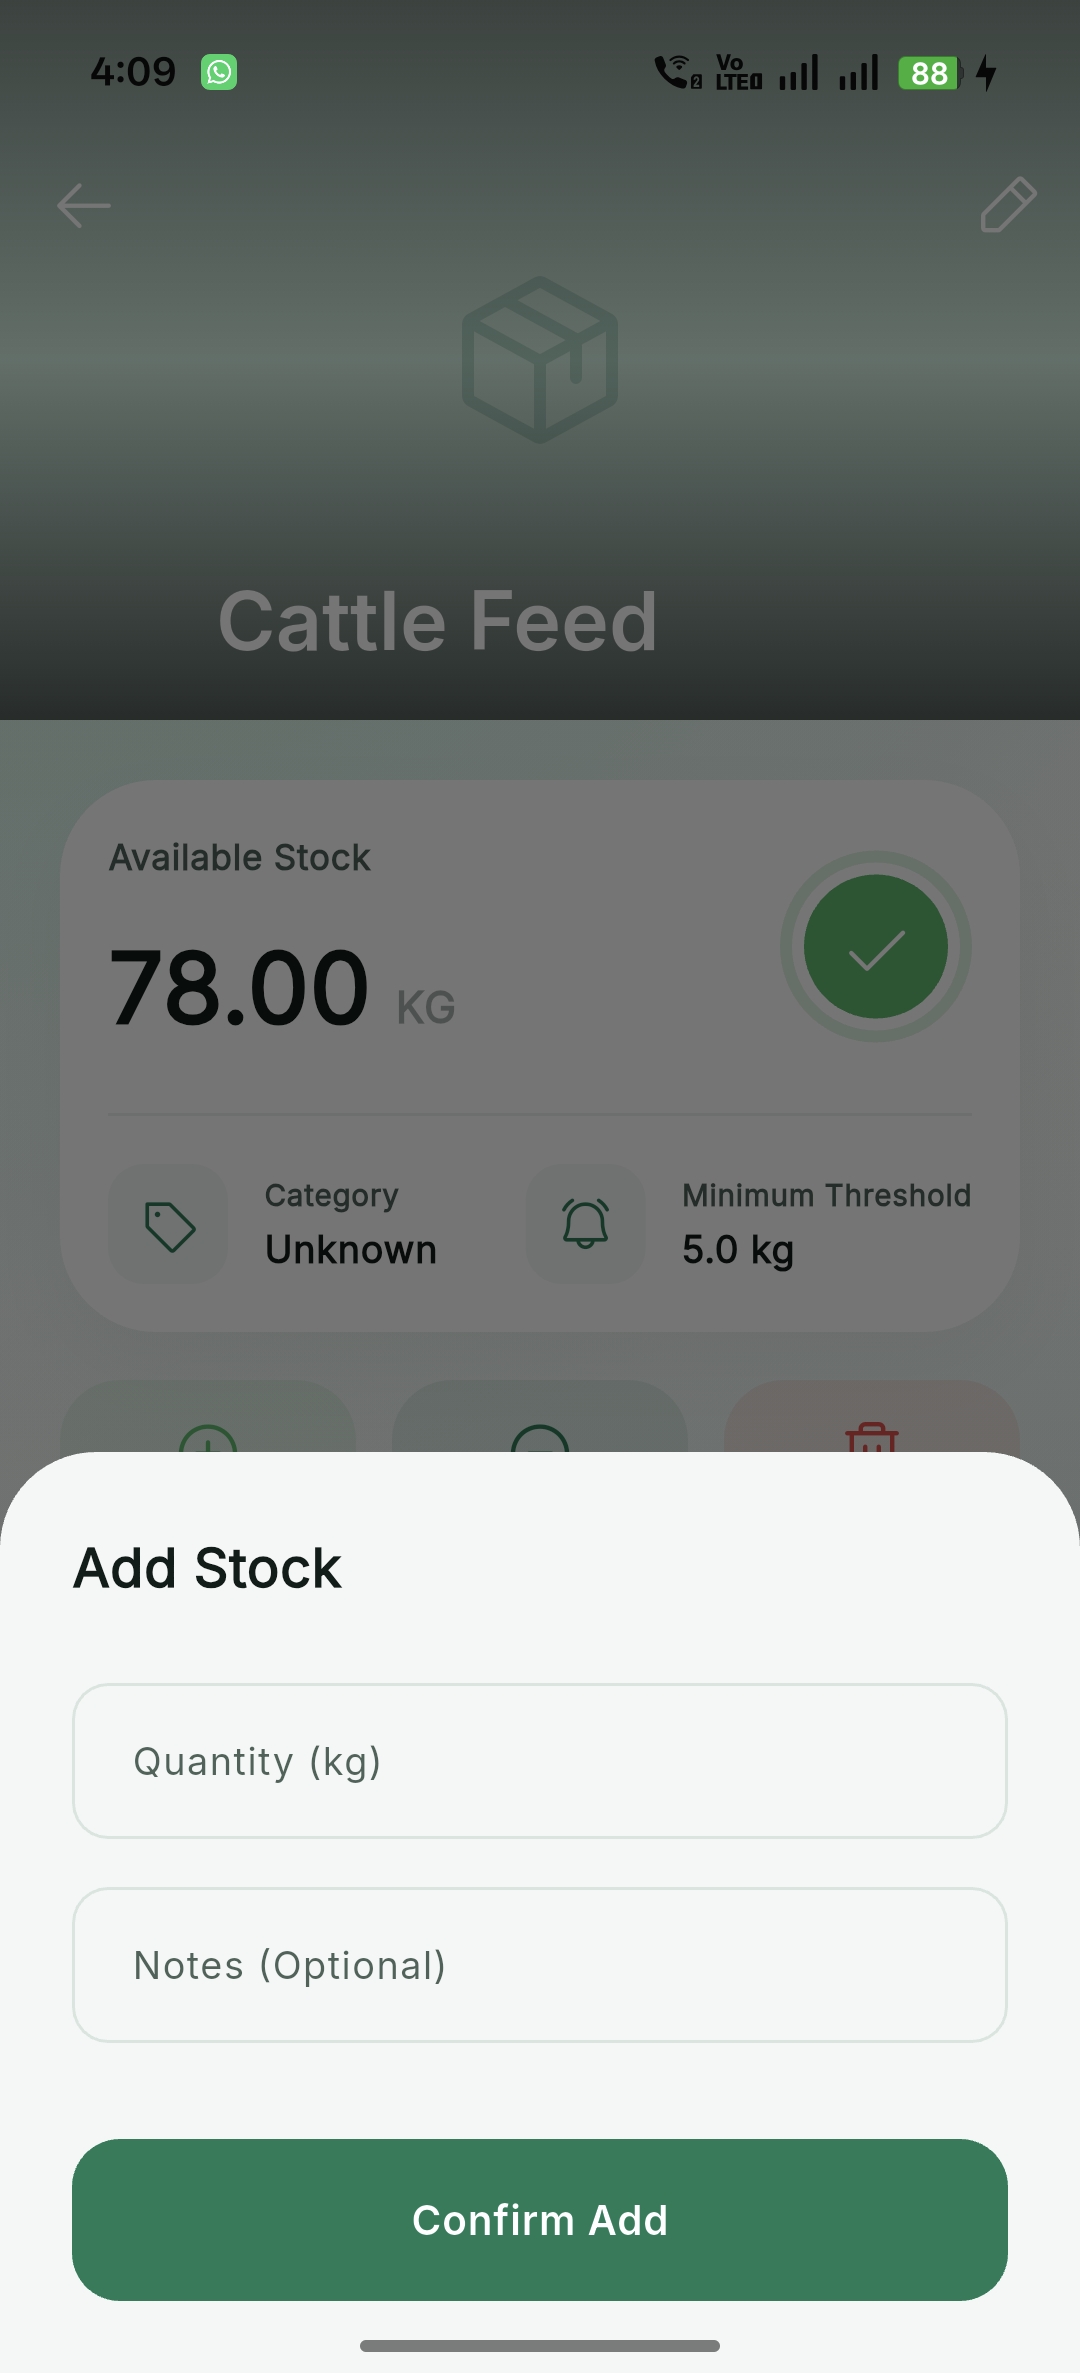
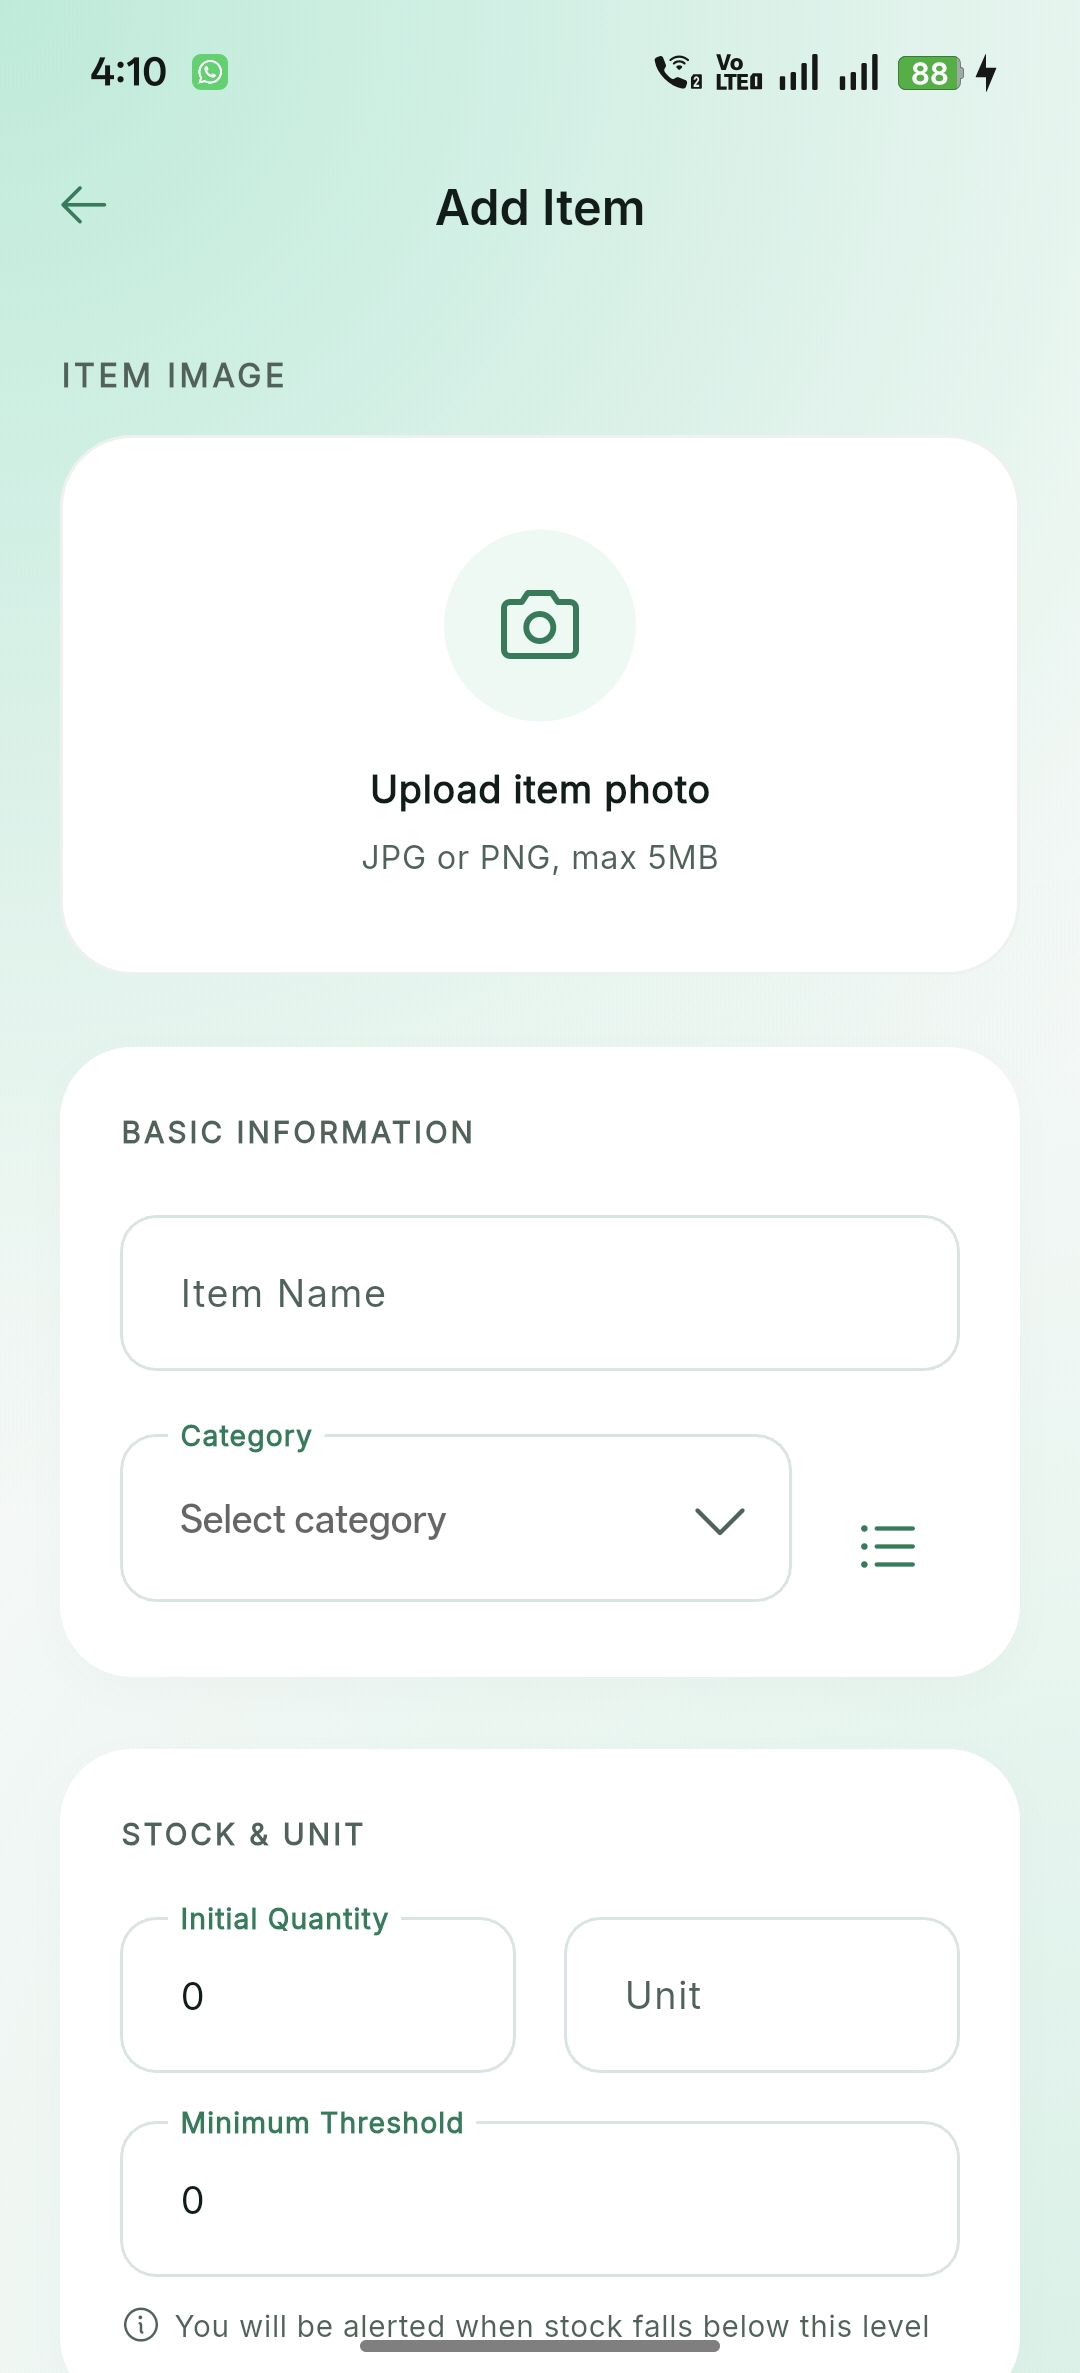
Inventory & Assets
Manage feed, medical supplies, and equipment with stock alerts and usage tracking.
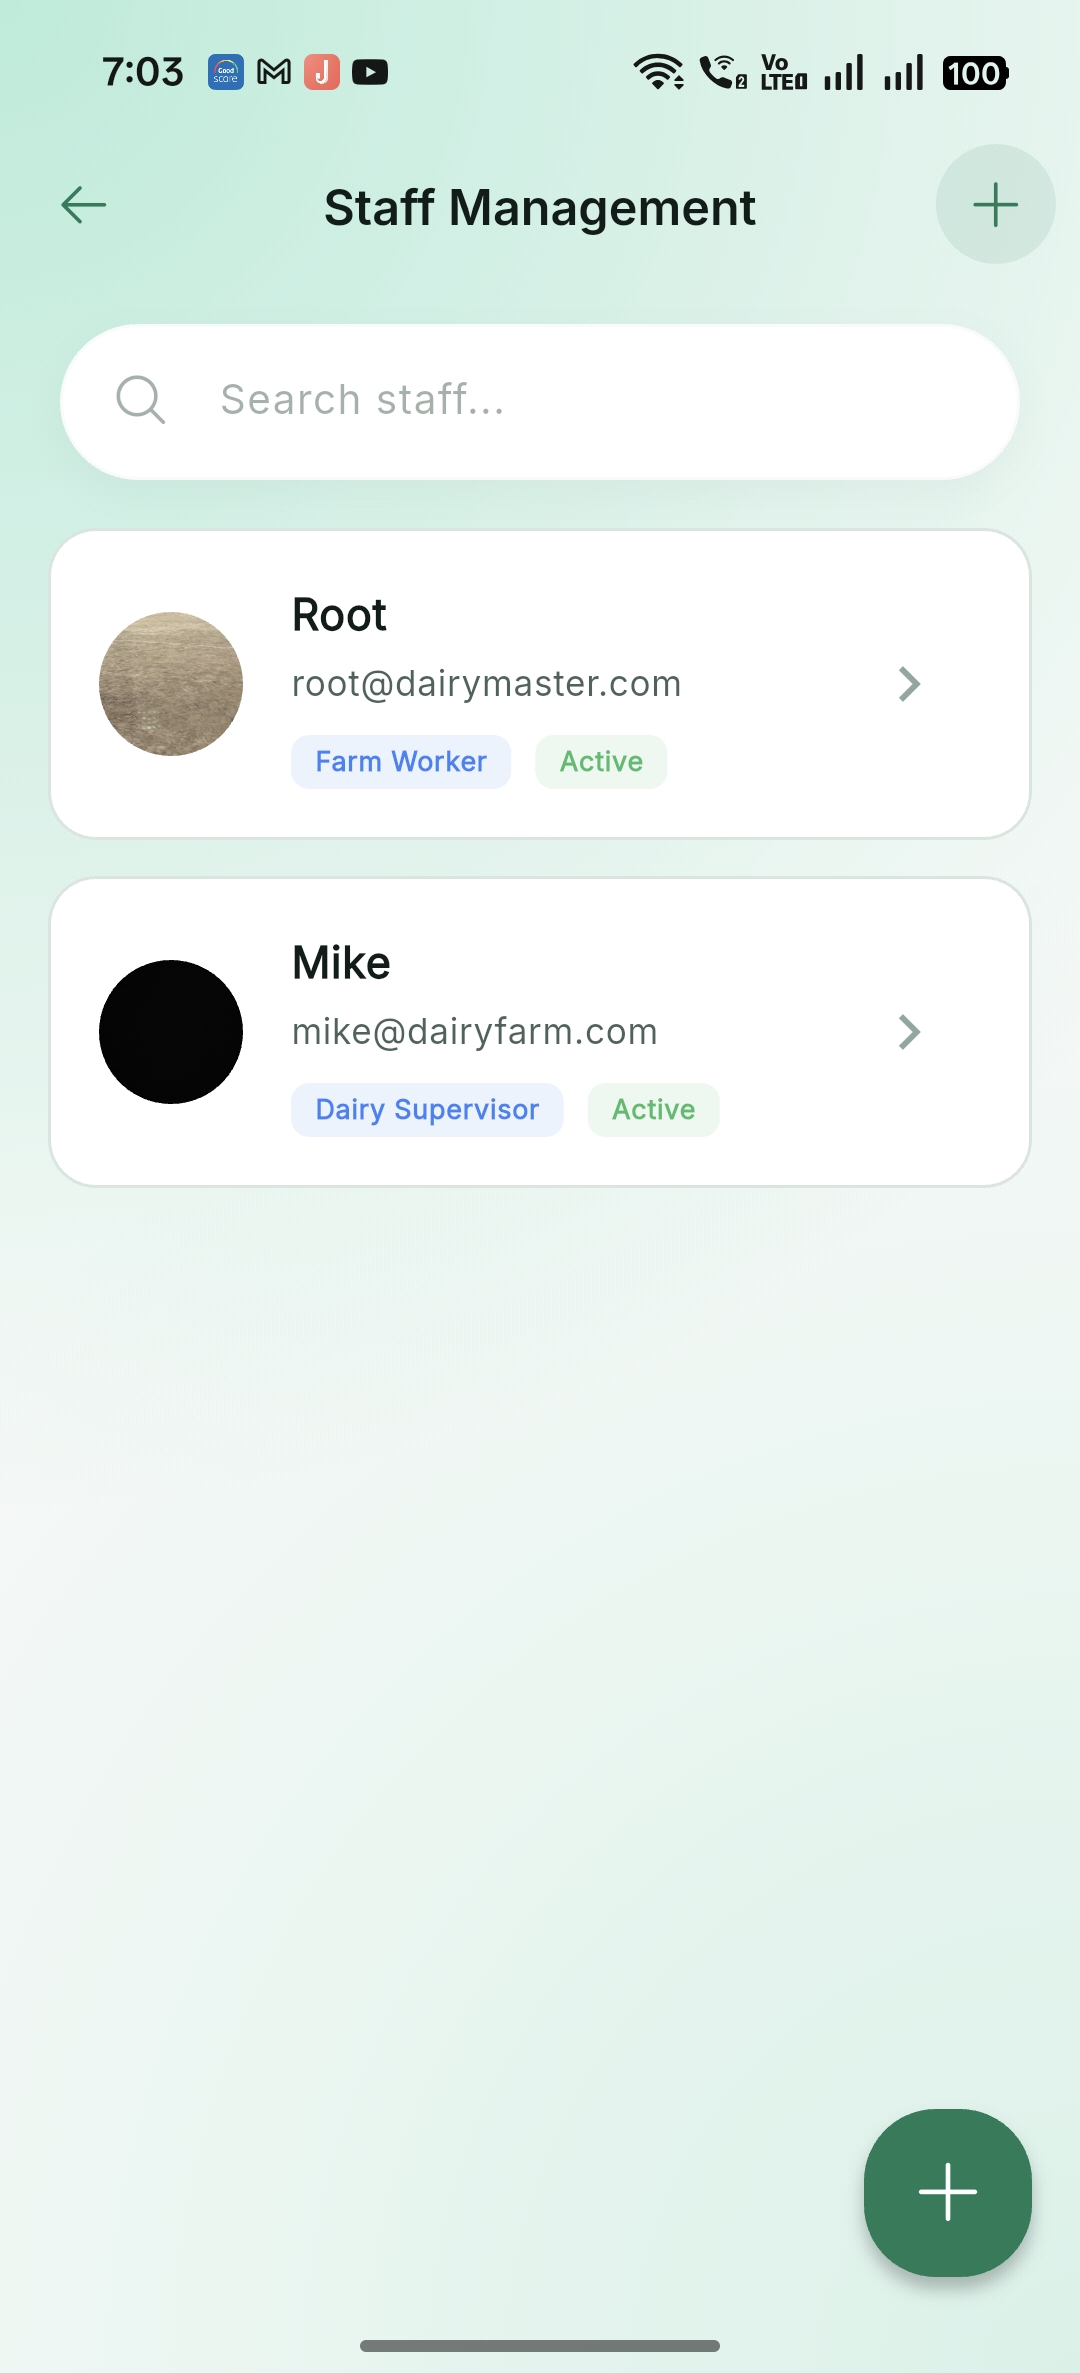
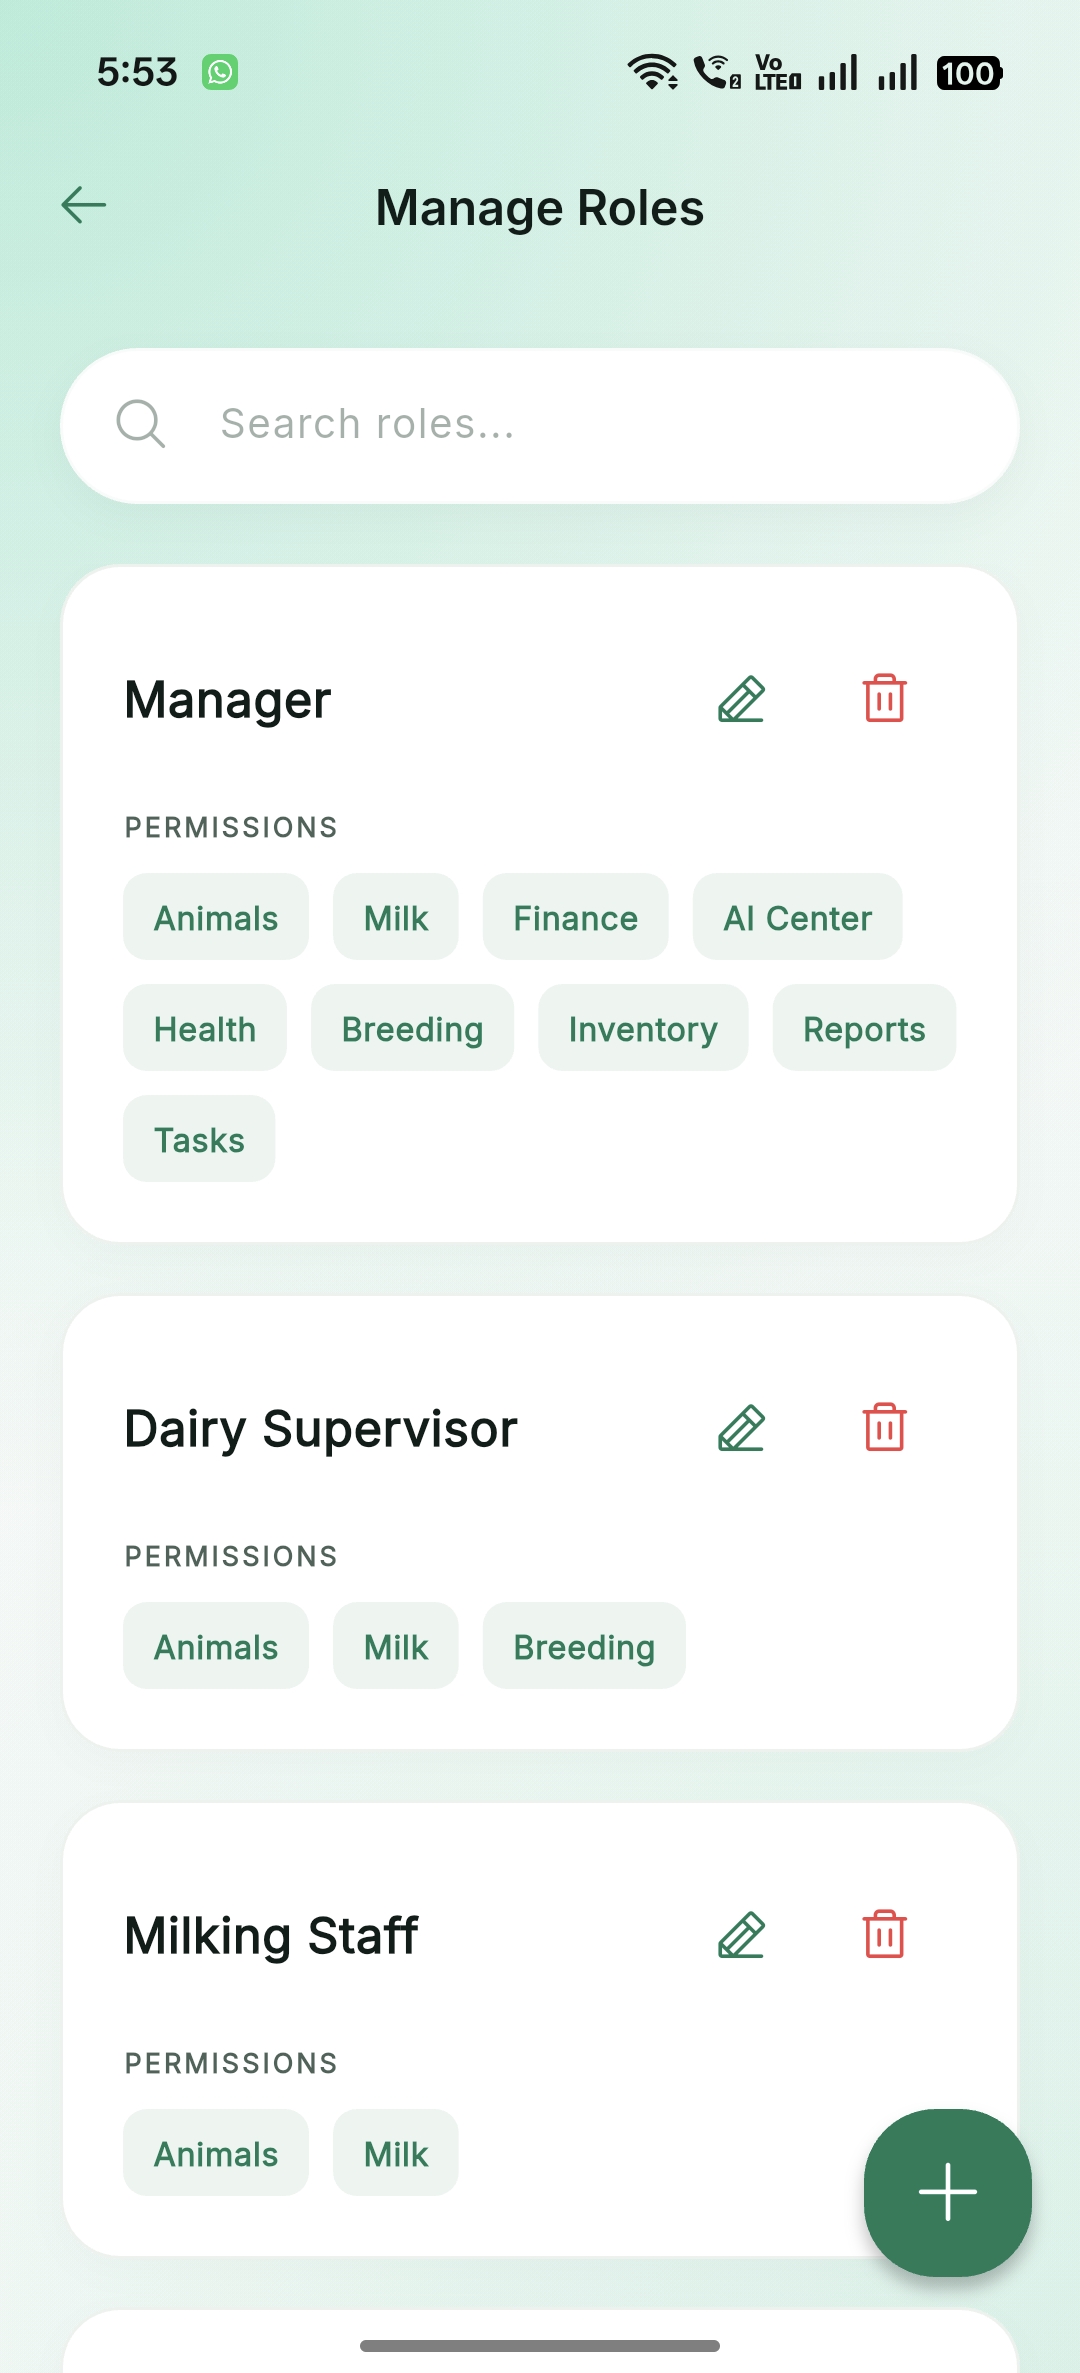
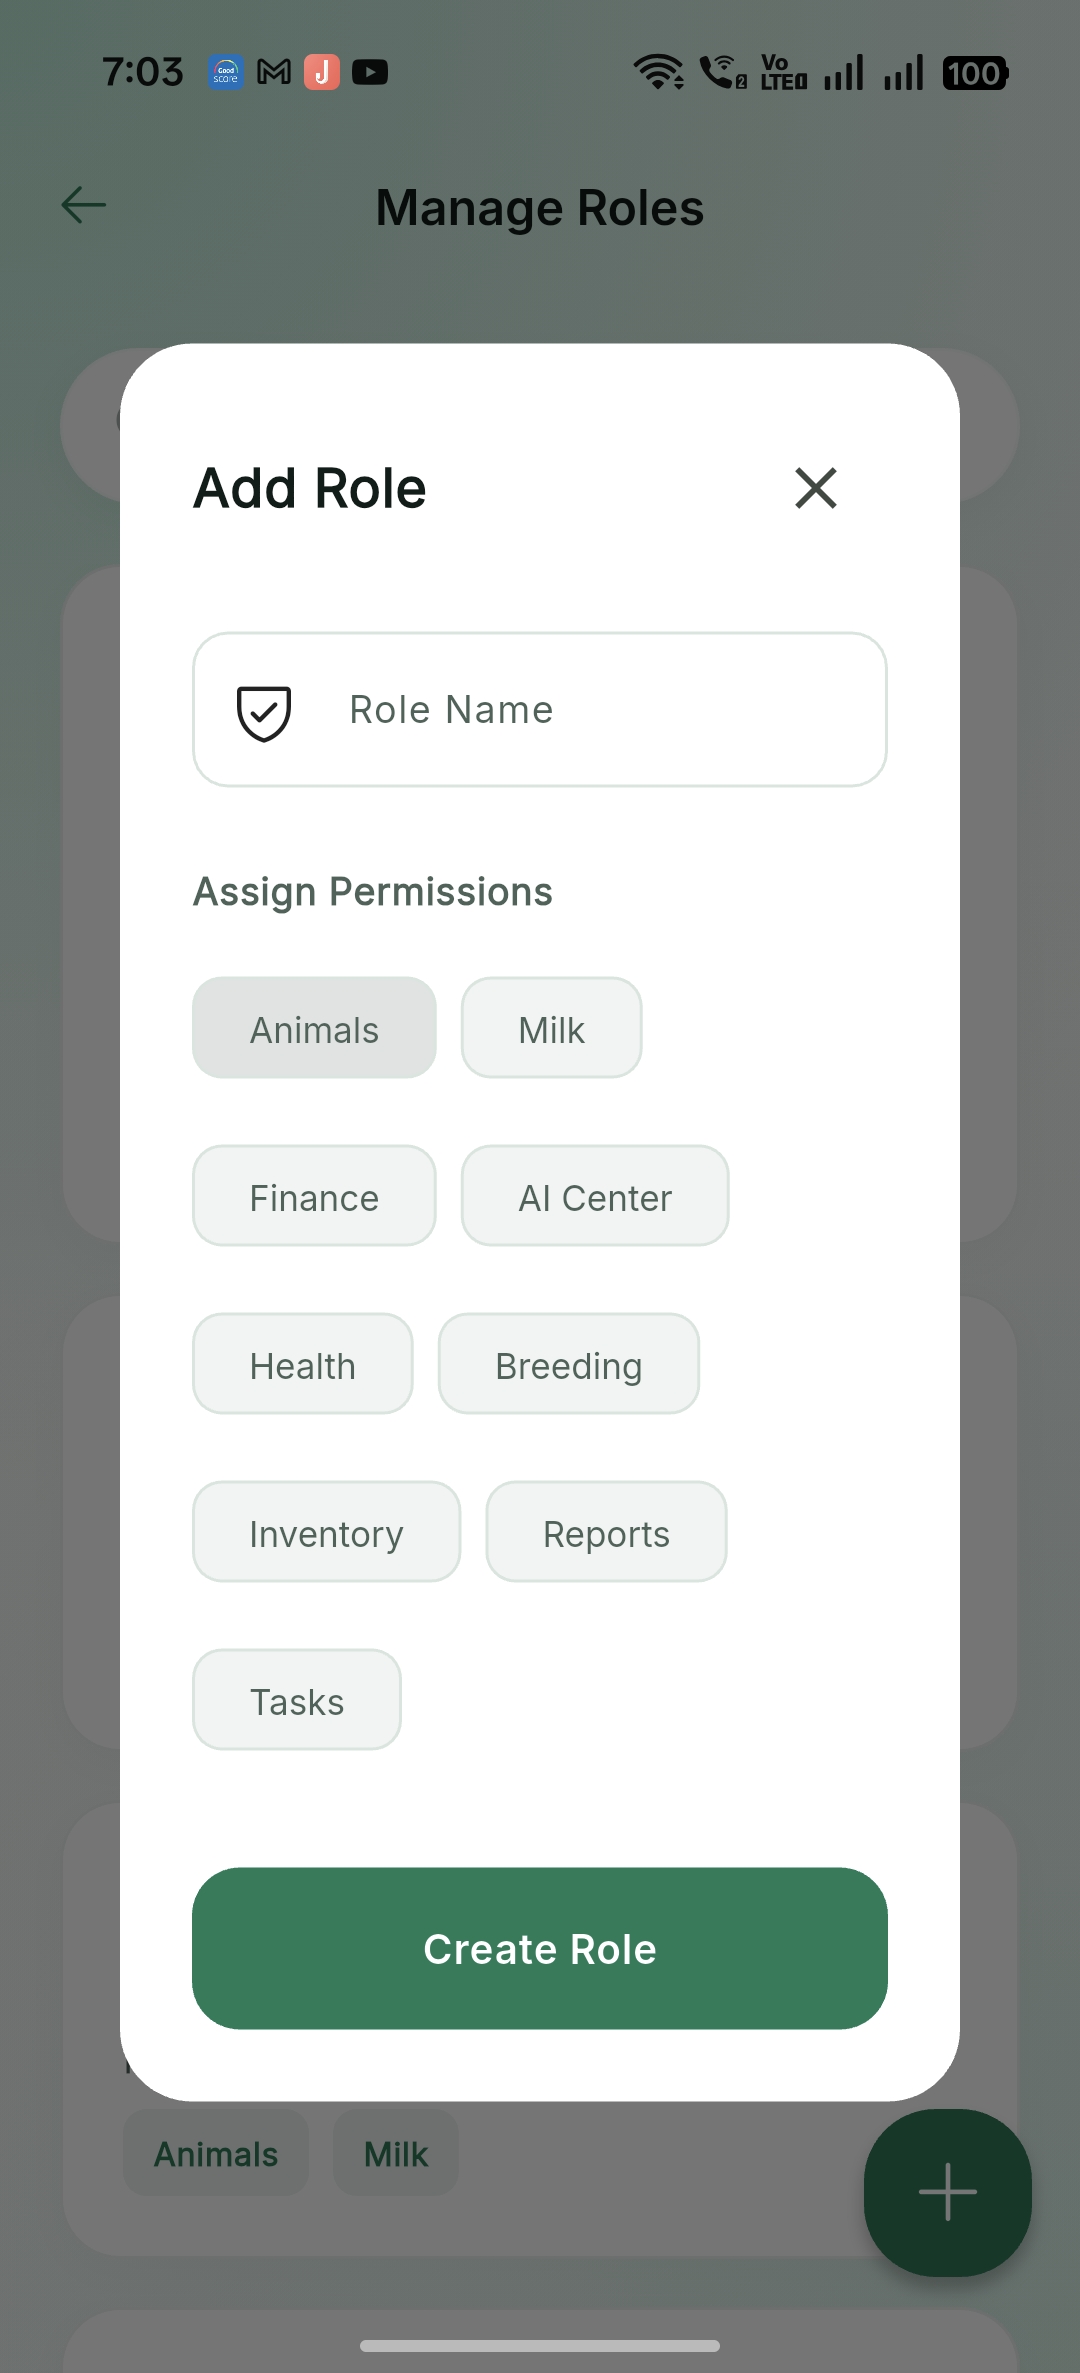
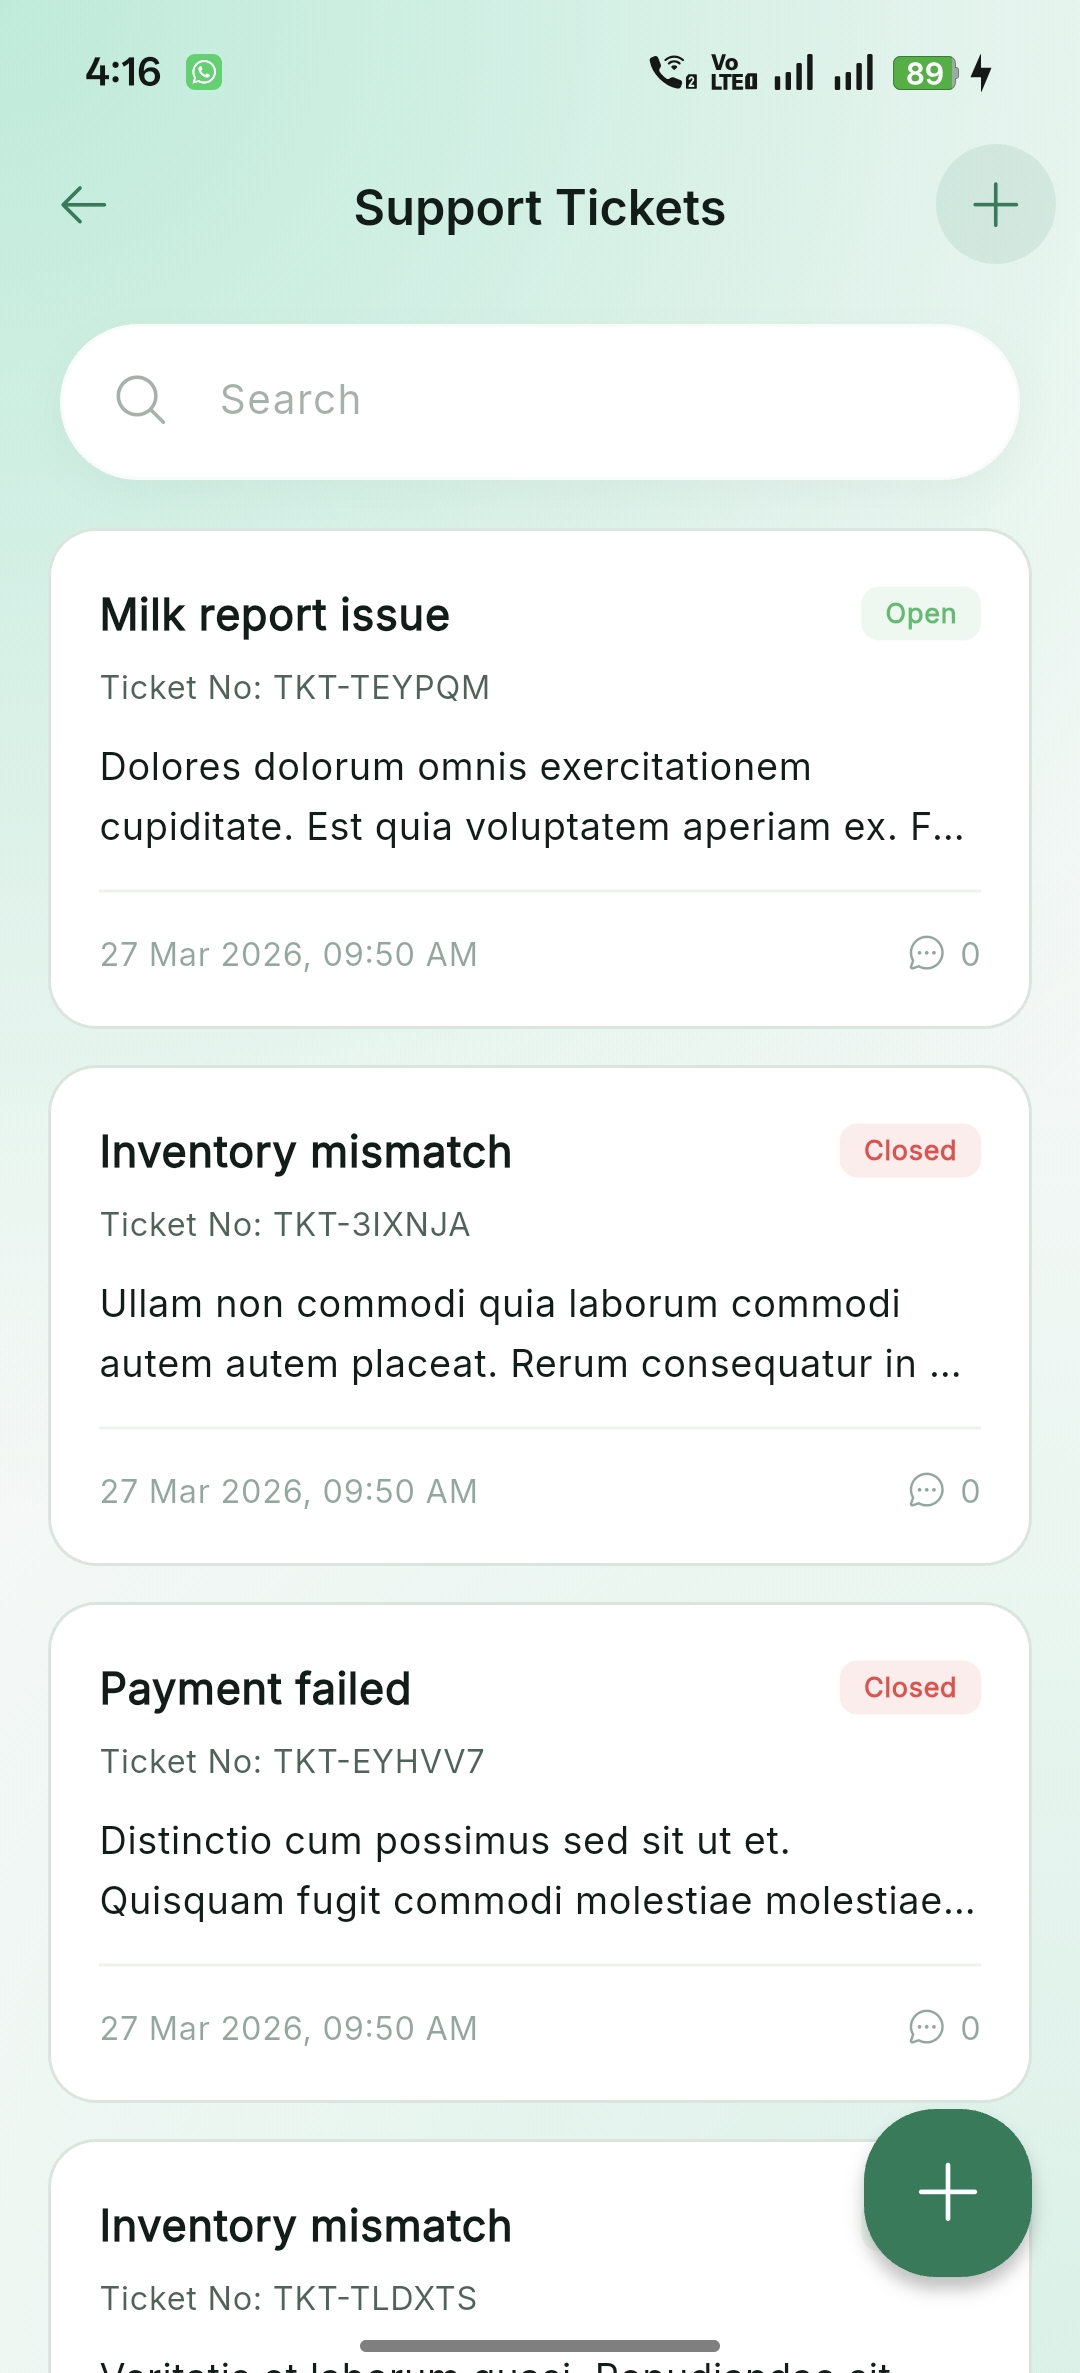
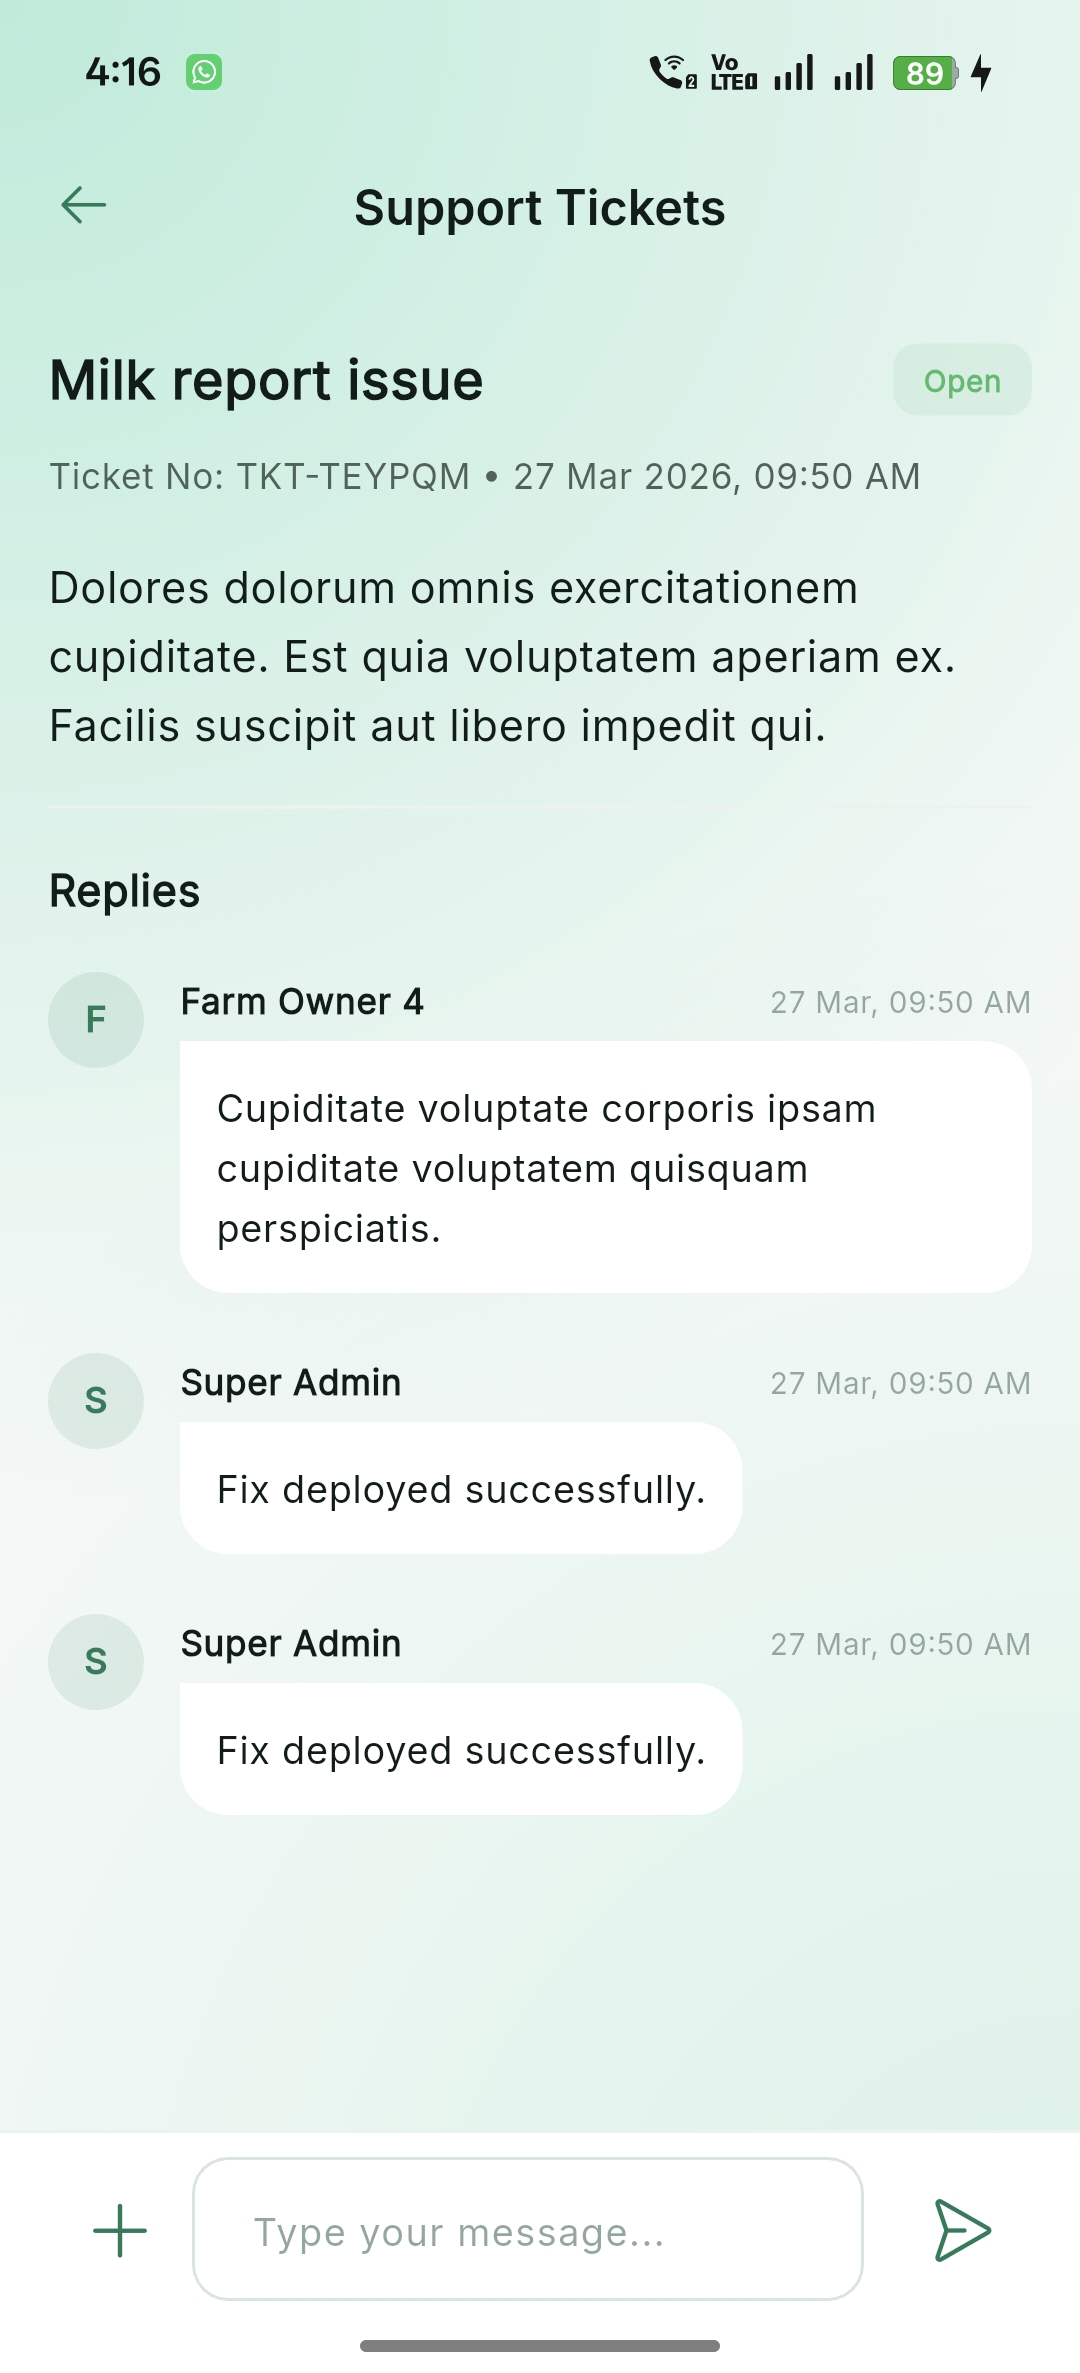
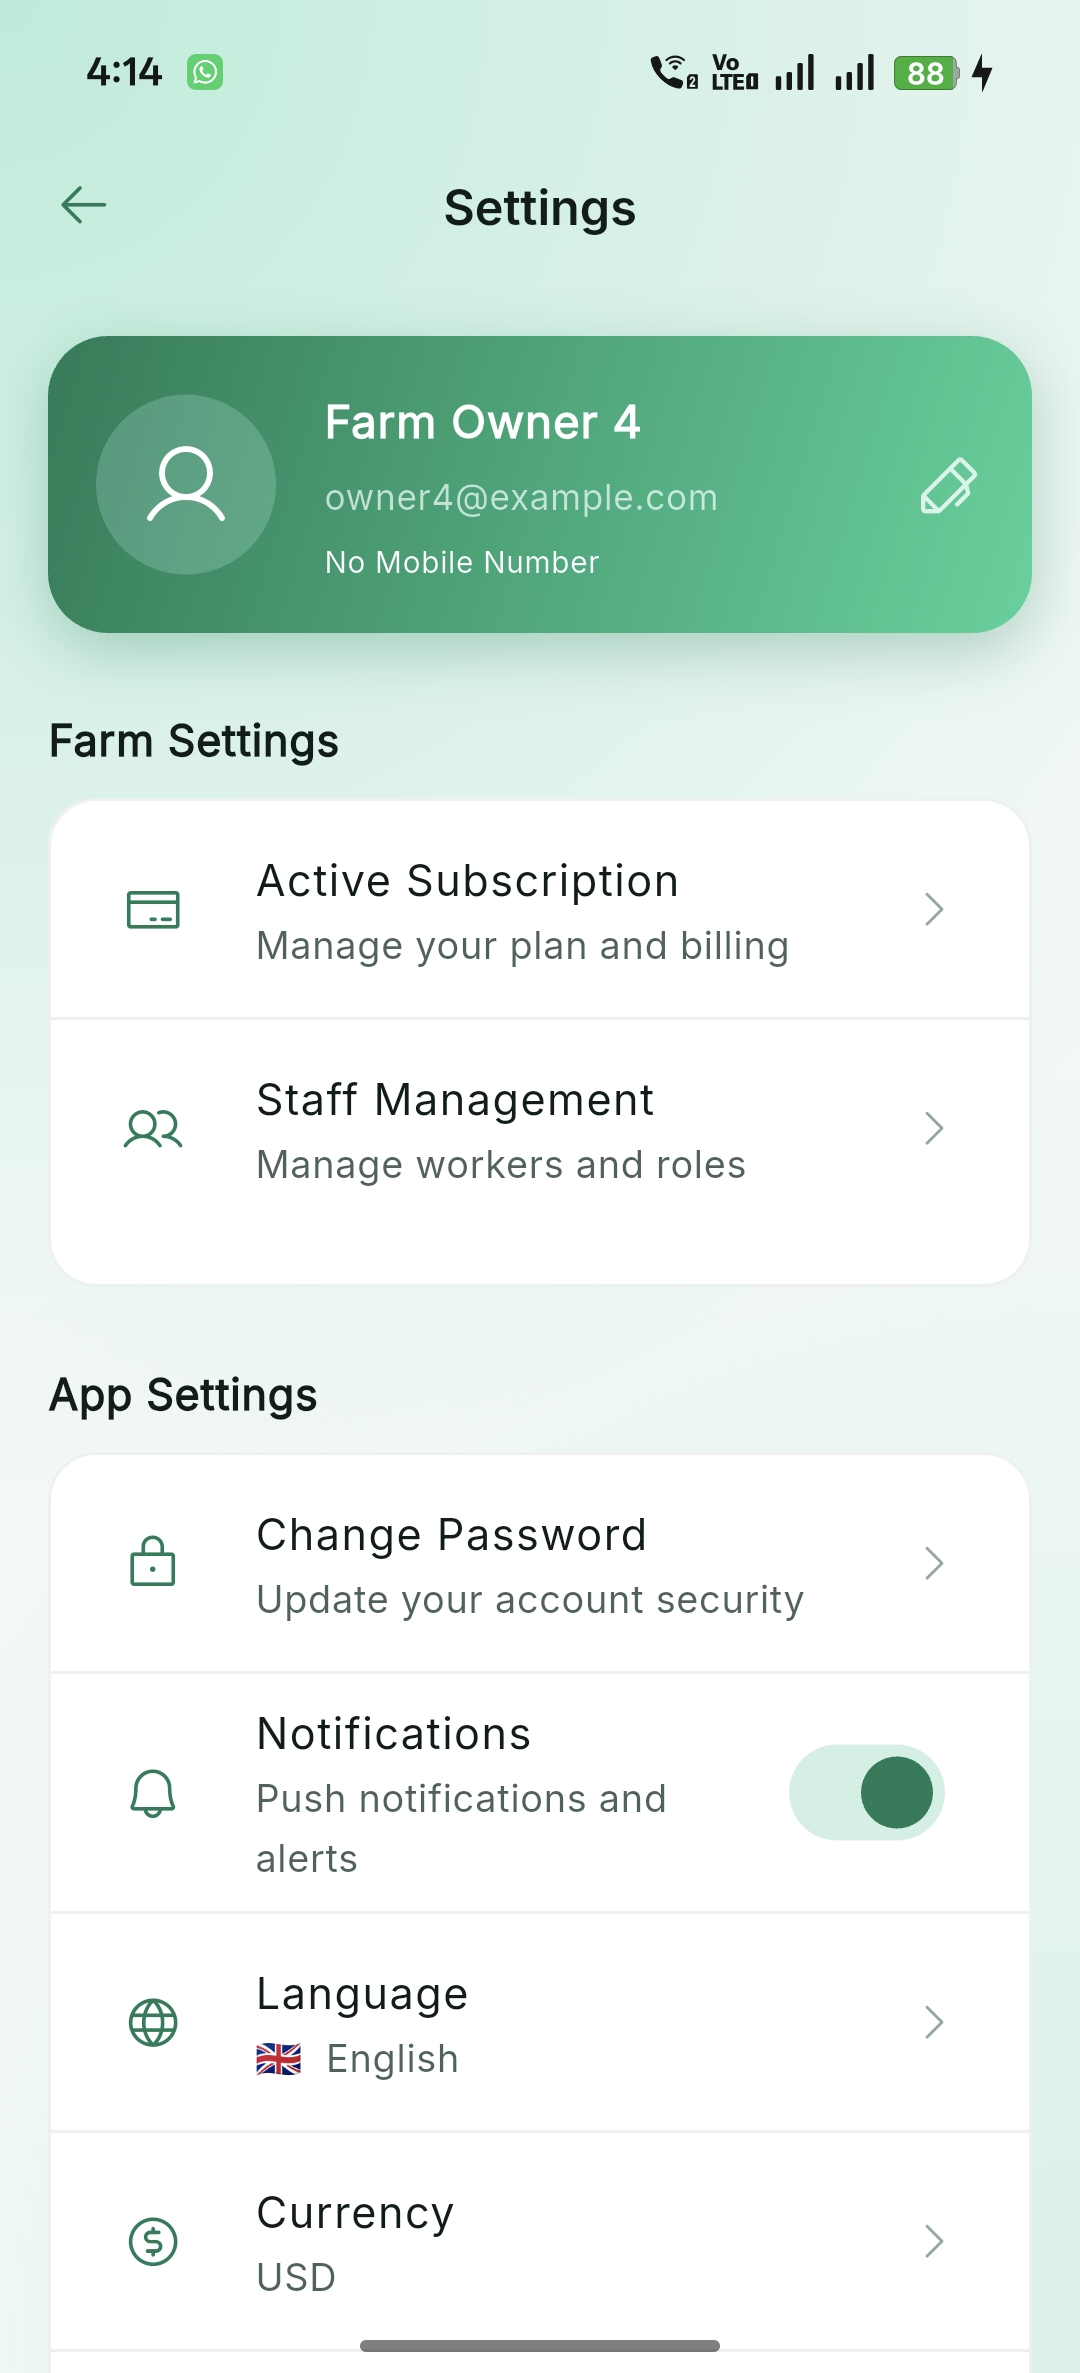
Team & Support
Manage farm staff, assign roles with specific permissions, and get direct assistance via support tickets.
FAQ (Frequently Asked Questions)
Common questions from buyers and developers regarding Dairy Master.
How do I add a new language to the app?
Create a new .arb file in lib/l10n/, add your translations, and run flutter gen-l10n. Our localization guide in the Customization section has more details.
Can I use this for multiple farms?
Yes! The system is built with Multi-Tenancy at its core. Super Admins can manage multiple farm owners, and each farm owner can manage their own livestock and staff.
How do I reset the Super Admin password?
You can use the Laravel CLI to update the password: php artisan tinker, find the user, and update their password using Hash::make('yournewpassword').
Errors & Troubleshooting
Facing technical difficulties? This section covers common pitfalls during customization and deployment.
Mobile App Troubleshooting (Flutter)
App Not Launching after Customization
Causes: Incorrect asset paths or renamed font files.
- Verify
pubspec.yamlasset path declarations. - Ensure file extensions match exactly (.png vs .jpg).
- Run
flutter clean&flutter pub get.
Crashes after Language Change
Causes: Missing translation keys in new ARB files.
- Ensure
app_en.arband your new file have the same keys. - Do not remove or rename dynamic placeholders like
{name}. - Re-run
flutter gen-l10nafter every change.
Backend & Admin Troubleshooting (Laravel)
500 Internal Server Error
Fix: Usually related to permissions or .env.
- Ensure
storageandbootstrap/cachefolders are writable. - Run
chmod -R 775 storage. - Check
storage/logs/laravel.logfor the exact stack trace.
Database Connection Refused
Fix: Correct your database host/port in .env.
- Restart your MySQL/MariaDB service.
- Verify
DB_DATABASE,DB_USERNAME, andDB_PASSWORD. - Run
php artisan config:clearto refresh settings.
Final Troubleshooting Checklist
Clear Cache (Artisan & Flutter) after major changes.
Test UI on both Light and Dark modes.
Verify RTL layout behavior for Arabic scripts.
Keep Placeholder text (e.g., ##dynamic##) intact.
Source Credits
Dairy Master is built using industry-standard open-source technologies, high-quality assets, and powerful third-party libraries.
Core Technology Stack
Icons & Typography
Key Libraries
Support & Contact
Our dedicated support team is here to assist you with setup and customization.
Email Support
Send us your queries, bug reports, or feature requests directly to our support inbox.
Still Facing Issues?
If the issue persists after reviewing the checklist:
- Review recent customization changes.
- Compare with default DairyMaster configuration.
- Include: App Name, Platform (Android/iOS), and Error Logs.
Thank You for Choosing DairyMaster!
We appreciate your support and hope this documentation helps you build something amazing. Don't forget to rate us ⭐⭐⭐⭐⭐ on CodeCanyon if you like our product!